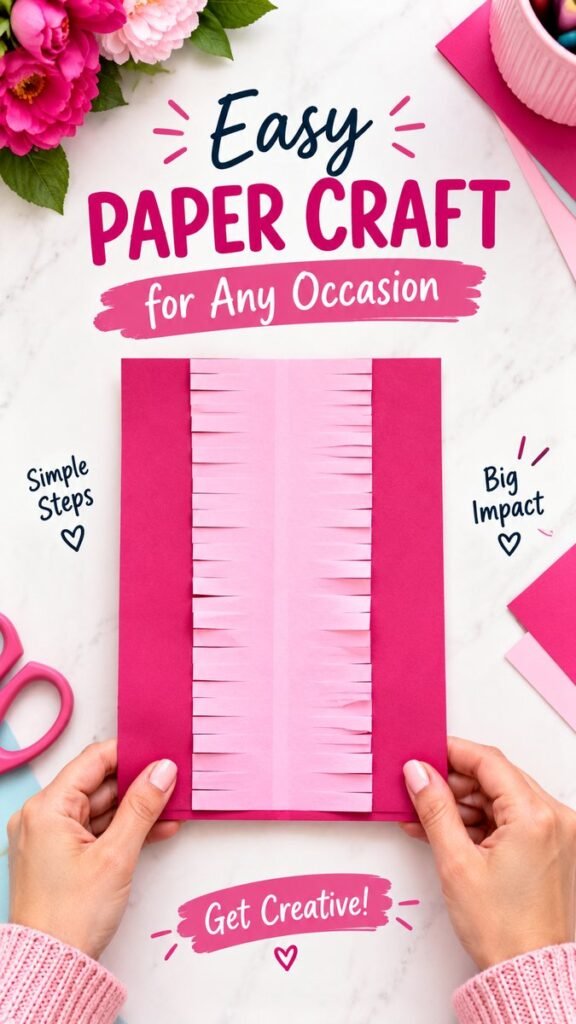
Tissue paper flowers are one of those simple DIY projects that can transform a few sheets of colorful paper into cheerful, eye-catching decorations. With their soft layers, playful texture, and endless color combinations, these handmade flowers are perfect for adding personality to parties, gifts, bedrooms, classrooms, seasonal displays, and creative craft projects. The bright pink paper design shown here highlights how simple layered paper techniques can create an attractive handmade look without complicated supplies.
Key Takeaways
- Tissue paper flowers are inexpensive and beginner-friendly.
- Layering and shaping create fuller, more dimensional blooms.
- Mixing shades can make handmade flowers look more vibrant.
- Different flower sizes work beautifully for wall and table displays.
- The same basic techniques can be adapted for gifts, parties, and home decor.
Why Tissue Paper Flowers Are So Fun to Make
A handmade paper flower has a special charm because it combines an easy process with a decorative result. Tissue paper is lightweight, flexible, and easy to shape, which makes it especially useful for creating petals and soft floral layers. You do not need advanced crafting skills to experiment with different forms, colors, or sizes.
The beauty of this project is also in its flexibility. A single flower can become a small gift embellishment, while several large flowers can be arranged together to create a statement backdrop. You can make a coordinated collection in shades of pink, white, and red, or choose contrasting colors for a more playful arrangement.
Important: The most attractive tissue paper flowers usually come from simple details rather than complicated techniques. Even layers, careful cutting, and gentle shaping can make a noticeable difference in the finished flower.
Supplies for a Tissue Paper Flowers DIY Project
One reason this craft is so approachable is that the supply list can remain short. Start with tissue paper in one or more colors. You can choose a single shade for a clean monochromatic look or combine several shades to create more depth.
You will also want scissors for cutting the paper and something suitable for securing the center layers. Depending on the style you want to create, a small piece of floral wire, craft wire, string, or another simple fastener can help hold the flower together. For certain projects, glue may also be useful for attaching flowers to a background or decorative surface.
- Tissue paper: Choose colors that complement your decorating theme.
- Scissors: Sharp scissors make clean edges and detailed cuts easier.
- Fastener: Use a suitable craft wire, string, or similar material to secure the center.
- Optional adhesive: Helpful when attaching finished flowers to cards, backdrops, or decor.
Choosing the Right Colors
Color can completely change the personality of your paper flowers. Bright pinks and magentas create a lively, energetic appearance similar to the cheerful palette shown in the craft design. Pastels can create a softer look, while combinations of deep and light shades can make individual petals appear more dimensional.
For a cohesive arrangement, choose two or three related colors. If you want a more playful display, mix several colors while keeping the flower shapes consistent. White or cream tissue paper can also be used between brighter layers to create contrast.
How to Make Tissue Paper Flowers
The basic process involves layering tissue paper, creating a secure center, cutting the outer edges, and gently separating the layers to form petals. The exact appearance depends on how wide the layers are, how you shape the edges, and how carefully you open the paper.
1. Prepare Your Tissue Paper
Begin by choosing several sheets of tissue paper. For a fuller flower, use multiple layers. Place the sheets neatly on top of one another and smooth them so the edges are aligned as evenly as possible.
Think about the final flower size before cutting. Larger sheets create larger blooms, while narrower sheets can be used for smaller decorative flowers. If you are making several flowers for a backdrop, preparing the paper in consistent sizes will make the final arrangement look more polished.
2. Create the Folded Layers
Fold the stacked tissue paper back and forth to create a compact layered shape. Keeping the folds relatively even helps the flower open symmetrically later. Take your time during this step because neat folds make the rest of the process easier.
The layered structure is what gives tissue paper flowers their recognizable fullness. Once opened, each sheet can become part of the petal structure, creating a soft, ruffled appearance without requiring complicated paper sculpting.
3. Secure the Center
Once the tissue paper has been folded, secure the center so the layers stay together. The fastener should hold the paper firmly enough to prevent it from slipping while still allowing you to separate the layers afterward.
Keep the center compact and avoid crushing the surrounding paper. A clean center gives you more control when you begin shaping the petals.
4. Shape the Petal Edges
Now comes the creative part. Use scissors to shape the outer edges of the folded paper. Rounded cuts can produce soft, rounded petals, while pointed or slightly angled cuts can create a more decorative flower silhouette.
For a fringed appearance, make a series of small cuts along the outer edges without cutting all the way through the center. This creates delicate strips that can later be separated to produce additional texture.
Expert Insight
Petal shape has a bigger visual impact than you might expect. Rounded edges create a soft, classic look, while narrow cuts and fringed edges add movement and texture. Try testing your cutting style on a small scrap of tissue paper before shaping the entire flower.
5. Carefully Separate the Layers
Gently lift the tissue paper layers one at a time and pull them toward the center. Work slowly because tissue paper can tear if it is pulled too quickly. As each layer is lifted, the flat folded bundle begins to develop the rounded shape of a flower.
Continue working around both sides until the layers are distributed evenly. You can adjust individual petals afterward to fill empty spaces and create a more natural shape.
6. Fluff and Finish the Flower
Once all the layers have been separated, gently fluff the petals. Do not worry about making every petal perfectly identical. Small differences can make a handmade flower look more organic and interesting.
If the flower looks too flat, gently lift additional layers toward the center. If it looks uneven, reposition a few petals until the overall shape feels balanced.
Creative Ways to Use DIY Tissue Paper Flowers
After making your first flowers, you can use them in many different ways. Their lightweight construction makes them particularly useful for decorative projects where you want a large visual effect without heavy materials.
Party and Event Decorations
Large tissue paper flowers can brighten a party table, celebration backdrop, photo area, or dessert display. Arrange flowers in different sizes to create a layered background rather than placing every flower at the same height.
For a coordinated event, match the tissue paper colors to the existing decorations. A limited palette often creates a more intentional look than using every available color.
Gift Wrapping and Handmade Cards
Small paper flowers can add a handmade detail to gift packaging. A tiny bloom attached to a ribbon or gift tag can make simple wrapping feel more personal. You can also create miniature flowers for greeting cards, scrapbook pages, and other paper crafts.
Bedroom and Home Decor
A collection of colorful paper flowers can turn an empty wall into a cheerful decorative feature. Arrange different flower sizes into a loose cluster or create a simple border around a mirror, shelf, or creative display.
Because the flowers are made from lightweight paper, they can be rearranged as your decor changes. This makes them a fun option for seasonal decorating or refreshing a room without committing to permanent changes.
Tips for Making Fuller and More Attractive Flowers
Small adjustments can make a big difference when creating paper flowers. If your first attempt looks flatter than expected, try adding more tissue paper layers. If the petals look crowded, use fewer layers or make the individual cuts slightly wider.
- Keep layers aligned: Neat preparation makes shaping much easier.
- Use gentle pressure: Tissue paper responds best to slow, careful movements.
- Vary flower sizes: A mixture of small and large blooms creates visual interest.
- Experiment with edges: Rounded, pointed, and fringed cuts can create completely different effects.
- Blend colors: Combining related shades can add depth without making the design look busy.
Pro Tip: Make several flowers before arranging them. Once you have a small collection, you can compare sizes and colors together and create a much more balanced display than you would by planning each flower individually.
Common Mistakes to Avoid
Even though tissue paper flowers are beginner-friendly, a few common issues can affect the final result. One is cutting too deeply into the folded layers. If the cuts reach too close to the center, the petals may separate or become difficult to shape.
Another issue is pulling the layers too aggressively. Tissue paper is delicate, so slow movements are better than trying to open several layers at once. If a petal tears, do not discard the whole flower. Small imperfections are often hidden once the flower is fully fluffed.
It is also easy to overwork the petals. Once the flower has reached a pleasing shape, stop adjusting it. Too much handling can flatten the paper and reduce the soft texture that makes tissue paper flowers appealing.
At a Glance
- Use layered tissue paper for fuller blooms.
- Shape the edges before opening the layers.
- Separate each layer gently to avoid tearing.
- Combine different sizes for more interesting arrangements.
- Use bright colors for cheerful party and home decor.
Make Your Own Tissue Paper Flower Collection
The best part of a tissue paper flowers DIY project is that there is no single correct way to create your blooms. You can start with a simple layered flower and gradually experiment with petal shapes, fringed edges, color combinations, and different sizes.
The bright paper palette and layered craft style provide plenty of inspiration for a cheerful handmade collection. Try creating a few flowers in shades of pink, then add lighter or darker tones to build contrast. Once you have several blooms, arrange them together and look for gaps that could be filled with smaller flowers.
Whether you are preparing decorations for a celebration or simply looking for a relaxing paper craft, these flowers offer an easy way to turn basic materials into something decorative. The process is simple enough for beginners while leaving plenty of room for creativity and personal style.
Conclusion
Tissue paper flowers DIY projects are a colorful, accessible way to bring handmade creativity into your decor. With a few sheets of tissue paper, simple cutting techniques, and careful shaping, you can create flowers that work beautifully for parties, gifts, crafts, and everyday decorating.
Start with a small flower, experiment with the petal edges, and gradually try different colors and sizes. Once you become comfortable with the basic technique, you can create entire arrangements that reflect your favorite palette and decorating style. Most importantly, enjoy the process. A handmade flower does not need to be perfectly symmetrical to be beautiful.
Save this idea for your next paper craft session and return to it whenever you need an easy, colorful DIY project. A few simple layers can become a surprisingly beautiful floral display with just a little imagination.
Tags
Tissue Paper Flowers DIY Flowers Paper Flowers Paper Crafts Easy Crafts DIY Decor Flower Craft Ideas Handmade Decorations