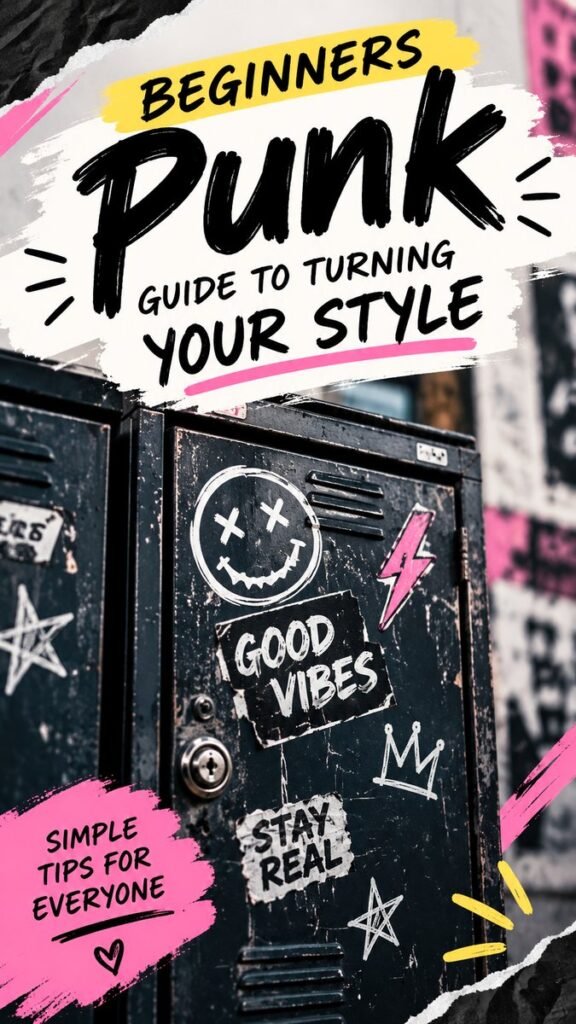
Punk DIY is all about turning ordinary pieces into something expressive, personal, and full of attitude. You do not need an expensive wardrobe or a complicated collection of supplies to create a strong punk-inspired look. A few patches, painted details, stickers, bold lettering, distressed textures, and creative embellishments can completely change the character of an everyday item. The inspiration here combines gritty locker-room textures, handmade graphics, playful doodles, and bold typography to create a rebellious visual style that feels energetic without being overly complicated.
Key Takeaways
- Punk DIY projects are built around individuality rather than perfection.
- Start with simple materials such as patches, paint, stickers, markers, and fabric.
- Mix distressed textures with bold lettering for an authentic alternative aesthetic.
- Use a limited color palette to make handmade details feel intentional.
- Customize everyday objects so your personality becomes part of the design.
What Makes Punk DIY Style So Appealing?
Punk DIY has always been closely associated with creativity, self-expression, and making things your own. Instead of relying on polished, perfectly coordinated designs, the style embraces rough edges, visible brushwork, layered graphics, handwritten lettering, and unexpected combinations. That freedom is one of the biggest reasons punk-inspired DIY projects remain so appealing.
The visual inspiration uses a dark, weathered surface as a foundation. Stickers and hand-drawn graphics create layers of personality across the surface, while bright accents provide contrast. The result feels collected rather than manufactured. Every mark looks as though it has a story behind it.
Important: The strongest punk DIY projects do not need to look perfectly finished. Slightly uneven lettering, rough paint edges, layered stickers, and distressed details can actually make a project feel more authentic and personal.
Start With a Simple DIY Canvas
Before choosing decorations, decide what you want to customize. A denim jacket, canvas bag, pair of old shoes, storage box, notebook, skateboard-style wall decoration, or small furniture piece can all become a punk-inspired DIY canvas. The goal is not to transform everything at once. Pick one object that could use more personality.
Dark or neutral surfaces work especially well because they provide a strong background for white graphics, bright paint, colorful patches, and metallic details. However, there is no strict rule. Punk DIY is flexible, so a light-colored base can work beautifully with black graphics and distressed accents.
Choose Materials That Feel Handmade
You can create plenty of punk DIY projects using inexpensive supplies. Permanent markers, acrylic paint, fabric paint, iron-on patches, adhesive patches, old magazines, stickers, scraps of fabric, safety pins, paint pens, and textured paper are useful starting points.
- Paint pens: Great for lettering, outlines, stars, symbols, and small illustrations.
- Fabric patches: Useful for jackets, bags, hats, and other fabric items.
- Stickers: Perfect for creating layered graphics without advanced artistic skills.
- Permanent markers: Handy for quick doodles and handwritten details.
- Scrap paper: Adds a torn, collage-like texture to boards and decorative surfaces.
Build a Strong Punk Color Palette
Color can completely change the personality of a DIY project. A classic approach starts with black, charcoal, white, and gray, then introduces one or two energetic accent colors. Pink, yellow, red, electric blue, or neon green can create eye-catching contrast without overwhelming the design.
The featured aesthetic demonstrates how a restrained dark foundation can make brighter details stand out. A colorful lightning bolt, painted underline, sticker, or small graphic can attract attention immediately when surrounded by darker tones.
Use Contrast Instead of Too Many Colors
If you are new to DIY design, choose a base color, a text color, and one accent color. This simple formula helps your project look intentional. You can always add another shade later if the surface needs more energy.
Create Bold Punk DIY Lettering
Typography is one of the easiest ways to give a DIY project a strong visual identity. The inspiration uses oversized handwritten lettering that feels spontaneous and expressive. You can recreate this approach with thick paint markers, brush pens, or layered paper letters.
Do not worry about making every letter identical. Slight variations can make the finished design feel handmade. Try mixing large headline words with smaller supporting phrases. You can also underline important words with a painted stroke or place text inside a rough sticker-like shape.
Keep the Main Message Short
For a jacket, bag, wall piece, or decorative object, short phrases usually have more visual impact than long sentences. Words such as “Stay Real,” “Good Vibes,” “DIY,” “Punk,” or “Keep Creating” can work as graphic elements. Choose language that feels natural to you rather than trying to force a particular aesthetic.
Why This Matters
A successful punk DIY piece feels personal. Instead of copying a finished design exactly, borrow broad ideas such as layered textures, bold lettering, contrasting colors, and handmade marks, then reinterpret them through your own interests and materials.
Layer Stickers, Patches, and Graphics
Layering is a major part of the visual character of punk DIY. One sticker can look simple, but several different shapes, textures, and graphic styles can create a much richer surface. Start with larger elements and gradually fill smaller spaces with supporting details.
Try overlapping a paper label with a painted shape. Place a small sticker near a larger graphic. Add handwritten marks around the edges. If you are decorating fabric, combine sewn patches with painted elements for additional texture.
Leave Some Empty Space
It can be tempting to cover every available area, especially when creating a collage-inspired design. However, empty space helps important graphics stand out. Leave breathing room around your main lettering or largest patch, then use smaller marks to connect the surrounding areas.
Add Doodles and Hand-Drawn Details
You do not have to be an experienced illustrator to add doodles. Simple stars, hearts, lightning bolts, crowns, smiley faces, arrows, lines, and abstract shapes can make a surface feel more energetic. Their imperfect appearance is part of the charm.
Use different line weights to create variety. A thick outline can frame a small graphic, while thinner marks can fill unused spaces. White paint pens are especially useful on dark backgrounds because they create immediate contrast.
Pro Tip: Sketch your doodles on scrap paper before applying them to the final surface. Once you have a few shapes you like, repeat selected elements throughout the project to create visual consistency.
Try a Distressed Punk DIY Finish
A distressed finish can make a new project appear more lived-in. The easiest approach is to build texture gradually rather than trying to make everything look worn at once. Torn paper edges, faded lettering, dry-brush paint, rough outlines, and overlapping stickers can all contribute to this effect.
For paper-based projects, gently tearing edges creates an organic shape. For painted surfaces, a dry brush can leave uneven marks that resemble aged paint. If you are working with fabric, combining different textures naturally creates visual variation.
Avoid Overdoing the Texture
Texture works best when it supports the design instead of hiding it. Keep the main message readable and make sure important graphics remain recognizable. A little wear can add character, while too much visual noise can make a project difficult to understand.
Easy Punk DIY Projects to Try
Once you understand the basic ingredients of the style, there are countless ways to apply them. Start with a project that matches your comfort level and available materials.
- Customize a denim jacket: Add patches, painted lettering, small graphics, and fabric details.
- Decorate a canvas tote: Use paint pens to create a bold phrase surrounded by doodles.
- Make a sticker collage: Combine stickers, handwritten labels, and torn-paper shapes on a board.
- Refresh an old storage box: Cover the surface with layered graphics and distressed paint.
- Create a personalized notebook: Mix bold typography, stickers, tape, and hand-drawn accents.
- Transform wall decor: Use a dark background with contrasting graphics for a striking statement piece.
How to Make Your Punk DIY Project Feel Personal
The most meaningful DIY projects contain details that reflect the person who made them. Think about the words, colors, symbols, textures, and visual references that naturally appeal to you. You can incorporate favorite phrases, initials, abstract drawings, music-inspired typography, or memories represented through small graphics.
Personalization also means knowing when to stop. Once the composition feels balanced, take a step back and look at the entire piece. If one section feels too empty, add a small detail. If another area feels crowded, allow some of the original surface to remain visible.
Experiment Before Committing
Planning does not have to eliminate spontaneity. Make a few rough arrangements first. Place patches or paper graphics on the surface without attaching them. Test different lettering sizes. Try your color combination on a spare piece of material. These small experiments can prevent mistakes while still leaving room for creative surprises.
Simple Tips for a Cleaner Finished Look
Although punk DIY embraces imperfection, thoughtful construction makes a handmade project much more durable and visually appealing. Clean the surface before applying stickers or paint. Let painted layers dry before adding another color. If you are using fabric, select materials and adhesives appropriate for the item.
- Plan your largest graphic before adding small details.
- Keep your most important words large and easy to read.
- Use repeated colors to connect different elements.
- Mix rough and clean textures for visual contrast.
- Allow enough empty space for the design to breathe.
At a Glance
- Start with one everyday object.
- Build around a dark or neutral base.
- Add bold lettering and handmade graphics.
- Use one or two bright accent colors.
- Layer stickers, patches, paint, and texture thoughtfully.
Conclusion: Make It Yours With Punk DIY
Punk DIY is less about following a fixed formula and more about creating something that feels unmistakably yours. A worn surface, oversized lettering, layered stickers, expressive doodles, and a few bold color accents can turn a basic object into a memorable statement piece. You can begin with just a marker and one old item, then gradually experiment with patches, paint, paper, and other textures as your confidence grows.
The beauty of this style is that perfection is not the goal. Your handwriting does not need to be flawless, your lines do not need to be perfectly straight, and every element does not need to match. What matters is creating a composition with personality, contrast, and intention. Start small, experiment freely, and let the finished piece show some of the creative process behind it.
Whether you are customizing clothing, decorating accessories, or creating bold room decor, punk DIY gives you an easy way to transform ordinary materials into expressive pieces. Grab a few supplies, choose your canvas, and start creating something that feels completely your own.
Tags
Punk DIY Punk Style DIY Fashion Alternative Style Punk Fashion DIY Projects Grunge DIY Creative Crafts