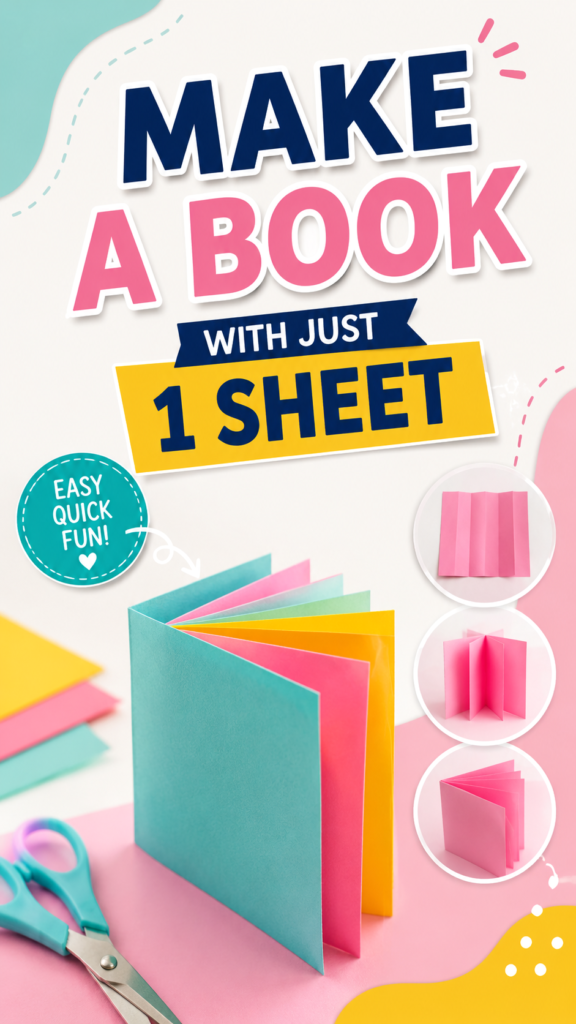
Making a DIY book from a single sheet of paper is one of those simple craft projects that feels surprisingly satisfying. With just paper, a pair of scissors, and a few careful folds, you can create a small handmade book that opens into multiple pages. It is inexpensive, approachable, and easy to customize with drawings, stories, notes, mini illustrations, or colorful decorations.
This one-sheet book craft is especially appealing when you want a creative activity without a long supply list. The finished project has a playful accordion-like structure, making it a fun introduction to basic paper folding and bookmaking. Whether you are crafting with children, preparing a classroom activity, or simply looking for an easy weekend paper craft, this DIY book is a great place to start.
Key Takeaways
- A single sheet of paper can become a compact handmade book.
- Simple folds create the basic page structure before cutting and shaping.
- Bright paper makes the finished DIY book especially eye-catching.
- The pages can be used for stories, drawings, lists, mini journals, or crafts.
- This project requires very few supplies and is easy to personalize.
Why Make a DIY Book From One Sheet of Paper?
There is something appealing about turning an ordinary piece of paper into something functional and creative. A one-sheet DIY book keeps the process simple while still producing a finished object that can be opened, closed, decorated, and filled with ideas.
Unlike more complicated bookbinding projects, this paper book does not require thread, glue, cardboard covers, or specialized equipment. The structure comes primarily from the way the paper is folded and cut. That makes it an excellent beginner paper craft and a convenient activity when you want to start creating immediately.
Important: The most important part of this craft is accuracy during the folding stage. Crisp, carefully aligned folds make the finished book easier to open and give the pages a cleaner, more polished appearance.
Materials for This Easy Paper Book
One of the best things about this DIY book idea is the short supply list. The basic project can be completed with everyday craft materials that are easy to find at home, school, or an art supply drawer.
- One sheet of paper
- Scissors
- A flat surface for folding
Choose colorful paper if you want the finished book to have a bright, playful appearance. Pink, yellow, blue, green, orange, and other vivid shades can make the finished pages stand out. White or pastel paper works beautifully too, especially if you plan to decorate the book afterward.
If children are participating, adult supervision is recommended when scissors are being used. For younger crafters, an adult can handle the cutting while the child focuses on folding and decorating.
How to Make a Book With One Sheet of Paper
The basic idea is straightforward: divide the sheet into sections through folding, create the necessary opening with a careful cut, and then manipulate the folded paper so the sections form a small book. Taking your time during each stage will make the final shape much easier to assemble.
Step 1: Choose Your Paper
Start with a single sheet of paper in a color and size that suits your project. A standard sheet is a practical choice because it is easy to fold and large enough to create several small sections.
Before making any cuts, place the paper on a clean, flat surface. Smooth away wrinkles so that your folds can be as precise as possible. If you want to make several books, experiment with different paper colors to create a colorful collection.
Step 2: Create the Folded Sections
Fold the paper carefully to establish the individual sections of your book. Aim for even spacing because these folds will determine how the pages open and close.
Press firmly along each crease with your fingertips. A crisp crease helps the paper remember its shape and makes the finished book more structured. You do not need complicated folding techniques. The goal is simply to divide the sheet into manageable sections that can become pages.
Step 3: Make the Necessary Cut
Once the paper has been folded into sections, use scissors to make the appropriate cut in the folded sheet. This step is what allows the paper to transform from a flat folded sheet into a connected book structure.
Work slowly and check the orientation of the paper before cutting. A neat cut will help the pages open correctly, while rushing can make the final shape uneven. If you are making this craft for the first time, it can be helpful to practice with scrap paper before using your favorite colored sheet.
Step 4: Shape the Book
After the cut is complete, begin opening and rearranging the folded sections. The paper will start to form the distinctive connected shape of a small handmade book.
Gently push the sections into position rather than forcing them. As the folds move into place, the pages should begin to sit together naturally. Run your fingers along the creases again if any section feels loose or uneven.
Step 5: Give Your Book a Final Fold
Finish by adjusting the pages and creases so the book can open and close smoothly. Take a moment to look at the front, back, and individual page sections. Small adjustments at this stage can make a noticeable difference in the finished result.
Pro Tip: Do not rush the folds. When each crease is sharp and aligned, the finished paper book looks cleaner and is much easier to handle. A few extra seconds spent pressing each fold can significantly improve the result.
Creative Ways to Use Your Handmade Book
Once your DIY book is assembled, the fun can continue. The small pages provide a compact canvas for all kinds of creative projects. You can leave the paper plain for a minimalist look or turn it into a colorful personalized keepsake.
Make a Mini Storybook
Use each page as part of a short story. Draw a character, create a setting, and add a few sentences to each section. Because the book is small, even a simple story can feel like a complete little publication.
Create a Tiny Sketchbook
Turn the pages into miniature drawing spaces. Try a different doodle on every page, experiment with patterns, or create a sequence of illustrations that changes from one section to the next.
Design a Mini Journal
A handmade paper book can also become a small journal for quick thoughts, favorite ideas, daily highlights, or creative prompts. The limited space encourages short entries and simple layouts.
Use It for Learning Activities
Teachers, parents, and students can adapt the craft for educational projects. A small folded book can organize vocabulary words, facts, drawings, writing exercises, or step-by-step explanations. Its interactive format can make ordinary notes feel more creative.
How to Decorate a DIY Paper Book
Decoration is where a simple paper craft can become completely personal. Once the structure is finished, consider adding simple details that match the purpose of your book.
- Colored pencils: Add illustrations, borders, patterns, and handwritten titles.
- Markers: Create bold lettering and colorful page designs.
- Stickers: Add quick decorative details without drawing everything by hand.
- Paper scraps: Layer small shapes or contrasting pieces for a collage effect.
- Simple doodles: Fill empty spaces with stars, hearts, flowers, geometric patterns, or other playful designs.
Try keeping the cover slightly more decorated than the inside pages. A bold title and a few simple accents can make the book look finished without overwhelming the small format.
Why This Matters
Simple crafts are often the easiest to repeat and customize. Once you understand the basic folding structure, you can make multiple versions and change the colors, artwork, themes, and page content without changing the basic process.
Tips for Getting Better Results
Paper crafts can look deceptively simple, but a few small habits can make the process much easier. First, always work on a flat surface. This gives you better control over the paper and helps prevent accidental bends.
Second, pay attention to alignment. If one fold is noticeably different from the others, the finished book may not close evenly. Take your time and compare the sections before moving on to the next stage.
Third, use a lighter paper when you are learning the technique. Lightweight paper is generally easier to fold and manipulate. Once you are comfortable with the structure, experiment with different textures and weights to discover the look you prefer.
Finally, do not worry if your first attempt is not perfect. Folding is a hands-on skill, and repeating the project is one of the best ways to improve. Save your first book as a reference and compare it with later versions.
Easy Variations to Try
The one-sheet book concept can become the starting point for many creative variations. Make several small books in different colors and use each one for a different purpose. One could hold drawings, another could contain short stories, and another could become a collection of favorite quotes or ideas.
You can also experiment with the visual theme. A bright color combination creates a cheerful craft project, while neutral paper with simple black lettering can give the book a clean, modern appearance. Mixing contrasting colors between the cover and interior pages can make the folded sections especially eye-catching.
If you are crafting with a group, let each person choose their own theme. Comparing the finished books is part of the fun because the same basic paper-folding technique can produce completely different results once decoration and storytelling are added.
At a Glance
- One sheet of paper creates the foundation.
- Careful folds form the connected page sections.
- Scissors are used for the key opening in the folded paper.
- Decorate the finished book with drawings, lettering, stickers, or patterns.
- Use it as a mini storybook, journal, sketchbook, or learning project.
Conclusion
A DIY book made from one sheet of paper is proof that a great craft does not need a complicated supply list. With a piece of paper, careful folds, and a pair of scissors, you can create a small handmade book that is ready to become a story, sketchbook, journal, classroom project, or personalized keepsake.
The simple construction also leaves plenty of room for creativity. Try bright colors, playful illustrations, handwritten titles, stickers, or minimalist designs to make every book your own. Once you become comfortable with the folding process, making another version takes little effort.
If you are looking for an easy paper craft that is inexpensive, creative, and satisfying to make, this one-sheet DIY book is a wonderful project to save and try. Gather a colorful piece of paper, make those first careful folds, and see how quickly a flat sheet transforms into something you can fill with your own ideas.
Tags
DIY Book Paper Craft Mini Book Book Craft Paper DIY Easy Crafts Handmade Book