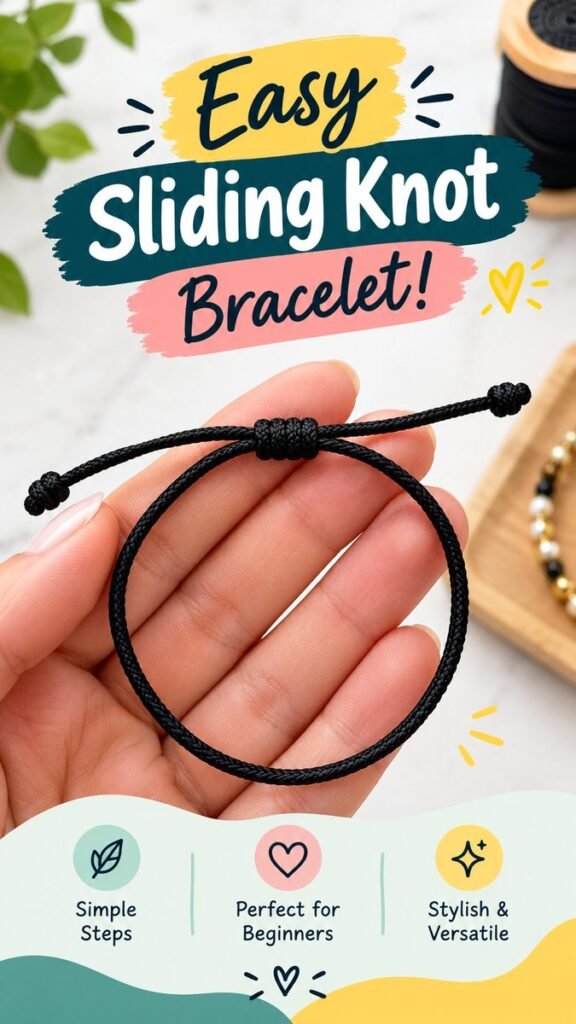
Making your own jewelry does not have to involve complicated patterns or a large collection of supplies. An adjustable bracelet made with a simple sliding knot is a perfect example of how a few basic materials can become a practical and stylish accessory. The sliding knot creates a flexible closure that lets you loosen or tighten the bracelet whenever you need to, making this project especially appealing for beginners.
This adjustable bracelet DIY is a fun way to practice simple knotting techniques while creating something you can actually wear. The clean black cord gives the finished piece a timeless look, while the adjustable construction keeps the design comfortable and easy to put on. Whether you are new to handmade jewelry or simply want a quick craft for your next creative afternoon, this sliding knot bracelet is a great place to start.
Key Takeaways
- A sliding knot creates an easy adjustable bracelet closure.
- Cord-based bracelets require only a few basic craft supplies.
- Simple knotting techniques make this project beginner-friendly.
- An adjustable design makes sizing easier without complicated measurements.
- Black cord offers a simple, versatile style that works for everyday wear.
Why Make an Adjustable Sliding Knot Bracelet?
One of the biggest advantages of a sliding knot bracelet is its simplicity. Traditional bracelets often require a clasp, button, hook, or carefully measured fastening system. A sliding knot removes much of that complexity. The knot acts as a movable closure, allowing the bracelet loop to become larger or smaller with a gentle adjustment.
This makes the design useful for handmade gifts as well. When you are not completely sure of someone’s wrist size, an adjustable bracelet is much easier to give than a fixed-size design. The recipient can customize the fit themselves, which adds both convenience and practicality.
The minimalist appearance is another reason this style remains popular. A simple cord bracelet can look casual, modern, understated, or personalized depending on the cord, colors, beads, and finishing details you choose.
Important: The most useful feature of a sliding knot is its adjustability. Instead of trying to make a perfect fixed-size loop, focus on creating a secure knot that moves smoothly while still holding its position when the bracelet is worn.
Materials for a Sliding Knot Bracelet
You do not need a large jewelry-making kit for this project. The design shown uses cord as the main material, which keeps the project affordable and approachable. Choose a cord that is flexible enough to form smooth knots but firm enough to hold its shape.
- Jewelry cord, waxed cord, or another suitable craft cord
- Sharp scissors for cleanly trimming the ends
- A ruler or measuring tape for checking the bracelet length
- Optional beads or charms for personalization
- A small amount of clear craft adhesive if needed for finishing loose ends
Black cord creates a particularly clean look, but you can easily experiment with other shades. Neutral tones such as beige, brown, white, gray, or navy create a subtle appearance, while brighter colors can make the bracelet feel playful and youthful.
Choosing the Right Cord
The cord you select can change the appearance and feel of the entire bracelet. A thin cord produces a delicate design, while a thicker cord gives the bracelet more visual weight. Braided cord can add texture, whereas smooth cord creates a cleaner minimalist finish.
For your first attempt, choose a cord that is easy to handle and knot. Extremely slippery materials can make the process more frustrating for beginners because knots may move more easily than expected. A cord with a little texture can make practicing much easier.
How the Sliding Knot Works
The sliding knot is essentially a movable knot that controls the size of the bracelet loop. When the knot is pulled in one direction, the opening becomes smaller. When it is adjusted in the opposite direction, the loop becomes larger.
This simple mechanism is what makes an adjustable bracelet so convenient. Rather than attaching a permanent clasp, you create a closure that can be changed whenever the bracelet is put on or removed.
Understanding the Bracelet Structure
Before tying anything, it helps to visualize the finished design. The cord forms a loop around the wrist, while the sliding knot sits at the top or side of the bracelet. The loose cord ends can be finished with small knots, beads, or simple trimmed ends.
Keeping the structure simple is useful when learning. You can always add decorative details after you are comfortable with the basic sliding knot technique.
Step-by-Step Adjustable Bracelet DIY
1. Prepare the Cord
Start by cutting a suitable length of cord with enough extra material to form the bracelet loop and create the sliding knot. Having a little more cord than you think you need is helpful when practicing because you can trim the ends after the knot is complete.
Run your fingers along the cord to straighten it before beginning. This makes it easier to see how the strands overlap and helps prevent unnecessary tangles.
2. Form the Bracelet Loop
Bring the cord around to create the basic bracelet shape. Check the approximate size against your wrist or another suitable reference before tightening the knot.
Do not make the loop too tight at this stage. The purpose of the sliding knot is to provide room for later adjustment, so leave enough flexibility for the closure to move.
3. Position the Sliding Knot
Arrange the cord so the section that will become the sliding knot is easy to access. Keep the strands organized and avoid crossing them unnecessarily. A clean arrangement makes it easier to create an even knot.
Use your fingers to maintain light tension while forming the knot. Too much tension can make the knot difficult to adjust, while too little can result in a loose structure.
4. Wrap and Tie the Knot
Wrap the working cord around the appropriate strands and form the sliding knot. Make the wraps neat and close together rather than spreading them across a large section of cord.
Once the knot is formed, gently pull the working strands to tighten it. The finished knot should feel secure while still being capable of sliding along the cord.
5. Test the Adjustment
This is one of the most important steps. Slowly adjust the bracelet several times before trimming the ends. The knot should move without requiring excessive force, and the loop should change size smoothly.
Try opening the bracelet wide enough to put it on comfortably, then pull the ends to reduce the size. If the knot feels stiff, inspect the wraps and make sure the cord is not tangled or pulled too tightly.
6. Finish the Cord Ends
Once you are satisfied with the adjustment, decide how you want to finish the loose ends. Small knots are an easy option and complement the handmade appearance. You can also add beads if the cord and bead openings are compatible.
Trim excess cord carefully, leaving enough material for the finish to remain secure. If you use adhesive, choose an appropriate craft adhesive and allow it to cure according to its instructions before wearing the bracelet.
Expert Insight
A smooth sliding knot depends more on even tension and organized cord placement than on pulling the knot as tightly as possible. Make the wraps neat, test the movement repeatedly, and only trim the cord after you are happy with the fit.
Tips for Making a Better Sliding Knot Bracelet
A little attention to technique can make a noticeable difference in the finished bracelet. If your first attempt does not look perfect, treat it as practice. Knotting becomes much easier once your hands get familiar with the movements.
Keep Your Tension Consistent
Try to maintain similar tension throughout the knot. Uneven pressure can create lopsided wraps or make one side of the bracelet feel tighter than the other. Work slowly and check the knot from different angles before finalizing it.
Do Not Trim Too Early
It can be tempting to cut the extra cord as soon as the knot looks finished. Resist that urge until you have tested the bracelet. Leaving the ends longer gives you room to make corrections, adjust the size, or change the finishing style.
Practice With Extra Cord
If you are completely new to sliding knots, make a practice knot before creating the final bracelet. This lets you learn how the cord moves without worrying about wasting your finished piece.
Pro Tip: Photographing your practice knot from above can help you understand which strand is wrapping around which. Once the movement feels natural, recreating the knot on your final bracelet becomes much easier.
Easy Ways to Personalize Your DIY Bracelet
The basic adjustable bracelet is intentionally simple, which makes it an excellent starting point for customization. You can create several different looks without changing the fundamental construction.
- Use two complementary cord colors for a layered effect.
- Add a small bead near the finished ends.
- Experiment with different cord thicknesses and textures.
- Create matching bracelets for friends or family.
- Use neutral cord for a minimalist everyday accessory.
- Combine several simple bracelets for a stacked jewelry look.
Color is one of the easiest ways to change the personality of the project. Soft pastels can create a delicate handmade aesthetic, while earthy shades work well for a natural look. Bold colors make the bracelet more noticeable and can be coordinated with seasonal outfits or favorite color combinations.
Common Sliding Knot Mistakes
Even a beginner-friendly project can have a few tricky moments. Understanding common problems can save time and make the process less frustrating.
The Knot Will Not Slide
If the knot barely moves, it may have been tightened too much or the cord may be crossing in an awkward position. Loosen it slightly and inspect the wraps. The knot should be secure, but it should not behave like a permanent knot.
The Bracelet Feels Too Loose
If the bracelet does not hold its adjusted position, check whether the knot has enough clean wraps around the working strands. The cord type can also influence how easily a knot grips.
The Knot Looks Uneven
Uneven wraps usually happen when the cord is not held consistently during the tying process. Slow down, straighten the strands, and rebuild the knot if necessary. A neat foundation generally produces a much cleaner finished bracelet.
Why This DIY Makes a Great Beginner Craft
This bracelet project combines several qualities that make handmade crafts satisfying: it is inexpensive, practical, customizable, and relatively quick to practice. You do not need advanced jewelry-making experience to understand the basic idea, and each attempt gives you an opportunity to improve your knotting technique.
It is also an excellent introduction to making adjustable jewelry. Once you understand how a sliding knot controls the size of a bracelet, you can experiment with different cords, decorative elements, and variations of the same closure.
How to Turn This Into a Handmade Gift
A handmade bracelet can be a thoughtful small gift because it combines personal effort with everyday usefulness. An adjustable design is particularly convenient when you are unsure of the recipient’s exact wrist measurement.
Try making several bracelets in different colors and packaging them together. Simple paper cards, small jewelry pouches, or handmade gift boxes can give the finished pieces a polished presentation without taking attention away from the bracelet itself.
You can also create coordinating sets for friends. Matching cord colors or complementary combinations can turn a straightforward DIY into a fun shared craft project.
At a Glance
- Simple cord construction
- Adjustable sliding knot closure
- Beginner-friendly technique
- Easy to personalize with colors or beads
- Great for everyday accessories and handmade gifts
Conclusion
An adjustable bracelet DIY with a sliding knot is a simple project with plenty of creative potential. The basic design is easy to understand, comfortable to adjust, and versatile enough to suit many different styles. With just a suitable cord and a little patience, you can practice the knot, refine your technique, and create a handmade accessory that feels both useful and personal.
The key is to focus on neat cord placement, balanced tension, and testing the sliding action before finishing the ends. Once you are comfortable with the basic construction, experiment with colors, textures, beads, and different finishing details to make each bracelet your own.
Whether you are making your first piece of handmade jewelry, preparing a small gift, or simply looking for an easy craft to enjoy, this sliding knot bracelet is a rewarding project to keep in your DIY collection.
Tags
Adjustable Bracelet DIY Sliding Knot DIY Bracelet Bracelet Tutorial Cord Bracelet Handmade Jewelry Beginner Crafts Jewelry DIY