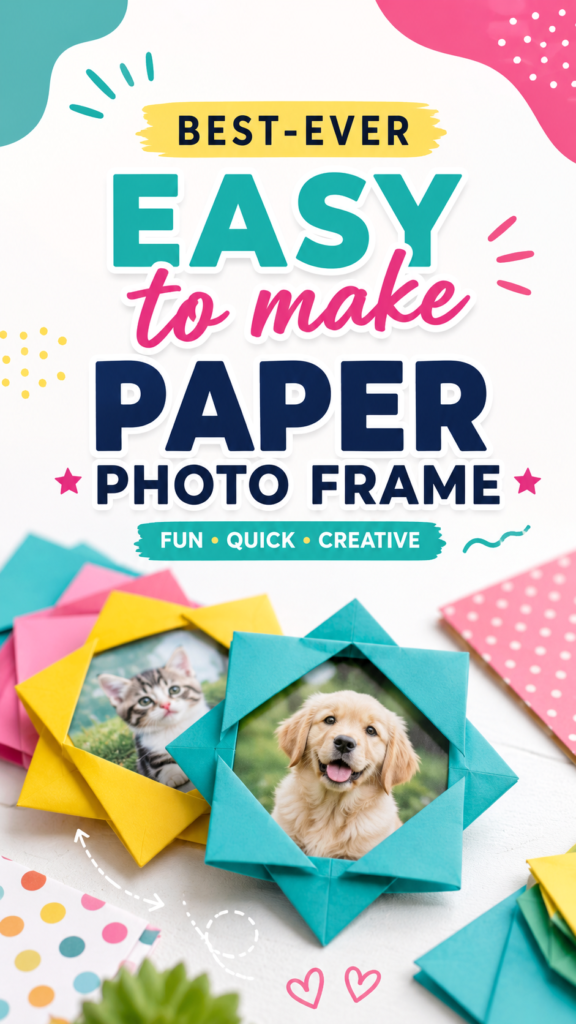
Turning a favorite picture into a handmade decoration can be as simple as folding a few pieces of paper. DIY photo frames are an easy craft project that combines creativity, color, and personal memories in one charming display. The colorful folded paper frames shown here demonstrate how ordinary cardstock or decorative paper can become eye-catching frames for photos of family, pets, friends, or special moments.
What makes this project especially appealing is its flexibility. You can choose bright solid colors for a playful look, patterned paper for extra personality, or coordinate several shades to create a colorful collection. These handmade paper photo frames also make wonderful craft projects for children, classroom activities, birthday projects, and simple homemade room decor.
Key Takeaways
- Paper photo frames are simple, inexpensive, and highly customizable.
- Bright cardstock can create a cheerful and playful finished look.
- Folded corners add dimension without requiring complicated materials.
- Patterned paper is an easy way to personalize handmade frames.
- DIY frames work well for photos, gifts, crafts, and home decor.
Why DIY Paper Photo Frames Are So Fun
A photo frame does more than surround a picture. It can influence the entire way a photograph looks and feels. A colorful handmade frame can make an ordinary snapshot feel playful, while a carefully coordinated paper design can turn a favorite picture into a thoughtful piece of decor.
Paper is particularly useful for this kind of craft because it is accessible and easy to customize. You can experiment with different colors, textures, patterns, and sizes without needing specialized crafting equipment. If a design does not work the first time, it is also easy to try again with another sheet of paper.
The folded construction gives these frames an interesting dimensional appearance. Instead of relying on a traditional flat border, the paper creates raised shapes and geometric details around the photograph. This makes the finished frame look more decorative while keeping the basic craft approachable.
Important: The best DIY photo frame is not necessarily the most complicated one. A simple folding technique, strong color combination, and neatly finished edges can create a result that looks polished and intentional.
Materials You Can Use for a DIY Photo Frame
One of the biggest advantages of this project is the short materials list. You can adapt the supplies depending on what you already have at home.
- Colored cardstock or craft paper
- Patterned scrapbook paper
- A favorite printed photograph
- Scissors for trimming paper when necessary
- A ruler for checking measurements
- A pencil for light marking
- Double-sided tape or craft glue
- A flat surface for folding
Cardstock is a particularly useful choice because it has enough structure to hold folded shapes. Regular paper can also work, especially for lightweight decorative frames, but thicker paper tends to produce sharper folds and a sturdier finished piece.
Choosing the Right Paper
Color selection is where you can make the project completely your own. Bright yellow, turquoise, pink, orange, green, and purple can create an energetic craft collection similar in spirit to the colorful examples shown. For a softer aesthetic, try pastel pink, cream, sage green, lavender, or light blue.
Patterned paper can be especially effective when used as an accent. Floral prints, geometric designs, dots, stripes, and small illustrations can add visual interest without requiring additional decoration.
How to Make a Simple Folded Paper Photo Frame
The basic idea behind a folded paper photo frame is to create a central opening surrounded by folded sections. The folds become both the structure and the decoration, which is why careful creasing makes such a difference.
1. Choose Your Photo and Frame Size
Start by deciding which photograph you want to display. Measure the picture or simply place it on your work surface and determine how much of the image you want visible. A slightly larger sheet of paper gives you more room to create a decorative border.
For a coordinated display, consider using several photos with frames in different colors. The frames do not need to be identical. A collection of different colors and patterns can look more creative and relaxed when grouped together.
2. Prepare the Paper
Place your paper flat on a clean surface. If you are using patterned cardstock, decide which side should face outward before making the folds. Lightly marking important fold points with a pencil can help maintain symmetry, particularly if you are making several frames.
Use a ruler when you want precise proportions. For a more casual handmade appearance, you can work by eye and allow slight variations between frames.
3. Create Clean Folds
Fold the paper carefully along the planned lines and press each crease firmly. Sharp folds help the frame hold its shape and make the geometric design more visible.
Take your time at the corners. The folded corner details are what give this style of paper frame its distinctive appearance. If a fold looks uneven, unfold it gently and try again before moving to the next section.
4. Form the Photo Opening
As the folded sections come together, arrange them so they create an opening for the photograph. Check the placement before attaching anything permanently. You want the image to sit securely behind the decorative border without being covered too much.
A good frame balances the photograph and the paper design. If the border becomes too wide, the picture can lose visual impact. If it is too narrow, the folded details may not stand out as well.
5. Secure the Frame
Once you are happy with the shape, use small pieces of double-sided tape or a small amount of craft glue to secure loose sections. Avoid using too much adhesive because excess glue can wrinkle paper or become visible on the finished project.
Allow glued areas to settle flat before moving the frame. If you are working with children, pre-cutting paper and helping with adhesive can make the activity easier and more enjoyable.
6. Add Your Photograph
Slide or position your photograph behind the paper opening. Make sure the important part of the image remains visible. Pet photos are particularly charming in colorful handmade frames, but the same design can showcase family snapshots, vacation pictures, school memories, or small artwork.
If you plan to change photographs regularly, consider using removable adhesive instead of permanently gluing the picture into place.
Expert Insight
Color coordination can make a collection of handmade frames feel much more intentional. Choose two or three complementary colors, then vary the patterns or frame shapes to keep the display interesting without making it look cluttered.
Creative Ways to Personalize Your Paper Frames
Once you understand the basic folded frame concept, there are plenty of ways to make each piece unique. The simplest option is to experiment with color, but you can also combine papers, add small embellishments, or create themed collections.
Mix Solid and Patterned Paper
A solid-colored frame can be paired with a patterned border or backing. This creates contrast while keeping the photograph as the main focal point. Try placing a bright solid frame beside a floral or geometric design for a cheerful craft display.
Create a Rainbow Collection
Make several DIY photo frames using different colors of cardstock. Arrange them together in a rainbow-inspired sequence or scatter them across a shelf, craft wall, or desk.
This approach is especially useful when you have multiple photographs that you want to display as a group. Instead of making every frame identical, let each color provide its own personality.
Use Themed Photos
Paper frames can be designed around a particular type of photograph. Create colorful frames for pet pictures, soft pastel frames for baby photos, bright designs for vacation memories, or playful patterns for children’s artwork.
Matching the frame style to the photograph can make a simple picture display feel more curated.
DIY Photo Frame Ideas for Kids
This craft can be adapted into a fun hands-on activity for children. Folding paper encourages careful attention to shapes and patterns while allowing kids to make creative choices about colors and decorations.
For younger children, adults can prepare the paper and demonstrate the folding technique. Older children may enjoy measuring, folding, decorating, and arranging the frames independently.
Keep the project simple rather than focusing on perfect symmetry. A handmade frame should feel personal. Small differences between projects can actually make the finished collection more charming.
Children can also decorate the surrounding paper with stickers, simple drawings, dots, stars, hearts, or other non-religious craft motifs. The result can become a personalized keepsake featuring a favorite family or pet photo.
Pro Tip: Before applying glue, arrange all folded pieces and the photograph together first. This simple test helps you spot alignment problems and gives you the chance to adjust the composition without damaging the paper.
Easy Display Ideas for Handmade Frames
After making your frames, think beyond a traditional picture frame arrangement. Several paper frames can be grouped together on a desk, shelf, craft board, or other suitable display area.
A small collection can create a colorful memory corner. Mix different frame sizes and colors while keeping the photographs visually related. For example, several pet photographs can be arranged together using contrasting paper colors.
You can also use a single handmade frame as a small decorative accent. Because paper frames are lightweight, they are easy to rearrange when you want to refresh your decor or change the photograph.
Common Mistakes to Avoid
Even simple paper crafts become easier when you know what to watch for. Uneven folds are one of the most common problems. Press each crease carefully and try to keep corresponding sides similar in size.
Another issue is using paper that is too thin for the desired structure. Lightweight paper may work, but cardstock generally provides more support for decorative folded corners.
Too much glue can also affect the result. Apply adhesive sparingly and give it time to set. If you are using patterned paper, remember that the direction of the design can change how the finished folds look.
Finally, avoid overcrowding the frame with decorations. The photograph should remain easy to see. A few thoughtful accents usually create a stronger result than covering every available space.
Why Handmade Frames Make Great Gifts
A handmade photo frame has a personal quality that makes it suitable for thoughtful gifts. You can choose a photograph that has meaning for the recipient and pair it with paper colors that reflect their style.
This idea can work for birthdays, family celebrations, friendship gifts, classroom projects, or simply as a small surprise for someone special. The frame itself becomes part of the gift rather than just packaging around the photograph.
For a group project, everyone can make a frame using their own preferred colors and then combine the finished pieces into a shared photo display. This makes the craft suitable for parties, classrooms, creative afternoons, and family activities.
At a Glance
- Best material: Colored cardstock or decorative craft paper
- Best feature: Folded geometric details around the photo
- Easy customization: Change colors, patterns, and photo sizes
- Great for: Kids’ crafts, pet photos, gifts, and home decor
- Creative tip: Combine several different frames for a colorful display
Conclusion
DIY photo frames are a simple way to turn paper and photographs into something colorful, personal, and decorative. The folded-paper approach creates visual interest without requiring a long list of supplies or advanced crafting skills. With a few sheets of cardstock, a favorite photograph, and some careful folds, you can create a handmade frame that feels completely your own.
The real fun comes from experimenting. Try bold colors, combine patterned and solid papers, create a collection of frames, or involve children in choosing the designs. Small changes in color and paper can transform the overall appearance while keeping the basic project easy to repeat.
Whether you want a creative afternoon activity, a handmade gift, or a fresh way to display favorite memories, paper photo frames are an approachable craft worth trying. Start with one simple design, experiment with the folds, and then build a collection that reflects your personality and favorite moments.
Tags
DIY Photo Frames Paper Crafts DIY Frames Easy Crafts Paper Folding Kids Crafts Handmade Decor Photo Display Ideas