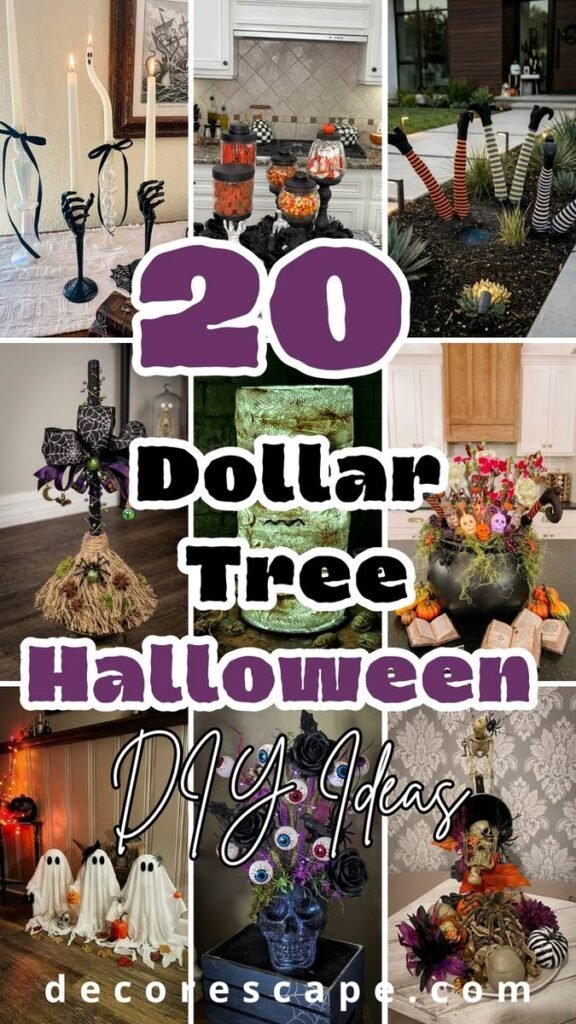
Halloween decorating does not have to mean spending a fortune on seasonal decorations. With a little creativity, inexpensive finds can become charming, spooky, and surprisingly stylish pieces for your home. Dollar Tree Halloween DIY projects are especially appealing because they make it easy to experiment with colors, textures, shapes, and seasonal details while keeping the budget under control. Whether you are decorating a mantel, entryway, table, shelf, porch, or party space, simple craft supplies can be transformed into decorations that feel much more personal than store-bought pieces.
The best part is that these projects can be adapted to your decorating style. You can create something playful and family-friendly, lean into a classic spooky atmosphere, or choose a more refined Halloween look with neutral colors and subtle details. The goal is not simply to make inexpensive decorations. It is to turn ordinary materials into something that looks intentional, festive, and fun.
Key Takeaways
- Dollar Tree supplies can become creative Halloween decorations with a few simple changes.
- Mixing textures and heights helps inexpensive decor look more polished.
- Black, white, orange, and neutral tones create an easy Halloween color palette.
- DIY projects can be customized for shelves, tables, mantels, doors, and party spaces.
- Small decorative details can make simple crafts feel intentional and seasonal.
- Saving reusable supplies makes future Halloween projects even easier.
Why Dollar Tree Halloween DIY Projects Are So Popular
There is something satisfying about taking a basic, inexpensive item and giving it a completely different purpose. Dollar Tree Halloween DIY projects offer exactly that experience. Instead of searching for one perfect decoration, you can collect a few simple pieces and combine them into something unique.
Budget-friendly crafting also removes some of the pressure that comes with decorating for a short season. You can try a new idea without worrying about wasting a large amount of money if the finished project does not turn out exactly as planned. That freedom makes Halloween one of the most enjoyable seasons for experimenting with DIY decor.
Another advantage is customization. A finished decoration can be adjusted to match your existing home decor. Change the colors, add ribbon, switch the placement of embellishments, or simplify the design for a cleaner appearance. The same basic supplies can produce completely different results.
Start With a Simple Halloween Color Palette
One of the easiest ways to make inexpensive DIY Halloween decor look coordinated is to choose a limited color palette. Traditional orange and black immediately create a recognizable Halloween atmosphere, while black and white can produce a more modern look.
Neutral shades such as cream, beige, gray, and muted brown can soften the traditional Halloween palette. If you prefer something more dramatic, small touches of metallic finishes can add visual interest without overwhelming the decoration.
Think about the area you are decorating before choosing your colors. A bright orange accent can stand out beautifully against a neutral shelf, while black and white pieces may blend more naturally into an existing modern interior.
Choose the Right Dollar Tree Supplies
The easiest DIY projects usually begin with ordinary items rather than specialty craft products. Look for pieces that have a useful shape, surface, or structure that can be changed with paint and decorative accents.
- Small containers, trays, and bowls
- Wooden or unfinished decorative pieces
- Plastic or lightweight seasonal objects
- Ribbon, mesh, and fabric accents
- Craft paint and brushes
- Artificial flowers and greenery
- Foam or decorative embellishments
- Small signs and frames
- Battery-operated decorative lighting
You do not need to buy everything at once. Start with a basic selection and think about how each item could be combined with something you already have at home.
Pro Tip: Before buying a craft item, ask yourself whether it can serve more than one purpose. Versatile pieces are especially useful because the same supplies can be reused for different Halloween projects or future seasonal crafts.
Create a Cohesive Halloween Display
A collection of individual crafts can look disconnected if everything has the same size, shape, and visual weight. Creating variation makes a display much more interesting.
Try combining tall and short pieces. Place larger decorations toward the back and smaller accents toward the front. You can also overlap a few objects slightly instead of lining everything up in a straight row.
Texture matters, too. Smooth painted surfaces can be balanced with fabric, faux greenery, rougher natural materials, or decorative mesh. These small differences give a display more depth.
Use Repetition to Make DIY Decor Look Intentional
Repetition is a simple decorating trick that works particularly well with inexpensive crafts. If you use black ribbon on one project, consider repeating that color or material somewhere else nearby. The same idea works with orange accents, metallic details, lettering, or a specific shape.
Repeating one or two elements creates a visual connection between separate decorations. This can make a collection of simple Dollar Tree Halloween DIY pieces feel like one thoughtfully designed display.
Easy Ways to Transform Basic Items
Paint is one of the most useful tools for transforming inexpensive supplies. A basic object can take on an entirely different personality with a new finish. Matte black can create a classic spooky appearance, while white or cream can make a Halloween piece feel softer and more contemporary.
Layering is another effective technique. Instead of decorating an item with one large embellishment, build several smaller details into the design. Ribbon, lettering, faux foliage, small shapes, and textured materials can be layered carefully to create depth.
Another simple approach is to change the purpose of an item. A tray can become part of a seasonal centerpiece. A frame can hold a Halloween-themed message. A small container can become part of a tabletop arrangement. Looking beyond an item’s original purpose is often where the most creative ideas begin.
Why This Matters
The strongest budget DIYs are not necessarily the most complicated. A simple transformation can look more polished when the colors are coordinated, the materials are layered thoughtfully, and the finished piece has a clear place in the room.
Ideas for Different Areas of the Home
One of the easiest ways to plan Halloween crafts is to decorate one area at a time. This keeps the process manageable and helps prevent a room from becoming visually crowded.
Entryway
The entryway is a natural place for seasonal decorating because it introduces the Halloween theme as soon as guests arrive. A small arrangement, seasonal sign, decorated frame, or tabletop accent can make the space feel festive without taking up much room.
Living Room
For the living room, focus on areas that already attract attention. Shelves, side tables, mantels, and media consoles can provide ideal spaces for small DIY decorations. Use different heights and repeat a few colors to create a balanced arrangement.
Dining Table
A Halloween centerpiece does not need to be elaborate. A tray, a few decorative objects, faux foliage, and seasonal accents can create a festive focal point. Keep the arrangement low enough that it does not interfere with conversation if the table will be used for meals.
Porch and Outdoor Spaces
Outdoor decorations benefit from bold shapes and strong contrast because they need to remain visible from a distance. If you are adapting a Dollar Tree craft for outdoor use, consider where it will be placed and whether the materials are suitable for exposure to weather.
Make Your DIY Projects Look More Expensive
Affordable supplies do not automatically have to look inexpensive. The difference often comes down to finishing details. Clean edges, consistent colors, balanced proportions, and thoughtful placement can dramatically improve the final result.
Instead of covering every surface with decorations, leave some open space. A little breathing room makes individual pieces easier to appreciate and can give a display a more sophisticated appearance.
It also helps to avoid adding too many unrelated colors. Choose a few shades and repeat them throughout the arrangement. When everything feels connected, even simple craft projects can look like part of a larger decorating collection.
Important: The goal of budget Halloween decorating is not to hide the fact that the materials are inexpensive. It is to use creativity, proportion, color, and placement to give simple pieces a distinctive finished look.
Simple Steps for Planning a Halloween DIY
- Choose the area. Decide whether you are decorating a shelf, table, entryway, porch, or another specific spot.
- Select a color palette. Pick two or three main colors to keep the display coordinated.
- Gather basic supplies. Look for simple objects that can be painted, layered, decorated, or repurposed.
- Plan the arrangement. Consider height, texture, spacing, and visual balance before attaching anything permanently.
- Add small details. Use ribbon, lettering, foliage, or other accents to give the project personality.
- Step back and edit. Remove anything that feels unnecessary or makes the display look crowded.
Make Halloween Crafting a Creative Activity
Dollar Tree Halloween DIY projects can be more than a decorating task. They can also become a fun seasonal activity for friends or family. Set up a small crafting station with basic supplies and let everyone personalize a simple piece.
For group crafting, choose projects that do not require complicated tools or highly technical techniques. Simple painting, decorating, arranging, and embellishing can be enough to create something memorable.
The beauty of DIY is that there is no requirement for every finished piece to look identical. Different interpretations can make a seasonal display feel much more personal.
Smart Tips for Budget-Friendly Halloween Decorating
- Shop your home before buying additional supplies.
- Reuse containers, frames, trays, and decorative materials whenever possible.
- Choose versatile colors that can work with several projects.
- Buy small quantities of specialty materials until you know you need more.
- Keep leftover ribbon, embellishments, and craft paint for future seasonal projects.
- Take photos of successful arrangements so you can recreate them next year.
Another useful habit is to create a small seasonal craft box. Store leftover supplies together after Halloween so you can quickly see what you already own the following year. This can prevent unnecessary purchases and make future projects faster to plan.
At a Glance
- Keep the color palette simple and consistent.
- Mix different heights and textures for visual interest.
- Repurpose ordinary items instead of relying on specialty supplies.
- Use small finishing details to personalize each project.
- Leave enough open space so the final display feels balanced.
Conclusion: Turn Simple Finds Into Halloween Style
Dollar Tree Halloween DIY projects prove that festive decorating is more about creativity than cost. With basic supplies, a thoughtful color palette, and a little imagination, ordinary items can become memorable seasonal accents for almost any room.
Whether your style is spooky, playful, modern, rustic, or understated, the same DIY principles can help you create decorations that feel personal. Start small, experiment with different combinations, and do not be afraid to change an idea until it works for your space.
The most successful Halloween decorations are often the ones that reflect the person who made them. So gather a few affordable supplies, choose your favorite seasonal colors, and start creating. A simple Dollar Tree find may be all you need to turn an everyday corner into a fun Halloween display.
Tags
Dollar Tree Halloween Halloween DIY Dollar Tree DIY Halloween Crafts Budget Halloween Decor DIY Halloween Decor Spooky Home Decor Halloween Decorating Ideas