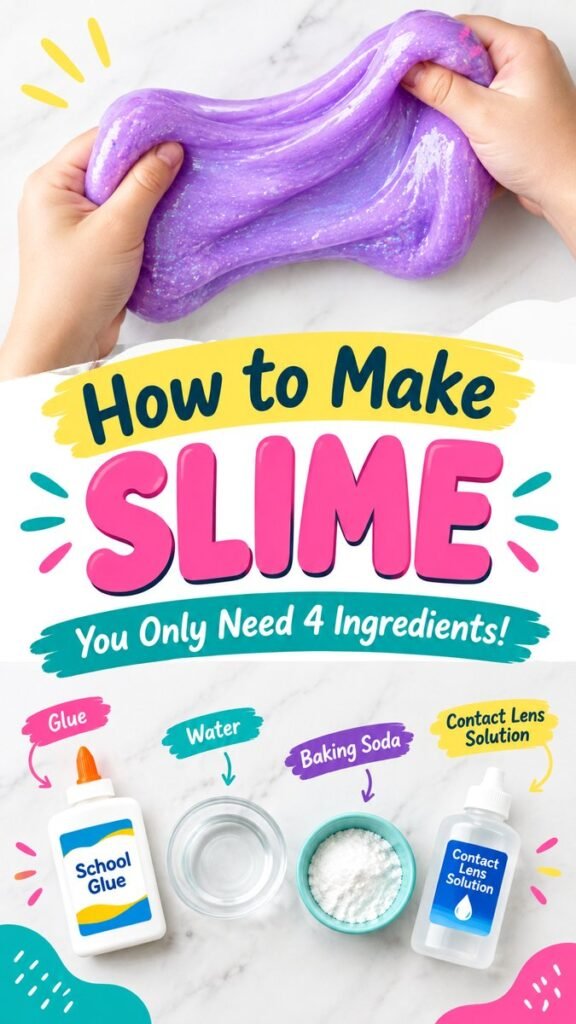
Making DIY slime at home is a colorful, hands-on activity that turns a few simple ingredients into a stretchy, squishy sensory experience. The bright slime and basic supplies shown here make this project especially appealing for kids, families, classrooms, rainy afternoons, and anyone looking for an easy homemade craft. With school glue, water, baking soda, and contact lens solution, you can create a classic slime texture without needing a long list of ingredients.
Important: Slime is best made with adult supervision, especially when younger children are involved. Keep the ingredients away from eyes and mouths, wash hands after playing, and always check product labels before using them.
Key Takeaways
- A simple DIY slime project can use just a handful of common supplies.
- School glue forms the main base of the slime mixture.
- Baking soda and contact lens solution help transform the mixture into a stretchy texture.
- Small changes in mixing and kneading can affect the final consistency.
- Color, glitter, and other craft-safe additions can personalize the finished slime.
- Proper storage and clean hands help keep homemade slime enjoyable for longer.
Why DIY Slime Is Such a Fun Homemade Activity
DIY slime combines creativity, simple science, and sensory play in one easy project. Instead of simply following a craft where the finished result is visible immediately, slime changes as the ingredients are combined, stirred, and kneaded. That transformation is part of what makes the activity so satisfying.
The finished slime can be stretched, folded, rolled, squeezed, and shaped. Its soft texture also makes it an engaging addition to sensory play sessions. For families, preparing slime together can become a creative afternoon activity rather than just a quick craft.
Another advantage is how customizable slime can be. A basic recipe provides a starting point, while colors and decorations can give each batch a completely different look. Bright pink, purple, blue, green, or pastel shades can all create a distinctive finished project.
What You Need for Easy DIY Slime
The reference design centers on four main ingredients: school glue, water, baking soda, and contact lens solution. These supplies create a straightforward starting point for a homemade slime recipe.
- School glue: This provides the primary base and gives the slime its familiar stretchy quality.
- Water: Water helps adjust the mixture and makes it easier to combine the ingredients.
- Baking soda: A small amount contributes to the texture of the mixture.
- Contact lens solution: This is used as part of the process that changes the glue mixture into slime.
You will also want a mixing bowl and a spoon or spatula. A clean work surface is helpful too, since slime can become sticky during the early stages of preparation.
Pro Tip: Contact lens solutions can have different formulations, so always check the label and follow the product directions. If you are preparing slime with children, an adult should handle the ingredients and supervise the entire activity.
How to Make DIY Slime Step by Step
Once your workspace is ready, the process is simple. The most important part is paying attention to the consistency as you mix. Slime often needs a little hands-on kneading before it reaches the smooth, stretchy texture you want.
1. Prepare Your Workspace
Cover your work area if needed and gather all of your supplies before starting. Having everything nearby makes the process easier and prevents interruptions while the slime is coming together.
A bowl with enough room for stirring is ideal. Choose a surface that can be cleaned easily, and keep paper towels nearby for quick cleanup.
2. Add the School Glue
Start with school glue in your mixing bowl. The glue acts as the main foundation of the slime, so make sure it is thoroughly mixed before moving on to the next ingredients.
If you want colorful slime, this is also a convenient stage to introduce a small amount of suitable coloring. Mix gradually so you can control the intensity rather than making the color darker than intended.
3. Mix in Water
Add water and stir the mixture thoroughly. The goal is to create an even consistency before adding the ingredients that help turn the mixture into slime.
Stir slowly at first to avoid splashing. Scrape the sides and bottom of the bowl as you mix so the ingredients combine evenly.
4. Add Baking Soda
Next, incorporate the baking soda and mix until it is distributed throughout the glue mixture. Avoid rushing this stage. A consistent mixture makes it easier to judge how the texture is developing.
5. Add Contact Lens Solution Gradually
Add the contact lens solution gradually while stirring. This is the stage where the mixture begins changing from a liquid-like glue mixture into a thicker, more cohesive slime.
Rather than adding a large amount at once, work slowly and watch the texture. The exact amount required can vary depending on the products used, so consistency is a more useful guide than simply relying on a fixed quantity.
6. Knead the Slime
When the mixture becomes thick enough to handle, remove it from the bowl and begin gently kneading it. At first, it may feel sticky. Continue working it with clean hands until the texture becomes smoother and more stretchy.
If the slime remains very sticky, small adjustments may help. Additions should be made gradually because too much activating ingredient can produce a firmer, less flexible result.
How to Get the Right Slime Consistency
One of the most useful skills when making homemade slime is learning to judge texture by feel. A good slime should be flexible enough to stretch without immediately breaking, while still holding together when lifted.
If your slime feels too sticky, continue kneading it for a little longer before making further changes. Sometimes the texture improves naturally as the ingredients become fully incorporated.
If the slime feels too firm, it may have received too much of the ingredient responsible for thickening it. Gentle kneading and careful adjustments are preferable to adding large amounts of any ingredient.
Why This Matters
Slime recipes are affected by the specific products used, room conditions, and how thoroughly the ingredients are mixed. Use the texture as your guide and make small adjustments rather than changing the mixture dramatically.
- Knead before deciding that the slime needs more ingredients.
- Add adjustments slowly and mix thoroughly after each change.
- Avoid expecting every batch to have exactly the same texture.
Fun Ways to Customize Homemade Slime
Once you have the basic slime texture, the creative possibilities begin. The bright purple slime shown in the pin demonstrates how much personality color can add to a simple recipe.
Try Different Colors
Food coloring or craft-safe coloring designed for the intended use can transform plain slime into a colorful sensory activity. Try one shade for a simple look or experiment with two compatible colors for a marbled effect.
Pastel shades can create a soft, modern appearance, while bold colors make the slime especially eye-catching for kids’ craft activities.
Add Sparkle Carefully
Fine glitter can give slime a shimmering appearance, making it especially fun for creative play. Use only materials that are appropriate for the activity and keep loose glitter away from eyes and mouths.
Create Seasonal Themes
DIY slime can easily fit different seasons and celebrations. Try soft pastels for spring, bright colors for summer, warm shades for autumn, or cool colors for winter-inspired play.
You can also create themed batches for birthday parties, classroom activities, playdates, or family craft afternoons. Changing the color alone can make the same basic slime activity feel fresh.
DIY Slime Ideas for Kids and Families
Homemade slime is flexible enough to work for different types of activities. Younger children can enjoy supervised sensory exploration, while older kids can focus on experimenting with color, texture, and decoration.
- Rainy day activity: Set up a simple craft station when outdoor play is not an option.
- Playdate project: Give each child a small batch to customize.
- Birthday activity: Use slime making as a hands-on party station.
- Creative afternoon: Combine slime making with drawing, decorating, or other crafts.
- Sensory play: Let children explore stretching, squeezing, folding, and shaping the finished slime.
For group activities, prepare the workspace in advance and provide individual bowls or containers when possible. This makes cleanup easier and gives everyone a chance to personalize their own slime.
Common DIY Slime Problems and Simple Fixes
The Slime Is Too Sticky
Sticky slime can happen when the mixture has not been kneaded enough or when the balance of ingredients is not quite right. Start by kneading it thoroughly. If it remains excessively sticky, make only a small adjustment and mix again.
The Slime Is Too Stiff
A stiff batch may have received too much activating ingredient or simply needs additional kneading. Work it gently between your hands and observe whether the texture becomes more flexible.
The Slime Breaks Too Easily
If the slime does not stretch well, avoid pulling it aggressively. Slow, gentle stretching can help you understand its texture. The mixture may need further kneading or a careful adjustment depending on how it was prepared.
The Mixture Looks Uneven
Continue stirring and kneading until the ingredients are fully incorporated. Scraping the bowl during mixing can help prevent portions of glue or powder from remaining unmixed.
How to Store DIY Slime
Once playtime is finished, place the slime in a clean, airtight container or resealable bag. Keeping it covered helps prevent it from drying out and protects it from dust and debris.
Always use clean hands before handling stored slime. If the slime develops an unusual smell, visible contamination, or a significant change in appearance, discard it rather than continuing to use it.
Keep homemade slime away from fabrics, carpets, furniture, and other surfaces where residue could be difficult to remove. A dedicated play area makes cleanup much easier.
Quick Safety Reminder: Slime is a craft material, not food. Do not allow children to taste it, and supervise younger children closely. Wash hands after play and clean the work surface when the activity is finished.
Making DIY Slime More Enjoyable
The best slime projects are not necessarily the most complicated. A simple base recipe gives you more room to experiment with color, texture, presentation, and play. Start with one straightforward batch, learn how the ingredients behave, and then experiment with new variations.
It can also be fun to let children participate in age-appropriate parts of the process. They can choose colors, help stir with supervision, decorate containers, or decide which texture they prefer. This turns the activity into a creative project rather than simply making a finished product.
For Pinterest-inspired craft sessions, consider preparing several small batches in different colors. A collection of pastel pink, bright blue, lavender, and mint green slime can create a colorful sensory station without requiring a complicated recipe.
At a Glance
- Use school glue as the main slime base.
- Add water and baking soda while mixing carefully.
- Introduce contact lens solution gradually and observe the texture.
- Knead the mixture until it becomes smooth and stretchy.
- Customize with suitable colors or craft additions.
Conclusion: Make Your Own Colorful DIY Slime
DIY slime is a simple craft that combines creativity, sensory play, and a little hands-on experimentation. With a short ingredient list and a few basic tools, you can create a stretchy homemade activity that is easy to customize for different ages, occasions, and color themes.
The key is to work gradually and pay attention to consistency. Mix thoroughly, knead patiently, and make small adjustments when necessary. Once you are comfortable with the basic process, experiment with colors and creative variations to make each batch your own.
Whether you are planning a rainy-day activity, a playdate, a family craft session, or simply looking for a fun homemade project, this easy DIY slime idea is a great place to start. Gather your supplies, prepare a clean workspace, and enjoy the satisfying process of turning a few simple ingredients into colorful, stretchy slime.