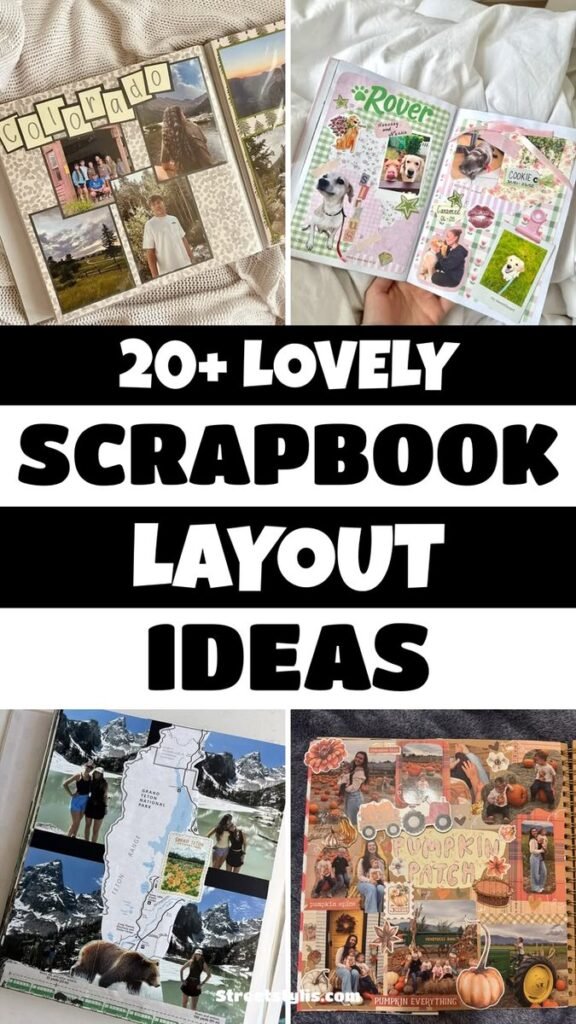
Scrapbooking is a wonderful way to turn photographs, paper pieces, handwritten notes, and small memories into a creative keepsake that feels completely personal. A well-designed DIY scrapbook page does more than display pictures. It tells a story through colors, textures, layers, lettering, and thoughtful details. Whether you are making a memory book for yourself, creating a handmade gift, or simply looking for a relaxing paper craft, scrapbook projects offer endless opportunities to experiment and create.
Key Takeaways
- Combine photos, patterned paper, stickers, and handwritten details to create personality.
- Use layering to add depth without making the page feel overcrowded.
- Choose a simple color palette that keeps the entire scrapbook page cohesive.
- Leave enough breathing room so important photos and memories remain easy to enjoy.
- Small handmade details can make a scrapbook feel more meaningful and original.
Why DIY Scrapbooking Is So Appealing
One of the best things about DIY scrapbooking is the freedom to make every page different. There is no single correct layout, color combination, or decorating method. You can keep a page clean and minimal or build a richly layered composition filled with decorative elements. The goal is to create something that reflects the memory and your own creative style.
Scrapbooking also gives ordinary materials a second life. A ticket, greeting card, paper label, pressed-looking botanical detail, handwritten message, or favorite photograph can become part of a larger visual story. Instead of keeping meaningful items hidden away, you can arrange them into a format that can be revisited for years.
Important: A beautiful scrapbook does not need expensive supplies. Strong composition, thoughtful placement, and a few personal details often have a greater impact than a large collection of decorative products.
How to Build a Creative Scrapbook Page
Before adding decorations, think about the story you want the page to tell. A scrapbook becomes much more engaging when the photographs and decorative elements work together around a clear idea. Your theme might be a special day, a trip, a friendship, a family memory, a seasonal moment, or simply a collection of everyday highlights.
1. Start With Your Favorite Photos
Choose the photographs that best represent the memory rather than trying to use every available picture. A few carefully selected photos can create a stronger layout than a crowded page filled with images.
Consider the size and orientation of each photograph. A larger image can act as the visual anchor, while smaller photographs can support it. You can also crop photographs into different shapes if doing so helps the composition feel more balanced.
2. Pick a Simple Color Palette
Color is one of the easiest ways to make a DIY scrapbook look polished. Start with two or three main colors and add one subtle accent if needed. The colors can come from the photographs themselves, from the season represented on the page, or simply from your personal preference.
Neutral backgrounds are particularly useful when the photographs are colorful because they allow the images to remain the focus. Softer tones can create a calm, nostalgic feeling, while stronger contrasts can make a playful scrapbook feel energetic and modern.
3. Create Layers With Paper
Layering is a simple scrapbooking technique that adds depth and visual interest. Place a photograph over a slightly larger piece of patterned or textured paper, then add another smaller decorative layer underneath or beside it.
Try overlapping elements instead of arranging everything in perfectly separated boxes. Slight overlaps can make a page feel more handmade and relaxed while helping connect separate pieces of the composition.
4. Add Meaningful Details
The smallest details can become some of the most memorable parts of a scrapbook. Handwritten captions, dates, short descriptions, decorative labels, stickers, paper shapes, and tiny notes can help explain why a particular photograph matters.
Instead of writing long paragraphs, consider short phrases that capture the feeling of the moment. A few sincere words can add emotional value without taking attention away from the photographs.
Scrapbook Layout Ideas for Beginners
If you are new to scrapbooking, starting with a simple structure can make the process much easier. Once you understand how spacing, layering, and visual balance work, you can gradually experiment with more complex layouts.
The Main Photo Layout
Place one favorite photograph in a prominent position and build the rest of the page around it. Add a title, a few smaller decorative pieces, and a short caption. This approach works especially well when one photograph represents the main memory.
The Collage Layout
A collage layout allows several photographs to share attention. Arrange images in different sizes while maintaining a visual connection between them. Repeating the same paper color, sticker style, or border treatment can help unify the page.
The Journaling Layout
For memories that need more context, make the written story a central part of the design. Use a small journaling area beside or beneath the photographs. Keep the text concise and break longer thoughts into short sections for easier reading.
The Minimalist Layout
Minimal scrapbooking can be just as beautiful as a heavily decorated page. Use plenty of open space, one or two photographs, a restrained color palette, and a few carefully selected accents. This approach is ideal if you prefer a clean, contemporary look.
Expert Insight
Think of every scrapbook page as a visual hierarchy. Choose one element to receive the most attention, then arrange supporting photos, words, and decorations around it. This keeps a creative page interesting without making it visually overwhelming.
Creative Materials to Try
You do not need a huge craft collection to begin. A small selection of versatile supplies can support many different DIY scrapbook projects.
- Cardstock and patterned scrapbook paper
- Printed photographs
- Decorative stickers and labels
- Colored pens and fine-tip markers
- Paper scissors and a ruler
- Double-sided tape or paper adhesive
- Decorative paper shapes
- Ribbon, thread, or other lightweight embellishments
When choosing supplies, focus on materials that complement your theme. Too many unrelated patterns can make a page feel chaotic, while a small collection of coordinated pieces can create a much more intentional result.
How to Make a Scrapbook Look More Professional
A polished scrapbook does not necessarily require advanced techniques. In many cases, the difference comes down to spacing, repetition, and consistency.
Keep Repeated Elements Consistent
Repeating a particular shape, color, font style, or decorative detail creates a sense of unity. For example, if you use small paper labels in one area, repeating similar labels elsewhere can help the whole page feel connected.
Pay Attention to Spacing
Leaving some open space around photographs and decorations gives the eye a place to rest. If every part of the page is filled, the most important elements can lose their impact.
Mix Textures Carefully
Different paper finishes and lightweight embellishments can make a scrapbook feel tactile and interesting. The key is balance. Combine a few contrasting textures while keeping the overall color palette coordinated.
Pro Tip: Step back from your scrapbook page before adding the final decorations. If the layout already feels balanced, you may need fewer embellishments than you initially expected.
DIY Scrapbook Themes to Explore
Once you become comfortable with basic layouts, themed scrapbook pages can make your creative projects even more enjoyable. A theme gives you a starting point for selecting colors, photographs, lettering, and decorative elements.
- Travel memories: Combine photographs with short notes about places, experiences, and favorite moments.
- Family memories: Create pages that bring several photographs and personal stories together.
- Friendship pages: Use fun colors, casual captions, and favorite snapshots to celebrate shared experiences.
- Seasonal memories: Match colors and decorative details to the feeling of the season.
- Everyday moments: Document simple moments that might otherwise be forgotten.
- Gift scrapbooks: Build a personalized collection of photographs and messages for someone special.
Simple Scrapbooking Tips That Make a Difference
One of the easiest ways to improve a scrapbook is to plan before gluing anything permanently. Arrange the photographs and decorations loosely on the page first. Move pieces around until the composition feels natural, then attach them once you are happy with the result.
Another useful approach is to work from large elements to small ones. Place your main photographs first, add larger paper layers next, and finish with small accents. This method makes it easier to maintain balance throughout the design.
Remember that imperfections can be part of the charm. A handmade scrapbook does not need to look machine-produced. Slightly uneven handwritten lettering, organic paper edges, and personal touches can make the finished page feel authentic.
Making Scrapbooking a Relaxing Creative Habit
DIY scrapbooking can be more than a one-time craft project. It can become a relaxing creative routine. Set aside a small amount of time to print photographs, sort paper supplies, write memories, or prepare a few decorative elements.
Keeping your materials organized can make it easier to start. Store papers together, group stickers by style or color, and keep basic tools in one accessible place. When the creative process feels convenient, you are more likely to return to it.
There is also no need to finish an entire scrapbook at once. One meaningful page can be a complete project. Over time, those individual pages can become a collection of memories that reflects different seasons, experiences, and stages of life.
At a Glance
- Choose a clear memory or theme for each page.
- Build the layout around one main visual focal point.
- Use coordinated colors and repeated details for consistency.
- Leave open space so photographs and captions remain easy to appreciate.
- Add personal details that make the page meaningful to you.
Conclusion
DIY scrapbooking is a simple and rewarding way to transform photographs and everyday keepsakes into something personal. With a thoughtful layout, a coordinated color palette, a few layers, and meaningful details, even a beginner can create pages that feel polished and full of character.
The most important part is not following a perfect formula. It is choosing details that help tell your story. Experiment with layouts, combine materials you enjoy, and give yourself permission to try something different on every page. Whether your style is colorful and playful, soft and nostalgic, or clean and minimalist, the best scrapbook is one that feels genuinely yours.
Start with one favorite memory, gather a few simple supplies, and create a page that captures why that moment matters. Over time, those individual pages can become a beautiful handmade collection of memories that is worth revisiting again and again.