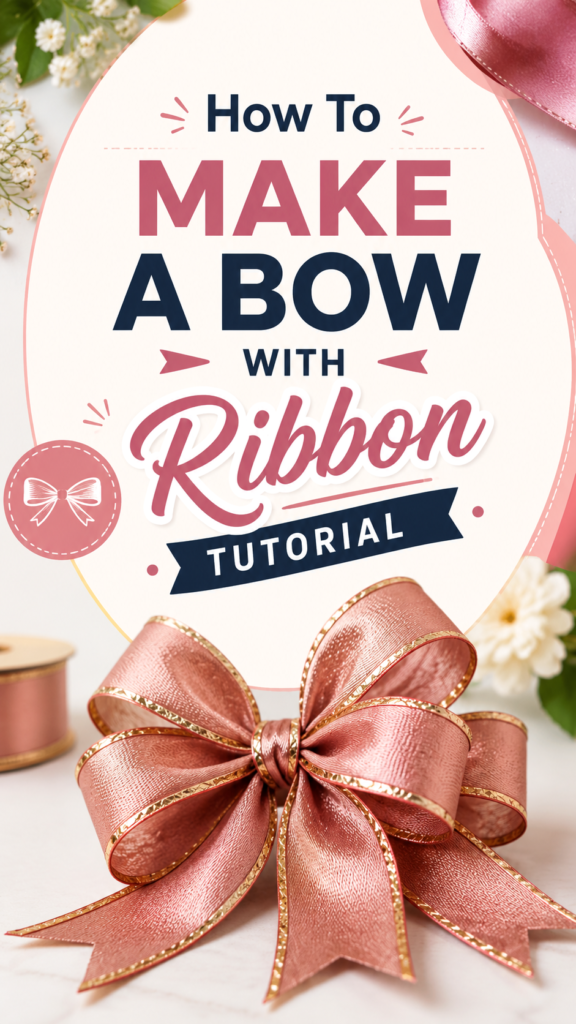
There is something instantly charming about a beautifully made ribbon bow. A few carefully shaped loops can turn an ordinary package, wreath, craft project, or decorative arrangement into something that feels polished and special. The soft blush-pink ribbon shown here, finished with a delicate gold edge, demonstrates just how much impact the right bow can have. With a little practice, you can create your own DIY ribbon bows at home and customize them for almost any occasion.
Making bows does not have to be complicated. The secret is learning how to control the ribbon, build balanced loops, secure the center neatly, and shape the finished bow so it looks full rather than flat. Once you understand those basics, you can experiment with different ribbon widths, textures, colors, and tail lengths to create a style that fits your project perfectly.
Key Takeaways
- Choose ribbon that holds its shape and suits your project.
- Keep the loops as even as possible for a polished appearance.
- Secure the center tightly before fluffing the bow.
- Cut ribbon tails after shaping the main bow.
- Use angled or notched cuts for attractive finished ends.
- Practice with inexpensive ribbon before working with specialty materials.
How to Make a Bow With Ribbon
A classic ribbon bow is made by creating loops on both sides of a central knot or wrap. The process looks impressive once finished, but the basic technique is surprisingly approachable. The visual goal is simple: create a full center, evenly sized loops, and graceful tails that spread naturally.
The style shown in the image has a generous, layered appearance. Several loops overlap around the center, giving the bow dimension and volume. The metallic edging also helps define each loop, making the finished shape easier to see.
Important: The most attractive DIY ribbon bows are not necessarily the ones made with the most complicated technique. Consistent tension, careful shaping, and a clean center usually make a bigger difference than adding lots of extra elements.
Materials You Will Need
You only need a few basic supplies to get started. Gather everything before beginning so you can concentrate on shaping the ribbon instead of stopping halfway through the process.
- Ribbon in your preferred width, color, and texture
- Sharp fabric or craft scissors
- Floral wire, thin craft wire, or another suitable fastening material
- A ruler or measuring tape for consistent lengths
- Optional: a small amount of craft adhesive for decorative applications
Ribbon with some structure is often easier for beginners because the loops are less likely to collapse. Wired ribbon is particularly convenient when you want to sculpt the loops and tails after securing the center. Softer ribbon can create an elegant look too, but it may require more careful handling.
Choosing the Right Ribbon for DIY Bows
The ribbon you choose can completely change the character of your finished bow. Satin creates a smooth, refined appearance, while grosgrain offers more texture and structure. Sheer ribbon produces a light, delicate effect, and velvet can give a bow a rich, cozy appearance.
For a look similar to the featured bow, consider a medium-width satin or decorative ribbon with a contrasting edge. A metallic border adds definition and makes each loop stand out, especially when the bow is photographed or used as a focal point.
Think About Width and Structure
Ribbon width affects both the scale and personality of a bow. Narrow ribbon works well for small gifts, accessories, and delicate crafts. Wider ribbon is better suited to large packages, wreaths, decorative arrangements, and statement bows.
If your ribbon is very soft, experiment with shorter loops at first. If it has a firm edge or wire, you can make larger loops and shape them more dramatically without losing the overall form.
Select a Color That Fits the Project
Color is another easy way to personalize a ribbon bow. Blush, dusty rose, cream, champagne, and soft neutrals create an elegant palette. Brighter colors can make the bow playful, while deep tones can create a more sophisticated seasonal look.
Do not feel limited to one color. Layering two compatible ribbons can create additional depth, although beginners may want to start with one ribbon until they are comfortable with the basic bow-making technique.
Step-by-Step Ribbon Bow Tutorial
1. Measure and Cut the Ribbon
Start by deciding how large you want the finished bow to be. Cut a generous length of ribbon rather than trying to work with a piece that is barely long enough. Extra ribbon gives you more freedom to adjust the loops and tails later.
If you are making several bows for a project, measure the first one carefully and use it as a guide for the rest. Consistent measurements are especially useful when you want multiple bows to have a coordinated appearance.
2. Create the First Loop
Form one loop by bringing a section of ribbon back toward the center. Avoid creasing the ribbon sharply unless that is part of the style you want. Instead, create a soft fold that allows the material to curve naturally.
Hold the center securely between your fingers. Maintaining control of the center from the beginning makes the remaining steps much easier.
3. Form the Opposite Loop
Create a matching loop on the other side. Try to keep both loops close in size. They do not need to be perfectly identical, but a noticeable difference can make the bow appear unbalanced.
At this stage, resist the urge to fluff everything. Focus on establishing the basic structure first. You can make small adjustments once the center has been secured.
4. Add More Loops for Volume
For a fuller bow like the one pictured, continue building additional loops around the center. Each new loop should sit naturally beside or slightly behind the previous one. Alternating their positions helps create a layered effect instead of one flat cluster.
Keep the center compact while allowing the outer portions of each loop to open outward. This contrast between a defined center and generous loops is what gives a decorative bow its distinctive silhouette.
5. Secure the Center
Once the loops look balanced, tightly secure the center with floral wire, thin craft wire, or another appropriate fastener. Wrap it firmly enough to hold the layers together, but avoid crushing delicate ribbon.
The center fastening is one of the most important parts of the process. If it is loose, the bow can gradually lose its shape. If it is excessively tight, it may leave unwanted marks or distort the ribbon.
Expert Insight
- Secure the center before spending time on detailed fluffing.
- Shape one loop at a time instead of pulling all the ribbon at once.
- Use the ribbon’s natural stiffness to help maintain the final silhouette.
6. Wrap and Finish the Center
A narrow strip of the same ribbon can be wrapped around the center to hide the fastening material. This creates the clean, finished appearance seen on many decorative bows.
Keep the center wrap smooth and snug. If the ribbon has a decorative edge, position it carefully so the border remains visible and complements the loops.
7. Shape the Loops
Now comes the fun part. Gently pull each loop outward, rotating and lifting sections until the bow looks full. Spread the loops in different directions rather than leaving them stacked directly on top of one another.
Look at the bow from several angles as you work. One side may need a little more volume while another may need to be pulled forward. Small adjustments can dramatically improve the finished shape.
8. Shape and Trim the Tails
Allow the remaining ribbon to fall naturally from the center. Decide how long you want the tails, then trim them evenly. A diagonal cut creates a simple, elegant finish, while a V-shaped notch provides a more decorative appearance.
Take your time with this step. Uneven tails can make an otherwise beautiful bow look unfinished. If you are unsure about the length, leave them slightly longer and trim them again after the bow is completely shaped.
Pro Tip: Always fluff first and make the final cuts afterward. Adjusting the loops can change how the tails hang, so trimming too early may leave you with tails that are shorter than intended.
How to Make a Bow Look Fuller
A full bow is largely about positioning rather than simply adding more ribbon. If the loops are all facing the same direction, the bow can look flat. Instead, gently angle the loops outward and vary their orientation.
Try lifting some loops slightly upward while allowing others to extend horizontally. The result is a more dimensional shape that catches light from different angles.
Another useful technique is to create different loop sizes. Larger outer loops can frame smaller inner loops, creating visual depth around the center. This works especially well with smooth satin ribbon because the material naturally reflects light across the curved surfaces.
Common DIY Bow-Making Mistakes
Uneven Loops
If one loop is much larger than the other, the bow may lean to one side. Compare the loops before securing the center whenever possible. Small differences can be corrected during the final fluffing stage.
A Loose Center
A loose center allows the loops to shift and can make the bow difficult to shape. Make sure the fastening is secure before moving on to decorative adjustments.
Over-Creasing the Ribbon
Sharp folds can leave visible marks, particularly on satin ribbon. Whenever possible, form smooth curves and let the ribbon’s structure create the shape.
Cutting the Tails Too Soon
It is tempting to trim the tails immediately, but wait until the bow is fully shaped. Fluffing can change the way the tails sit, so finishing them last gives you more control.
Creative Ways to Use Handmade Ribbon Bows
Once you know how to make a ribbon bow, you can use the technique for much more than gift wrapping. Handmade bows are versatile decorations that can instantly add color, texture, and personality to everyday projects.
- Gift wrapping: Add a large bow to a package for an elevated finishing touch.
- Wreaths: Attach a decorative bow as a focal point on a seasonal or everyday wreath.
- Home decor: Use bows to decorate baskets, containers, decorative trays, or other accents.
- Party decorations: Coordinate ribbon colors with a celebration theme.
- Craft projects: Add small bows to handmade cards, boxes, ornaments, and other creations.
- Hair accessories: Smaller versions can be adapted into decorative clips or other accessories.
The beauty of DIY ribbon bows is that the same basic technique can be scaled up or down. A small bow can be delicate and understated, while a large multi-loop bow can become the centerpiece of a decorative arrangement.
Making Your Bow Look Professional
Professional-looking results often come down to finishing details. Keep the center neat, make the loops visually balanced, and ensure the tails have clean edges. Even inexpensive ribbon can look beautiful when it is carefully shaped.
Pay attention to the direction of the ribbon’s surface as you work. Some decorative ribbons have a front and back side, and accidentally twisting them can make the finished bow look inconsistent. Before securing each loop, check that the preferred side is facing outward.
Good lighting also helps while crafting. It makes it easier to spot twisted sections, uneven loops, and rough cuts before the bow is finished.
Why This Simple Craft Is Worth Learning
A ribbon bow is a small project with plenty of creative possibilities. Once you master the basic structure, you can change the scale, materials, colors, number of loops, and tail shapes to suit almost any aesthetic.
It is also a useful skill to have during busy decorating seasons. Instead of searching for a bow that perfectly matches your project, you can make one using the exact ribbon you already have.
Most importantly, practice becomes easier very quickly. Your first bow may require more adjustments than expected, but after making a few, your hands begin to understand how much tension is needed and how the ribbon responds to different folds.
Quick Points
- Use structured ribbon for easier shaping.
- Keep both sides visually balanced.
- Secure the center firmly and neatly.
- Fluff every loop before making final cuts.
- Customize colors and sizes for different projects.
Conclusion
Learning how to make a bow with ribbon is one of those simple DIY skills that can transform ordinary materials into something beautiful. With a suitable ribbon, a pair of sharp scissors, and a little patience, you can create full, elegant bows that look carefully crafted and completely personalized.
Start with a simple two-loop design, then experiment with additional layers as your confidence grows. Focus on keeping the center secure, the loops balanced, and the tails neatly finished. From there, let your creativity take over.
Whether you are dressing up a gift, adding a decorative touch to your home, creating a wreath, or simply enjoying a relaxing ribbon craft, handmade bows are an easy way to make your projects feel more thoughtful. Save this ribbon bow tutorial for your next creative session and keep experimenting with new colors, textures, and shapes. 🎀
Tags
DIY Ribbon Bows Bow Tutorial Ribbon Crafts DIY Crafts Gift Wrapping Ideas Handmade Bows Ribbon Decoration Craft Ideas