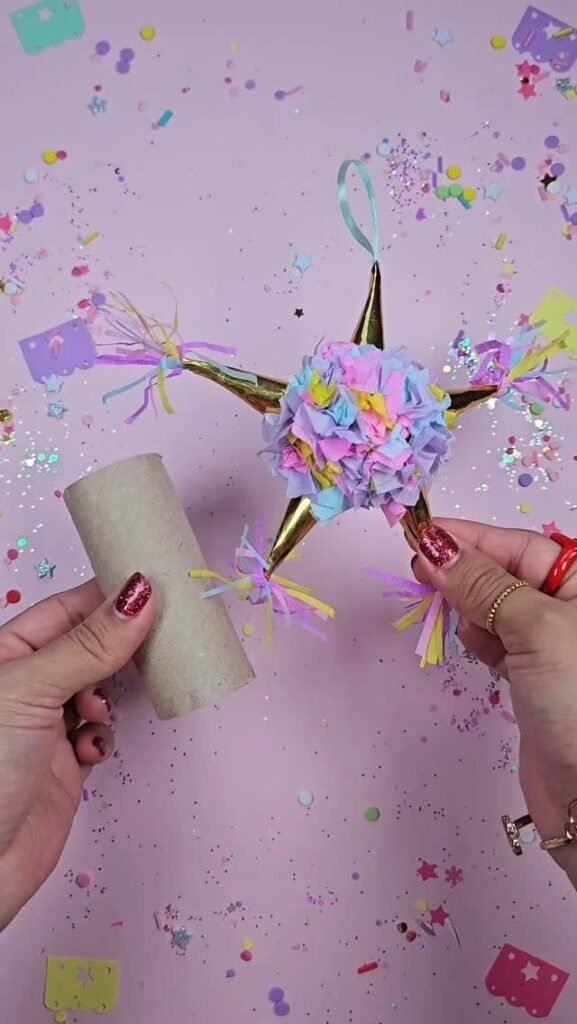
Creating a DIY pinata is a fun and creative way to add a handmade touch to any celebration. Whether you are planning a birthday party, a holiday gathering, or a colorful event with friends and family, a homemade pinata can become a memorable decoration and an exciting activity. With simple craft materials, playful designs, and a little imagination, you can create a unique party centerpiece that matches your theme perfectly.
From bright colors and cheerful shapes to personalized designs, DIY pinatas offer endless possibilities for creativity. They are a great project for beginners, families, and anyone who enjoys making party decorations by hand. This guide will explore inspiring DIY pinata ideas, helpful crafting tips, and simple ways to create a fun decoration that guests will love.
Key Takeaways
- DIY pinatas are affordable, creative, and easy to customize.
- Simple craft supplies can create impressive party decorations.
- Personalized shapes and colors make every pinata unique.
- Homemade pinatas add a fun handmade element to celebrations.
- Creative details can transform a basic design into a party highlight.
Why DIY Pinatas Are Perfect for Any Celebration
A DIY pinata brings energy and personality to a party setup. Unlike store-bought decorations, handmade pinatas allow you to choose the colors, shapes, and details that fit your event. A simple cardboard base can become a bright animal design, a favorite character-inspired shape, or a cheerful decoration filled with colorful surprises.
Many people enjoy making pinatas because the process is just as entertaining as the final result. Crafting becomes an activity that encourages creativity, especially when children and families join together to design and decorate the project.
Important: A successful DIY pinata does not need complicated materials or advanced crafting skills. The most memorable designs often come from simple ideas combined with thoughtful colors, textures, and personal touches.
Choosing the Right DIY Pinata Design
The best DIY pinata design depends on the style of celebration and the person you are creating it for. A colorful pinata with playful patterns works beautifully for children’s parties, while a more elegant design can complement themed events or creative gatherings.
Popular DIY pinata ideas include:
- Classic star-shaped pinatas with layered fringe decorations
- Animal-inspired designs with fun facial details
- Rainbow and cloud themes for bright party settings
- Number-shaped pinatas for birthday milestones
- Simple geometric designs using modern color combinations
When selecting a design, think about the overall party theme. Matching the pinata colors with invitations, decorations, or table settings can create a more connected and polished look.
Materials You Need for a Homemade Pinata
One of the best things about DIY pinatas is that they can be made with easy-to-find supplies. Many projects use materials that are already available at home or can be purchased from a local craft store.
- Cardboard pieces for the main structure
- Tissue paper or crepe paper for decoration
- Glue or craft adhesive
- Scissors for cutting shapes and details
- String or ribbon for hanging
- Markers, stickers, or decorative accents
The exact materials can change depending on the style you want to create. A simple design may only need colorful paper and cardboard, while a more detailed pinata can include additional textures and creative decorations.
How to Create a DIY Pinata Step by Step
Making a homemade pinata is a relaxing craft project that can be completed with a few basic steps. The process allows plenty of room for creativity, so you can adjust the design as you go.
Step 1: Plan Your Shape
Start by deciding the size and style of your pinata. Sketch your idea on paper before cutting materials. Simple shapes are often easiest for beginners, while more detailed designs can be created with extra planning.
Step 2: Build the Base
Cut cardboard pieces to create the front and back sections of your pinata. Add side strips to connect the pieces and form a hollow structure. Leave an opening where you can add treats or small surprises later.
Step 3: Add Decorative Layers
Cover the outside with colorful paper strips, patterns, or creative details. Layering materials creates texture and gives the pinata a finished party-ready appearance.
Step 4: Personalize Your Creation
Add extra decorations that match your theme. You can include playful faces, unique patterns, glitter details, or custom colors to make your DIY pinata stand out.
Step 5: Prepare It for Display
Attach a strong hanging string or ribbon and check that the structure feels secure. Once finished, your handmade pinata is ready to become part of the celebration decor.
Expert Insight
Small decorative choices can make a big difference. Combining two or three colors, adding texture with layered paper, and keeping the design balanced can create a professional-looking DIY pinata without requiring advanced skills.
- Choose colors that complement your party theme.
- Use clean cuts and neat layers for a polished appearance.
- Add personal details to make the decoration memorable.
Creative DIY Pinata Ideas for Inspiration
If you are looking for fresh inspiration, there are many ways to customize a homemade pinata. The design possibilities are nearly endless, making this craft suitable for different ages, events, and themes.
Colorful Party Themes
Bright colors instantly create a festive atmosphere. Try combining bold shades, pastel tones, or rainbow-inspired decorations to match the mood of your celebration.
Personalized Birthday Designs
A DIY pinata can be customized with names, numbers, favorite colors, or themed decorations. Personalized details make the project feel more meaningful and unique.
Minimal Modern Styles
Not every pinata needs to be covered in many colors. Simple shapes with clean patterns and carefully chosen shades can create a stylish decoration with a modern look.
Tips for Making Your DIY Pinata Look Professional
A few simple techniques can help your homemade pinata look neat and impressive. Focus on clean construction, balanced decoration, and thoughtful design choices.
- Take time to measure your cardboard pieces before cutting.
- Use evenly spaced paper layers for a smooth finish.
- Avoid adding too many decorations that make the design feel crowded.
- Choose durable materials if the pinata will be used as part of a party activity.
- Allow glue and decorations enough time to dry before displaying.
Pro Tip: Take photos of your DIY pinata creation process. Sharing the colorful crafting stages can inspire others and help you remember the fun behind your handmade party decoration.
Why Handmade Party Decorations Feel More Special
Handmade decorations add a personal feeling that ready-made items often cannot provide. A DIY pinata represents time, creativity, and effort, making it more than just a decoration. It becomes part of the story behind the celebration.
Crafting your own party accessories can also be a meaningful activity. Friends and family can work together, share ideas, and create something that reflects the personality of the event.
At a Glance
- Easy craft project for parties and celebrations
- Customizable with colors, shapes, and decorations
- Perfect for beginners and creative families
- Adds a handmade touch to event decor
Conclusion: Create a Memorable DIY Pinata
A DIY pinata is a simple craft idea that can make any celebration brighter and more personal. With basic supplies, creative thinking, and a little patience, you can design a decoration that reflects your style and brings excitement to your event.
Whether you choose a colorful traditional look or a modern custom design, the joy of creating something by hand makes the final result even more special. Save these DIY pinata ideas, gather your materials, and start planning your next creative party project.