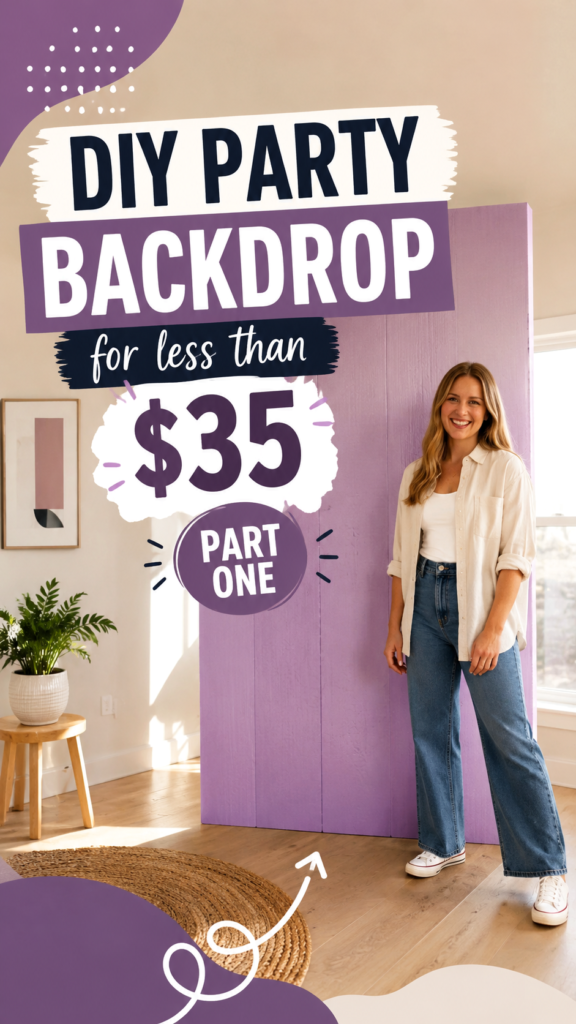
Creating a memorable party space does not have to mean spending a fortune on professional decorations. A DIY backdrop can completely transform an ordinary room into a photo-ready celebration area with a few affordable materials, a little creativity, and a clear design plan. The featured idea shows how a simple oversized backdrop can become the visual centerpiece of a party while keeping the overall project budget-friendly.
Key Takeaways
- A DIY backdrop can create an instant focal point for a party or celebration.
- Large lightweight panels provide a simple foundation for a customizable backdrop.
- Color, texture, lettering, balloons, flowers, and other accents can personalize the design.
- A carefully planned backdrop can double as a photo booth background.
- Smart material choices can help keep the project affordable and practical.
- Simple designs often look more polished when the colors and decorations work together.
Why DIY Backdrops Are Perfect for Parties
A party backdrop serves more than one purpose. It fills an empty wall, creates a dedicated area for photographs, and gives the celebration a stronger visual identity. Instead of decorating an entire room from floor to ceiling, you can focus your effort on one statement-making area.
This approach is especially useful when decorating for birthdays, showers, graduation celebrations, dinner parties, holiday gatherings, or casual get-togethers. A well-designed backdrop can make even a simple room feel intentional and festive.
The inspiration here has a particularly approachable quality because the backdrop is large enough to make an impact without requiring complicated construction. Its height draws attention immediately, while the simple panel format leaves plenty of room for creative finishing touches.
Important: The most successful DIY backdrop does not need to be complicated. A strong shape, cohesive color palette, and a few carefully selected decorative details can create a much bigger visual impact than a crowded arrangement.
Choosing the Right Base for a DIY Backdrop
The foundation is one of the most important parts of a DIY party backdrop. The featured design demonstrates the visual effect of using tall, broad panels to create a temporary wall-like surface. This gives the decoration a clean background and makes it easier to add other elements later.
When choosing your base, think about weight, size, stability, appearance, and how you plan to transport or store it. Lightweight foam or craft panels can be convenient for temporary decorations, while corrugated plastic, fabric, cardboard, or thin plywood may work for different types of projects.
For an indoor party, lightweight materials are often easier to position. If the backdrop will be used outdoors, additional attention should be given to wind, moisture, and anchoring. The larger the backdrop, the more important stability becomes.
Think About the Size First
Before buying materials, measure the area where the backdrop will stand. A backdrop that is too narrow may disappear visually, while one that is excessively large can overwhelm a small room.
A useful strategy is to make the backdrop tall enough to appear impressive in photographs while keeping enough surrounding space for people to stand comfortably. Leave room in front of it for guests, props, a cake table, or other party activities.
Consider the Background Color
The base color should support the theme rather than compete with the decorations. Soft neutrals create a versatile canvas, while stronger colors can make the backdrop feel more dramatic and energetic.
If you are planning to use colorful balloons, florals, signs, or streamers, consider choosing a quieter background. If the decorations are simple, a bold backdrop color can provide the visual interest.
How to Build a Simple Party Backdrop
The basic concept can be broken down into a straightforward decorating process. You do not need advanced crafting skills to create something attractive. The key is to work from the largest elements toward the smallest details.
- Measure the space. Decide how much wall or floor area the backdrop should cover.
- Select your base panels. Choose lightweight materials that are easy to handle and decorate.
- Create a stable arrangement. Position or connect the panels securely so they remain upright.
- Choose a color palette. Select two to four complementary colors before adding decorations.
- Add your main decorative element. This could be lettering, balloons, flowers, fabric, paper shapes, or a themed sign.
- Balance the composition. Step back periodically to check whether one side looks heavier than the other.
- Finish with small accents. Add details only where they improve the overall design.
You can keep the structure minimal and allow the decorations to provide the personality. This makes it easier to adapt the same basic backdrop for completely different occasions.
Affordable Ways to Decorate a DIY Backdrop
The beauty of a DIY party backdrop is that the finishing materials can be surprisingly simple. You can use craft-store supplies, reusable decorations, leftover party materials, or items you already have at home.
Balloons
Balloons are one of the easiest ways to add volume and color. A cluster positioned along one side or across the top can frame the backdrop without covering the entire surface.
For a more modern look, use balloons in a limited palette rather than mixing too many unrelated colors. Different sizes can add depth and make the arrangement look fuller.
Paper Decorations
Paper fans, circles, flowers, stars, garlands, and cutout shapes are lightweight and easy to customize. They are particularly useful when you want a decorative backdrop that can be created in advance.
Paper accents also make it easy to coordinate the backdrop with invitations, table settings, party favors, or other decorations.
Fabric and Streamers
Fabric panels can soften the appearance of a rigid backdrop, while streamers can introduce movement and texture. You can layer these materials to create a more dimensional effect.
When working with fabric, consider whether you want a smooth, elegant appearance or a relaxed gathered effect. Both can work beautifully depending on the occasion.
Signs and Lettering
Personalized lettering can make a backdrop feel instantly connected to the celebration. A short phrase, name, age, event title, or simple greeting can become the central visual element.
For readability, keep the wording short and make sure the lettering contrasts strongly with the background. Large, uncomplicated fonts tend to photograph better than extremely detailed typefaces.
Expert Insight
Design your backdrop from the viewpoint of a camera, not only from the viewpoint of someone standing directly in front of it. Leave enough visual breathing room around faces, keep important lettering away from where people will stand, and make the strongest details easy to see in photographs.
Turn Your Backdrop Into a DIY Photo Booth
One of the biggest advantages of a party backdrop is that it naturally creates a photo opportunity. Guests know exactly where to stand, and the decorated background gives casual pictures a consistent look.
Place the backdrop in an area with good natural or artificial lighting. If possible, avoid placing it directly in front of a harsh window because strong backlighting can make people appear too dark in photographs.
Keep the floor area in front of the backdrop relatively clear. This gives guests room to move and makes full-body photographs easier. A small rug, stool, side table, or carefully chosen prop can add personality without cluttering the scene.
Create a Clear Focal Point
Every photo backdrop benefits from a focal point. It might be a large phrase, a balloon arrangement, a floral cluster, a decorative shape, or a personalized sign.
Try not to give every section of the backdrop equal visual weight. When everything is bold, nothing feels particularly important. Instead, choose one dominant feature and let the remaining decorations support it.
DIY Backdrop Ideas for Different Celebrations
Once you have the basic structure, the same backdrop concept can be adapted for many events. Changing the colors and decorative details can completely alter the final appearance.
Birthday Parties
Use the guest of honor’s favorite colors and add their age or name as a simple statement. Balloons, paper shapes, and a small dessert table can complete the party area.
Baby Showers
Soft colors, delicate paper flowers, fabric accents, and simple lettering can create a welcoming baby shower backdrop. A neutral base also makes it easy to reuse the structure for another celebration.
Graduation Parties
A graduation backdrop can feature school-inspired colors, a year, congratulatory lettering, or photographs. Keep the main message large enough to remain readable in group photos.
Dinner Parties and Gatherings
For a more sophisticated setting, skip oversized decorations and focus on texture. Fabric, greenery, subtle lettering, warm lighting, and a restrained color palette can create an elegant background without feeling overly themed.
How to Make Your DIY Backdrop Look More Professional
A professional-looking backdrop is often less about expensive materials and more about consistency. Choose a limited color palette, repeat visual elements, and avoid adding decorations simply because there is empty space.
Pay attention to spacing. If decorations are grouped too tightly, the design can feel crowded. If they are spread too far apart, the backdrop may look unfinished. Take photographs during the decorating process because the camera can reveal balance issues that are difficult to notice in person.
Pro Tip: Photograph your backdrop from several distances before the party begins. A design that looks impressive up close may lose its impact from across the room, while small lettering may disappear completely in a group photo.
Repeat Colors Throughout the Party
For a cohesive celebration, carry two or three backdrop colors into other parts of the room. Matching napkins, table decorations, balloons, signs, or party favors can make the entire space feel thoughtfully coordinated.
Keep the Main Message Simple
If you are adding text, resist the temptation to turn the backdrop into a paragraph. A short phrase has much more visual power and is easier for guests to read in photographs.
Practical Tips for Setting Up the Backdrop
Give yourself enough time to assemble the backdrop before guests arrive. If possible, build and test the main structure ahead of the event rather than attempting the entire project on the day of the party.
- Check that the backdrop is stable before adding decorations.
- Keep decorative materials away from heat sources and walkways.
- Make sure guests can move safely around the photo area.
- Use removable decorating methods when you want to protect walls and floors.
- Test lighting and take a few sample photographs before the event begins.
- Store reusable components carefully so they can be used for future projects.
Safety and stability should always come before appearance. A beautiful backdrop is not useful if it can easily tip over or obstruct a doorway. Choose an installation method appropriate for the size and weight of your materials and the location where the backdrop will be displayed.
Make the Project Your Own
The most appealing DIY backdrops are rarely exact copies of someone else’s design. Use the basic idea as a starting point, then adapt it to your space, event, colors, and personality.
You might create a minimalist neutral backdrop with a few large paper flowers, a colorful birthday wall filled with balloons, or a modern photo area with geometric shapes and simple lettering. The possibilities are practically endless because the foundation is so flexible.
Consider what you already own before purchasing new supplies. Leftover wrapping paper, ribbon, craft paper, fabric scraps, unused decorations, and removable hooks may become useful parts of the finished design.
Important: A budget-friendly backdrop can still look polished when the design has a clear focal point and a consistent color story. Spend your effort on composition first, then use inexpensive details to add personality.
At a Glance
- Start with a sturdy, appropriately sized base.
- Choose a simple color palette before decorating.
- Create one strong focal point.
- Leave space for guests and photographs.
- Use affordable accents to customize the design.
Conclusion
A DIY backdrop is one of the easiest ways to give a party a memorable focal point without decorating every corner of the room. With a simple panel base, thoughtful colors, and a few creative accents, you can create a backdrop that looks intentional, photographs beautifully, and fits the personality of your celebration.
The key is to keep the process simple. Start with the space, choose a strong foundation, decide on your color palette, and build the design around one main feature. From there, balloons, paper decorations, fabric, flowers, lettering, and other inexpensive details can bring the concept to life.
Whether you are planning a birthday party, shower, graduation celebration, dinner gathering, or casual event, a DIY backdrop gives you plenty of room to experiment. Most importantly, it lets you create something personal while keeping the project approachable and budget-conscious. Save the idea, gather a few supplies, and start designing a party backdrop that your guests will want to photograph.