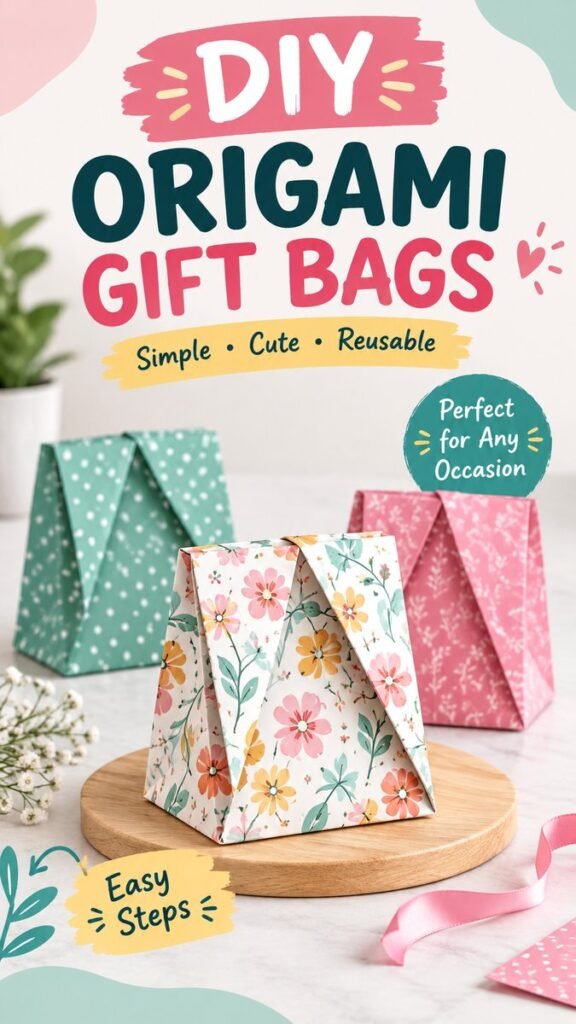
Making your own gift packaging can be surprisingly simple, and a DIY paper bag is one of the easiest craft projects to try when you want something practical, pretty, and personal. With a sheet of decorative paper and a few careful folds, you can create a charming origami-style gift bag without relying on complicated tools or elaborate supplies. These handmade paper bags are especially useful for small gifts, party favors, treats, and creative packaging projects.
The beauty of this project is its flexibility. Floral prints, pastel patterns, polka dots, kraft paper, scrapbook paper, and colorful sheets can all give the finished bag a completely different personality. You can keep the design soft and elegant, make it playful for a birthday, or coordinate the paper with a holiday or celebration.
Key Takeaways
- A DIY paper bag can be made with simple folding techniques.
- Decorative paper instantly adds personality to handmade packaging.
- Origami-style bags are useful for small gifts and party favors.
- Careful creasing helps create cleaner, stronger folds.
- Different paper patterns can transform the same basic design.
- This is a beginner-friendly paper craft for creative afternoons.
Why Make a DIY Paper Bag?
A handmade paper bag adds a thoughtful touch to even the simplest present. Instead of reaching for ordinary commercial packaging, you can choose a sheet that matches the occasion and fold it into a useful little container. The result feels more intentional because the packaging itself becomes part of the gift.
DIY paper bags are also a wonderful way to use attractive sheets of paper that might otherwise sit unused in a craft drawer. A single floral sheet can become a decorative gift bag, while a geometric print can create a more contemporary look. Even plain paper can be personalized with stickers, stamps, drawings, ribbons, or handwritten messages.
Important: The paper you choose has a major effect on the finished bag. A sheet with enough structure to hold a crease will generally produce a neater shape than very thin, floppy paper.
What You Need for This Origami Gift Bag
One reason this craft is so appealing is that the supply list can stay remarkably short. You do not need a large collection of specialist equipment to experiment with paper bag making.
- One square or rectangular decorative sheet of paper
- A flat, clean crafting surface
- A ruler for checking folds, if desired
- Scissors when trimming is necessary
- Ribbon, stickers, or tags for optional decoration
If you are following an origami-inspired approach, start with a paper sheet that is easy to fold. Scrapbook paper and other decorative craft papers can work beautifully when they are not excessively thick. For a softer handmade appearance, floral and botanical patterns are particularly attractive because the print naturally becomes part of the bag’s decoration.
Choosing the Right Paper
Paper selection is where you can really make this project your own. A pastel floral pattern creates a cheerful and feminine presentation, while kraft paper gives the bag a rustic handmade feel. Bright colors can make the finished package suitable for birthdays, and sophisticated botanical prints can work well for more elegant occasions.
Pay attention to both the pattern and the scale of the design. Large flowers can create a bold visual effect, while smaller repeated motifs can make the bag look more uniform. If you want the folds to stand out clearly, choose a print that does not become visually confusing when the paper overlaps itself.
How to Make a DIY Paper Bag
The basic process is all about creating deliberate folds and shaping the sheet into a three-dimensional form. You do not need to rush. Taking a moment to align each fold will make the final bag look much cleaner.
1. Prepare Your Paper
Begin by placing your chosen paper on a flat surface. Make sure the surface is clean and large enough to allow the sheet to open completely. If your paper has a directional pattern, decide which side you want to appear most prominently on the finished bag before beginning.
Gently smooth the sheet with your hand. Any unwanted bends or wrinkles can make subsequent folds harder to align, especially when you are aiming for a crisp geometric shape.
2. Create the Main Folding Lines
Origami projects depend on accurate creases, so take your time during this stage. Fold the paper according to the desired bag structure, pressing along each crease firmly but carefully. A ruler can be useful for smoothing longer folds without damaging the paper.
Try to keep opposite sides as symmetrical as possible. Small alignment errors can become more noticeable as the bag takes shape, so precision at the beginning saves time later.
3. Shape the Sides
Once the main crease pattern has been established, begin bringing the sides inward to create the bag’s depth. This is the stage where a flat sheet starts to look like an actual container.
Press the side folds firmly and check that the edges meet cleanly. The folded sections should create a balanced silhouette rather than pulling sharply to one side. If a crease is slightly off, gently unfold the area and correct it before continuing.
4. Form the Bottom
The bottom of the paper bag needs enough structure to support whatever you plan to place inside. Fold and reinforce the lower sections carefully, paying attention to the corners. A clean bottom helps the finished bag stand upright on a table.
This is also a good time to test the shape. Set the bag on your work surface and gently adjust the folds until it sits evenly. Avoid pressing too hard on decorative paper, especially if the printed surface is delicate.
5. Finish the Self-Closing Top
The folded top gives this style of gift bag its distinctive appearance. Instead of leaving the package completely open, overlapping folded sections can create a simple self-closing effect. This makes the finished bag look polished without requiring a complicated closure.
Check that the top folds sit naturally and that the opening remains accessible. If you want additional security, a small sticker or decorative seal can be added without changing the overall handmade look.
Expert Insight
The cleanest handmade bags usually come from patient folding rather than complicated techniques. Make each crease deliberately, align the edges before pressing, and shape the bag gradually instead of forcing the paper into position.
Creative Ways to Customize Paper Gift Bags
Once you have mastered the basic construction, there are countless ways to personalize your DIY paper bag. The folding technique can remain simple while the decorative choices make every finished bag look different.
Use Floral and Botanical Prints
Floral paper is an easy choice when you want the packaging to look decorative without adding many embellishments. As the paper folds over itself, flowers and leaves appear in different positions, creating a layered visual effect.
Soft pinks, greens, creams, and other gentle shades can give the bag a fresh appearance. For a bolder result, try vivid flowers or contrasting botanical patterns.
Add a Handmade Gift Tag
A small tag can turn a simple paper bag into personalized gift packaging. Write the recipient’s name or a short message on a small piece of cardstock and attach it to the folded top with ribbon or string.
You can also coordinate the tag with the paper. For example, a neutral tag works well with busy floral patterns, while a colorful tag can brighten a plain paper bag.
Experiment With Different Patterns
Do not feel limited to floral designs. Polka dots, stripes, abstract prints, geometric patterns, and seasonal motifs can all work beautifully. Creating several bags from different papers is an easy way to build a coordinated collection of handmade packaging.
What Can You Put Inside a DIY Paper Bag?
These small handmade bags are especially suited to lightweight items that fit comfortably inside the finished shape. They can be used for thoughtful little surprises, party favors, handmade treats, craft items, or small presents.
- Small birthday gifts
- Party favors
- Handmade craft items
- Small accessories
- Wrapped treats
- Thank-you gifts
- Small stationery items
Always consider the size and strength of the finished bag before filling it. Decorative paper bags are best used for items that are appropriate for their construction. If an object is heavy or has sharp edges, a stronger packaging method may be more suitable.
Tips for Neater Origami Gift Bags
Good folding technique makes a noticeable difference. You can improve the appearance of your paper bag with a few simple habits.
- Work on a flat surface. An even surface helps prevent uneven creases.
- Align edges before pressing. Take an extra second to check the position of each fold.
- Use consistent pressure. Firm creases are useful, but excessive pressure can damage decorative paper.
- Test the shape before decorating. Make sure the bag stands properly before adding tags or embellishments.
- Choose paper carefully. Medium-weight craft paper can provide a useful balance between flexibility and structure.
Pro Tip: If you are new to paper folding, practice the design once with ordinary paper before using your favorite decorative sheet. This lets you understand the fold sequence without worrying about making mistakes on your best paper.
DIY Paper Bag Ideas for Different Occasions
One of the best things about handmade gift bags is how easily they can be adapted. You can create the same basic shape repeatedly while changing the paper and finishing details to suit different occasions.
Birthday Gift Bags
Choose cheerful colors, playful patterns, or bright floral paper for birthday packaging. A handwritten tag or small decorative sticker can add a personal finishing touch.
Party Favor Bags
Make several matching paper bags using the same sheet or coordinate two or three complementary patterns. This is a simple way to create a cohesive table display without buying identical commercial packaging.
Everyday Handmade Packaging
You do not need a special celebration to make a DIY paper bag. Handmade packaging can make a small thank-you gesture or surprise feel more memorable. Keep a few finished bags ready for moments when you need a quick and attractive way to present a small item.
Why This Simple Craft Is Worth Trying
Paper crafts are often most enjoyable when the process is accessible enough to start immediately. A DIY paper bag combines creativity with a practical result, making it more than just a decorative project. You finish with something you can actually use.
The project also encourages experimentation. Once you understand how the folds create the bag’s structure, you can begin thinking about paper size, pattern placement, decorative details, and different ways to finish the opening. Each variation can give the same basic idea a new personality.
At a Glance
- Project: DIY paper gift bag
- Style: Origami-inspired folded packaging
- Best for: Small gifts, favors, treats, and handmade surprises
- Personalize with: Floral paper, tags, ribbons, stickers, and colorful patterns
- Skill level: Beginner-friendly paper craft
Conclusion: Create a Gift Bag That Feels Personal
A DIY paper bag is a simple project with plenty of creative potential. With attractive paper, careful folds, and a few thoughtful details, an ordinary sheet can become charming handmade packaging for a small gift or special occasion. The origami-inspired structure keeps the project interesting while remaining approachable for beginners.
Start with a paper pattern you love, focus on making clean and balanced folds, and then experiment with tags, ribbons, colors, and embellishments. Whether you are preparing birthday favors, wrapping small presents, or simply looking for an enjoyable paper craft, these handmade gift bags are an easy project to keep in your crafting rotation.
The best part is that your packaging becomes part of the gift. A thoughtfully chosen paper pattern and carefully folded bag can make even a small present feel more special, creative, and personal.
Tags
DIY Paper Bag Origami Gift Bags Paper Crafts DIY Gift Packaging Origami Tutorial Handmade Gift Bags Easy Paper Crafts Beginner Crafts