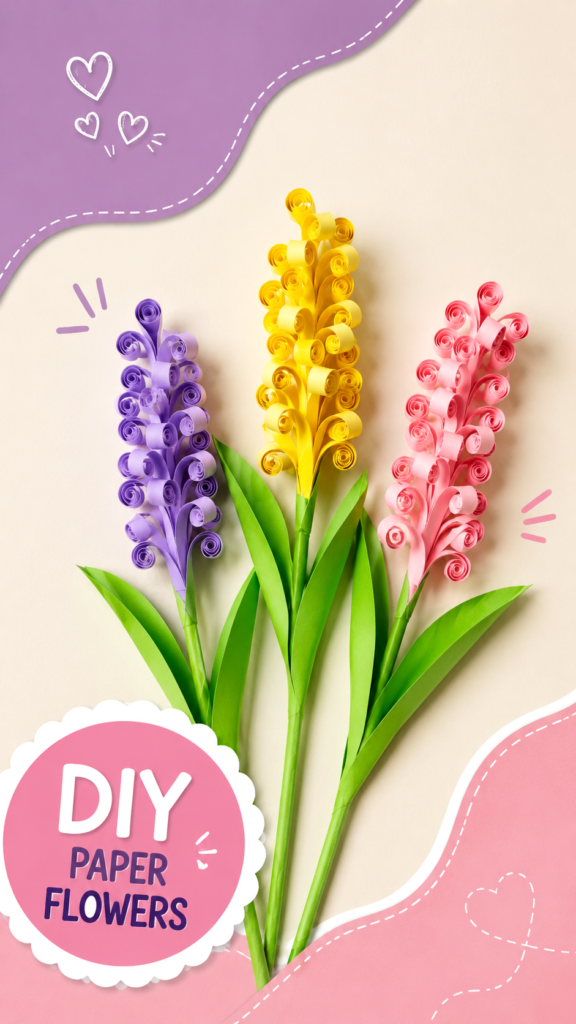
Simple paper can become something surprisingly beautiful with a little creativity, patience, and a few basic craft supplies. Paper flowers are one of the easiest ways to turn ordinary sheets of colored paper into cheerful handmade decorations, and quilled paper flowers add an especially charming touch. With their curled petals, layered shapes, long green stems, and folded leaves, these flowers create a handmade look that works beautifully for home decor, classroom projects, parties, gifts, and creative afternoons with kids.
This style of DIY paper crafts decoration is appealing because it combines simple techniques with a result that looks detailed and decorative. You do not need a large collection of supplies or complicated equipment. A few colors of paper, scissors, glue, and something to help curl narrow paper strips can be enough to create a colorful flower arrangement.
Key Takeaways
- Paper flowers are an easy way to create colorful handmade decorations.
- Rolled paper strips can create attractive curled petals and textured flower heads.
- Green paper leaves and stems make the flowers look more complete and balanced.
- Different color combinations can make the same craft fit many decorating styles.
- This project can be adapted for kids, beginners, classrooms, parties, and seasonal displays.
Why DIY Paper Flowers Make Wonderful Decorations
Paper flowers are more than a fun craft project. They can become decorative pieces that brighten a room without requiring fresh flowers or complicated arrangements. Because paper is lightweight and easy to shape, you can experiment with different sizes, colors, textures, and designs until you find a combination you love.
The colorful curled flowers in this style of craft create plenty of visual interest. Purple, yellow, pink, blue, or other cheerful shades can be mixed together for a playful bouquet. Green leaves provide contrast and help define the shape of each flower, while long stems give the arrangement a natural vertical flow.
Important: The charm of handmade paper flowers comes from their simplicity. Small variations in the curls, petals, and leaves can make every flower feel unique, so there is no need to make every detail perfectly identical.
A Budget-Friendly Craft Idea
One of the biggest advantages of DIY paper crafts is how accessible they are. Colored craft paper is inexpensive, easy to store, and available in countless shades. You can also use leftover paper from other projects instead of buying a large collection of new materials.
For a simple paper flower project, gather a selection of colored paper, green paper for the leaves and stems, scissors, craft glue, a pencil or narrow stick for creating curls, and a ruler if you want consistent strips. Optional decorative elements can include small paper shapes, stickers, glitter, or simple hand-drawn accents.
How to Make Quilled Paper Flower Decorations
The basic idea is to build the flower head from narrow strips of paper that are curled or rolled into decorative shapes. Instead of creating one flat flower, you gradually build up a three-dimensional flower head by arranging many curled pieces along a central stem.
Step 1: Choose Your Color Palette
Start by deciding which colors you want to use. A three-color arrangement can look especially attractive because it creates contrast without becoming visually overwhelming. Soft pink, lavender, and yellow offer a cheerful pastel effect, while stronger colors can create a bolder decoration.
Think about where the finished flowers will be displayed. Light colors can work beautifully for spring-inspired decor, children’s craft projects, and soft bedroom decorations. Brighter shades can add energy to party tables, classroom displays, or handmade gift arrangements.
Step 2: Prepare the Paper Strips
Cut narrow strips of colored paper for the curled flower pieces. Keeping the strips relatively similar in width will help create a consistent look, although small differences are completely fine for handmade crafts.
For younger children, an adult can prepare the strips in advance. This allows the child to focus on the enjoyable parts of the project, such as curling, gluing, arranging, and choosing colors.
Step 3: Create the Curled Petals
Wrap each paper strip around a pencil, thin stick, or another rounded tool to create a spiral or curl. Slide the paper away carefully and allow the curl to hold its shape. You can leave the curl tight for a compact spiral or loosen it slightly for a softer petal effect.
Glue one end where necessary so the curl stays together. Repeat the process until you have enough decorative pieces to build the flower head. This repeated motion is simple, but it creates the detailed texture that makes quilled paper flowers so attractive.
Keep the Curls Consistent
If you want a polished-looking flower, try to keep the paper strips approximately the same width and curl them around the same tool. For a more playful handmade appearance, intentionally vary the curl size and direction.
Step 4: Build the Flower Head
Arrange the curled paper pieces along a narrow central strip or stem. Start near the top and gradually work downward, placing curls close enough together to create a full flower shape. You can slightly overlap the pieces to avoid large gaps.
Do not worry if your first flower looks different from the example. Paper crafts are highly adaptable. A narrower flower can look delicate, while a fuller arrangement creates a more dramatic decorative effect.
Step 5: Add Green Stems and Leaves
The green elements are an important part of the finished design. Cut long, narrow pieces of green paper for the stems and longer pointed shapes for the leaves. Fold the leaves slightly along the center to give them more dimension.
Attach the leaves around the lower portion of each flower. You can place one leaf on each side of the stem or experiment with different angles. Longer leaves can extend outward to make the bouquet feel fuller.
Expert Insight
A strong paper flower arrangement depends on contrast. Pair detailed curled petals with simple flat leaves and long clean stems. The difference between textured flower heads and streamlined green shapes helps each element stand out without making the design feel crowded.
Creative Ways to Use Paper Flower Decorations
Once you have made a few flowers, there are many ways to turn them into larger decorations. The flowers can be displayed individually, arranged as a bouquet, attached to a background, or incorporated into another craft project.
DIY Wall Decor
Create a colorful wall display by arranging several paper flowers at different heights. You can use a plain background to make the flowers stand out or add pastel paper shapes behind them for extra dimension. A small collection of handmade flowers can transform an empty corner into a cheerful craft display.
Classroom and Kids’ Craft Displays
Paper flower crafts are also suitable for group activities. Children can choose their own colors and create individual flowers before combining them into a larger classroom bouquet. Displaying the finished pieces gives everyone a chance to see how individual designs can work together as one colorful project.
Party and Celebration Decorations
Use paper flowers to decorate a party table, gift station, photo area, or handmade banner. Matching the flower colors to the event’s color palette can create a coordinated look without requiring complicated decorations.
Handmade Gift Embellishments
A small paper flower can also become part of a gift presentation. Attach one to a wrapped package, handmade card, gift bag, or decorative box. The recipient can keep the paper flower as a small keepsake long after the gift has been opened.
Easy Variations to Try
Once you understand the basic technique, changing the appearance of the flowers is easy. You can make smaller curls for delicate flowers, wider strips for larger petals, or combine several shades of the same color for a layered effect.
- Pastel bouquet: Combine soft pink, lavender, yellow, and blue for a gentle spring-inspired display.
- Bold bouquet: Choose bright contrasting colors to create an energetic centerpiece.
- Monochrome flowers: Use several shades of one color for a modern and coordinated look.
- Mini flowers: Cut shorter strips and create smaller blooms for cards and gift decorations.
- Large statement flowers: Use longer or wider paper strips to create oversized decorative blooms.
Tips for Better-Looking Paper Crafts
Good results come from taking your time with the small details. Paper does not need to be expensive or specialized. What matters most is how consistently you cut, curl, fold, and arrange each piece.
Pro Tip: Work on the flower heads before attaching the final leaves. This gives you more freedom to adjust the shape, fill empty areas, and create a balanced arrangement before everything is permanently glued.
Use a small amount of glue rather than covering the entire paper strip. Too much adhesive can make thin paper wet, wrinkled, or difficult to position. A small dab is usually enough to hold a curled piece in place.
It is also helpful to make several pieces before assembling the flower. Having a collection of curls ready lets you concentrate on arranging the flower head instead of constantly stopping to prepare another strip.
Let the Design Stay Handmade
Perfect symmetry is not necessary. In fact, a little variation can make a handmade paper flower look more natural and interesting. If one curl is slightly larger or one leaf sits at a different angle, embrace it. These details give handmade decorations personality.
How to Make the Project More Enjoyable for Kids
This type of paper craft can be adapted to different ages and skill levels. Younger children can choose colors, arrange prepared paper curls, and help position leaves, while older children can practice cutting strips and creating the curled pieces themselves.
Keep the activity relaxed rather than focusing on making every flower identical. Encourage children to experiment with unusual color combinations and different flower sizes. A mixed bouquet often looks more creative than a collection of perfectly matching flowers.
For group activities, prepare containers with different paper colors and let each participant create a few flowers. When everyone is finished, combine the flowers into one large display. This turns a simple craft into a collaborative decoration.
At a Glance
- Use colorful paper strips to create curled flower petals.
- Add folded green leaves for contrast and dimension.
- Mix flower colors to create cheerful handmade bouquets.
- Adapt the flowers for wall decor, cards, gifts, parties, or classroom displays.
- Experiment with different curl sizes, paper widths, and arrangements.
Conclusion: Turn Simple Paper Into Something Special
DIY paper crafts decoration does not have to be complicated to make a beautiful impression. Quilled paper flowers show how a few simple shapes can be combined into something colorful, dimensional, and full of personality. The curled petals create texture, while the long green stems and pointed leaves complete the handmade bouquet.
Whether you are looking for an easy afternoon activity, a creative project for kids, handmade party decor, or a simple way to brighten your home, paper flowers are an excellent place to start. Choose a few favorite colors, prepare your paper strips, and experiment with different curls until you discover a style that feels like your own.
The best part is that every finished flower can be customized. Change the colors, adjust the size, add more leaves, create a larger bouquet, or turn individual flowers into cards and gift decorations. With a little imagination, ordinary paper can become a beautiful collection of handmade decorations worth displaying and sharing.