Customizing a notebook is one of the easiest ways to turn an everyday stationery item into something that feels personal, creative, and completely your own. A plain notebook can become a colorful journal, a cheerful planner, a stylish study companion, or a thoughtful handmade gift with just a few simple decorating ideas. From floral patterns and painted details to stickers, doodles, patterned paper, and colorful accents, there are countless ways to create a DIY notebook that matches your personality and purpose.
Key Takeaways
- Turn a basic notebook into a personalized creative project.
- Use color, patterns, stickers, paper, and doodles to decorate the cover.
- Choose a design that suits journaling, planning, studying, or gifting.
- Combine simple materials for an eye-catching handmade finish.
- Keep your decoration practical so the notebook remains easy to use.
Why Customize a Notebook?
A notebook does not have to look ordinary simply because it started that way. Custom notebook projects give you an opportunity to experiment with colors, textures, illustrations, and patterns while creating something useful at the same time. The process can be as simple or detailed as you want.
Personalized stationery is especially appealing because it combines creativity with everyday function. Instead of buying another notebook that looks like everyone else’s, you can create a cover that reflects your favorite colors, hobbies, aesthetic, or current project.
Important: The best DIY notebook design is not necessarily the most complicated one. A thoughtful combination of colors, one strong pattern, and a few carefully placed decorative details can create a polished result without requiring advanced crafting skills.
Choose Your Notebook Style
Before decorating, think about how you plan to use the notebook. Its purpose can help guide the colors, materials, and amount of decoration you choose. A notebook for creative journaling can be expressive and colorful, while a study notebook may benefit from a cleaner, more organized appearance.
- Journal: Try floral designs, soft colors, stickers, and hand-drawn details.
- Planner: Use coordinated colors, simple patterns, and neat labels.
- School or study notebook: Choose a bold cover design that is attractive but durable.
- Creative notebook: Experiment with paint, collage elements, doodles, and mixed patterns.
- Gift notebook: Personalize the design around the recipient’s favorite colors or interests.
DIY Notebook Cover Ideas
The cover is the perfect place to make the biggest visual impact. You can completely transform a plain notebook by covering it with decorative paper or by adding smaller embellishments directly to the existing cover.
1. Create a Floral Notebook Cover
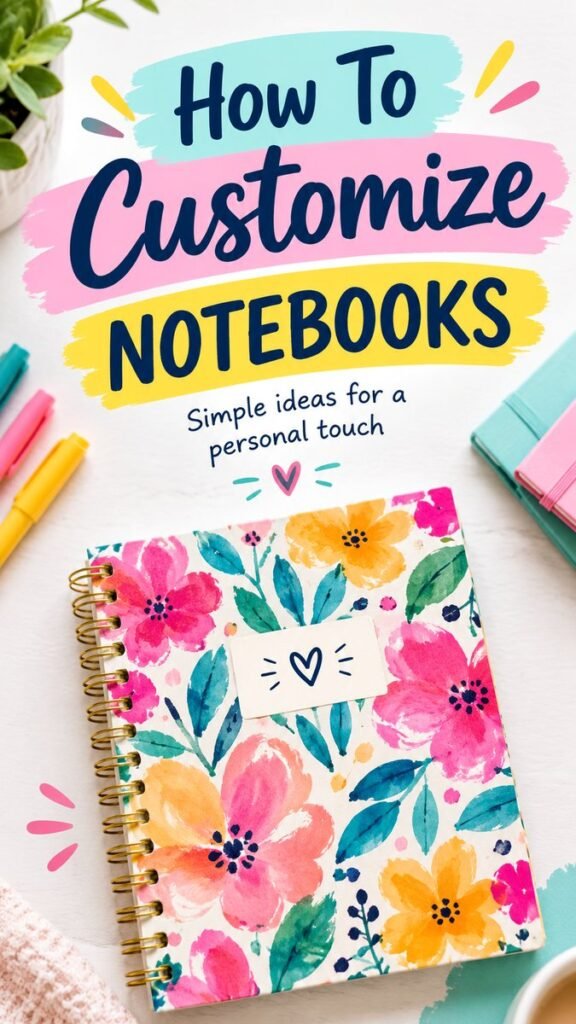
Floral designs are an easy way to make a notebook feel bright and cheerful. The colorful flower-covered notebook style shown here demonstrates how expressive flowers can become the main design element. You can use floral scrapbook paper, printed illustrations, painted flowers, or simple flower stickers.
For a handmade appearance, try combining several flower shapes instead of repeating one identical pattern. Mix larger blooms with smaller flowers and leaves to create visual variety. Bright pink, turquoise, blue, yellow, coral, and green can create a lively palette that immediately attracts attention.
2. Try a Colorful Painted Design
Watercolor-style decoration can give a notebook a soft artistic character. You do not need to paint a complicated scene. Loose brushstrokes, abstract shapes, colorful flowers, leaves, or small painted marks can create a beautiful cover.
If you are working with paper rather than painting directly onto the notebook, you can create the artwork separately and attach it once it has dried. This approach makes it easier to experiment without worrying about damaging the original notebook.
3. Use Patterned Scrapbook Paper
Decorative paper is one of the quickest ways to customize a notebook. Choose a pattern that fits your style, measure the cover carefully, and trim the paper so it fits neatly around the edges. Floral, geometric, abstract, botanical, and colorful patterned papers all work well.
For extra interest, layer a small contrasting paper shape over the main cover. A rectangle, circle, label, or banner can create a dedicated space for the notebook’s name or purpose.
4. Add Stickers and Doodles
Stickers are ideal when you want a quick notebook makeover. Arrange them around the cover rather than placing everything in one area. Small doodles can fill empty spaces and make the design feel more handmade.
Simple hearts, stars, dots, leaves, flowers, lines, and tiny geometric shapes can work as decorative accents. Use a consistent color palette to keep the finished cover looking intentional rather than crowded.
How to Build a Balanced Notebook Design
A beautiful notebook cover usually has one main focal point. This might be a floral pattern, a large title, a decorative label, or a colorful illustration. Once you have chosen that focal point, keep the surrounding decorations slightly simpler.
- Choose two to five main colors.
- Select one dominant pattern or illustration.
- Add a small title, label, or personal detail if desired.
- Use smaller accents to fill awkward empty spaces.
- Step back and check whether the design still looks clear from a distance.
Pro Tip: Repeating a few colors throughout the cover creates visual harmony. If your main artwork contains several bright colors, choose one or two of them for your lettering and smaller accents instead of introducing too many additional shades.
Simple Materials for Notebook Customization
You can create an attractive DIY notebook without a large collection of craft supplies. Start with a notebook and a few basic decorative materials, then add specialized items only when you need them.
- Decorative or scrapbook paper
- Colored pens and markers
- Stickers and labels
- Craft scissors
- Double-sided tape or suitable craft adhesive
- Washi tape
- Paint or watercolor supplies
- Pencils for planning layouts
- Ruler for clean edges
- Clear protective covering for extra durability
A Simple Step-by-Step DIY Notebook Makeover
Step 1: Plan the Cover
Start by deciding what you want the finished notebook to look like. Consider the main color palette, pattern, title, and decorative elements. A quick sketch on scrap paper can help you decide where everything should go before you begin.
Step 2: Prepare the Background
If you are using decorative paper, measure the notebook cover and cut the paper carefully. If you are painting, create the background first and allow it to dry completely before adding smaller details.
Step 3: Add the Main Design
Place your largest visual element first. For a floral notebook, this could be a large flower arrangement or a repeating botanical pattern. Give the main design enough room to stand out.
Step 4: Add Personal Details
Now bring the notebook to life with your own details. Add your name, initials, favorite quote, small doodles, stickers, or a simple label describing what the notebook is for. Keep these details readable and avoid covering the most important parts of the design.
Step 5: Protect Your Finished Cover
If the notebook will be carried in a backpack or used frequently, consider adding a protective layer. A suitable clear covering can help reduce scratches and keep decorative paper cleaner. Make sure the adhesive and covering you choose are compatible with your notebook material.
Why This Matters
Personalization works best when decoration and function support each other. Keep important areas easy to handle, avoid adding bulky pieces near the binding, and choose durable materials when the notebook will be used every day.
Make Your Notebook Practical as Well as Pretty
A decorative notebook should still be comfortable to use. When planning your design, pay attention to the spiral binding, edges, corners, and areas that will experience frequent handling. Keeping these areas relatively clear can help the notebook stay attractive for longer.
For notebooks used at school or work, consider leaving enough open space for a simple label. A clear title can make it easier to identify the notebook quickly. If you are creating a journal or personal notebook, a small decorative label can add a finished, organized appearance.
Creative Ways to Personalize Your Stationery
Once you have customized one notebook, the same techniques can be used across your stationery collection. Create matching covers for notebooks, journals, planners, folders, and other paper goods. Using a related color palette can make your desk feel coordinated without requiring every item to look identical.
You can also create themed notebook collections. Try a bright floral theme for creative writing, a calming botanical theme for journaling, or a colorful geometric style for school notes. Changing the theme allows you to experiment while keeping each notebook visually distinct.
Another fun approach is to customize notebooks seasonally. Replace a simple cover design with colors and patterns that match the time of year, or create special notebooks for particular projects and occasions. This makes an ordinary stationery item feel much more intentional.
Tips for a Polished Handmade Finish
Small finishing details can make a major difference. Take your time when measuring paper, cutting edges, and placing decorative elements. Uneven edges or overcrowded designs can distract from an otherwise beautiful concept.
- Use a ruler when cutting straight edges.
- Test your layout before permanently attaching anything.
- Keep the strongest colors balanced across the cover.
- Leave some breathing room around major decorative elements.
- Choose lightweight decorations for notebooks that will be carried often.
- Let paint or adhesive dry fully before using the notebook.
A little restraint can make a colorful design feel more sophisticated. If your patterned cover is already busy, you may only need a small label or a few simple accents. The goal is to create a notebook that feels expressive without losing its clean, usable appearance.
Quick Points
- Start with a clear color palette.
- Choose one main focal design.
- Add personal details gradually.
- Keep the binding and edges practical.
- Protect the finished cover when needed.
Final Thoughts
DIY notebook customization is a simple craft project with plenty of room for creativity. A plain notebook can become a colorful floral journal, a personalized planner, a creative sketchbook, or a thoughtful handmade gift with only a few carefully chosen materials.
The most important part is to create a design that feels like you. Start with colors and patterns you enjoy, build around one strong focal point, and add small details that make the notebook special. Whether you prefer a bold watercolor-inspired cover or a minimal design with a few decorative touches, there is no single right way to personalize your stationery.
Pick up a notebook, gather a few favorite craft supplies, and start experimenting. Your next everyday notebook could become one of the most creative pieces on your desk.