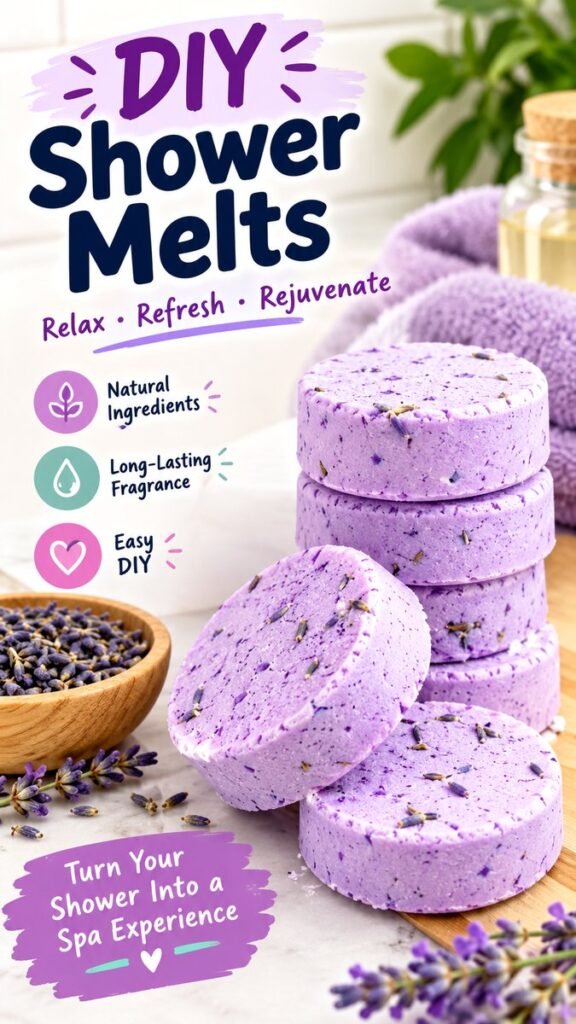
Turn an ordinary shower into a relaxing spa-inspired ritual with these easy DIY lavender shower melts. These simple homemade melts are designed to release a soothing lavender aroma as they dissolve around the shower, creating a fresh and comforting atmosphere without requiring complicated crafting skills. With a handful of accessible ingredients, a simple mold, and a little preparation, you can make a batch of colorful shower melts to keep on hand for relaxing mornings, refreshing evenings, or thoughtful homemade gifts.
Key Takeaways
- Lavender shower melts are a simple way to create a spa-like shower atmosphere.
- A few basic ingredients can be combined into easy homemade shower tablets.
- Keeping the melt on the shower floor helps it dissolve gradually rather than washing away immediately.
- Adjust the size and shape of your molds to create melts that suit your shower routine.
- Store finished melts in a dry, airtight container to help protect them from moisture.
- Always use essential oils thoughtfully and keep finished products away from children and pets.
Why Make DIY Lavender Shower Melts?
A relaxing shower does not need to involve expensive products or an elaborate routine. DIY shower melts offer an easy way to add fragrance and a little extra enjoyment to an everyday shower. Lavender is especially popular in bath and body projects because its familiar floral scent can create a calm, fresh-feeling atmosphere.
Unlike a traditional bath bomb, a shower melt is intended for use in the shower rather than directly in bathwater. When placed where it receives small amounts of splashing water, the tablet gradually breaks down and releases its fragrance into the surrounding steam and air.
Important: Shower melts are primarily an aromatherapy-style shower product, not a medicine. They should not be used to claim that congestion, colds, or other health conditions will be treated or cured. Keep the mixture out of your eyes and avoid placing concentrated essential oils directly on your skin.
What You Need to Make Lavender Shower Melts
The beauty of an easy DIY shower melt recipe is that the process can be kept straightforward. The finished melts shown in this style of project have a soft lavender appearance and a compact tablet shape, making them convenient to portion and store.
Basic Ingredients
- Vapor rub: A small amount can contribute a strong mentholated aroma to the shower melt. If using a commercial product, follow its label directions and intended uses.
- Lavender essential oil: This provides the characteristic floral fragrance. Choose an essential oil from a reputable source and use an appropriate amount.
- Cornstarch: This helps provide body and structure to the mixture.
- Baking soda: This is commonly used in homemade shower and bath projects because it creates a fine, workable powder.
- Water: A small amount helps bring the dry mixture together. Add it gradually rather than all at once.
You may also want a mixing bowl, spoon or spatula, measuring tools, and a silicone mold. A silicone mold is particularly convenient because flexible cavities make it easier to release the finished tablets without breaking them.
Choosing the Right Mold
The mold determines the final shape and size of your shower melts. Small round molds create compact tablets similar to the ones pictured, while decorative silicone molds can create stars, flowers, hearts, or other simple shapes.
For a first batch, choose cavities that are easy to fill and release. Very intricate molds can make a crumbly mixture harder to handle. A shallow mold can also make drying easier because the tablets have more exposed surface area.
How to Make Easy DIY Shower Melts
The process is simple, but the consistency of the mixture matters. You want a mixture that can be pressed firmly into the mold without becoming overly wet. Adding liquid slowly gives you much better control.
1. Combine the Dry Ingredients
Begin by combining the cornstarch and baking soda in a clean bowl. Break up any visible lumps and stir thoroughly so the powders are evenly distributed. A smooth dry base will make it easier to create consistent shower melts.
If you are using any powdered additions, keep them finely textured and make sure they are appropriate for a shower product. Avoid adding materials that could create sharp pieces or make the shower floor slippery.
2. Add the Fragrance
Add the lavender essential oil gradually and mix thoroughly. Rather than concentrating the oil in one spot, distribute it through the dry mixture. This helps the finished melts have a more even fragrance.
Pro Tip: Stronger fragrance is not automatically better. Essential oils are highly concentrated, so use a modest amount and follow the safety guidance provided by the essential oil manufacturer.
3. Incorporate the Moist Ingredients
If the recipe calls for vapor rub, incorporate it into the powder mixture until the texture becomes reasonably uniform. Work slowly and scrape the sides of the bowl as needed.
Next, add water a little at a time. This is one of the most important parts of the process. Too much water can cause the mixture to become sticky or begin reacting prematurely, while too little moisture can leave the mixture unable to hold its shape.
4. Check the Consistency
The finished mixture should resemble damp, moldable crumbs. When you squeeze a small amount in your hand, it should hold together instead of immediately falling apart. If it feels too dry, add a tiny amount of water and mix again.
Take your time during this stage. It is much easier to add more moisture than to correct a mixture that has become too wet. Small additions make it possible to reach the right texture without overshooting.
5. Pack the Mixture Into the Mold
Spoon the mixture into each mold cavity. Press it down firmly with your fingers, the back of a spoon, or another flat tool. Compacting the mixture helps prevent cracks and gives the shower melts a stronger finished structure.
Fill each cavity evenly so the finished tablets have a similar size. If the surface becomes rough, gently smooth it before leaving the melts to dry.
6. Let the Shower Melts Dry Completely
Allow the molded melts to dry in a cool, dry location. Drying time can vary depending on the size of the molds, humidity, and the amount of moisture used in the mixture.
Do not rush this step. The tablets need enough time to become firm before you attempt to remove them from the mold. If they feel soft or fragile, give them additional drying time.
How to Use Lavender Shower Melts
Once completely dry, remove one shower melt from the mold and place it on the shower floor in an area where it receives some splashing water but is not directly underneath a strong stream.
The goal is gradual contact with water. If the tablet sits directly beneath the showerhead, it may dissolve very quickly and provide less time for the fragrance to disperse. Positioning it toward the edge of the shower can help it last longer.
Why This Matters
- Controlled exposure to water helps the tablet dissolve more gradually.
- A shower melt should be placed where it will not become a slipping hazard.
- Keep the tablet away from direct contact with your eyes and sensitive areas.
Tips for Better DIY Shower Melts
A few small adjustments can make homemade shower melts easier to prepare and store. The most important factors are moisture control, firm molding, complete drying, and appropriate storage.
Avoid Adding Too Much Water
Water is useful for binding the mixture, but too much can make the tablets fragile or cause premature reactions between ingredients. Add it gradually and stop as soon as the mixture can be firmly packed.
Press the Mixture Firmly
Loose packing can result in tablets that crumble as soon as they are removed from the mold. Firm, even pressure creates a more compact melt that is easier to handle.
Give Them Enough Drying Time
Humidity can significantly affect homemade shower products. If your home is humid, the melts may need additional time to become completely firm. Avoid sealing them in a container while they still contain noticeable moisture.
Store Them Properly
After the shower melts are fully dry, transfer them to an airtight container and keep them somewhere cool and dry. Moisture is the enemy of homemade shower tablets, so avoid storing them beside an open shower or in another consistently humid location.
If you make several varieties, label the containers with the fragrance and date made. This simple habit makes it easier to keep track of different batches and prevents confusion when you have several DIY projects stored together.
Safety Tips for Homemade Shower Melts
Essential oils and fragranced ingredients deserve careful handling. Lavender essential oil may smell gentle, but it is still a concentrated substance. Read the manufacturer’s safety information and use the recommended dilution or amount for your intended application.
- Avoid getting essential oils or the concentrated mixture in your eyes.
- Do not intentionally apply a shower melt directly to your skin.
- Keep essential oils and finished melts away from children and pets.
- Use caution when stepping into a shower containing a dissolving melt, as oils and ingredients may affect the floor’s slipperiness.
- Stop using the product if it causes irritation or discomfort.
- Follow the instructions and warnings on any commercial ingredient used in the recipe.
People with fragrance sensitivities may prefer to skip strongly scented shower products altogether. If you are unsure whether an ingredient is appropriate for you, check its safety information before making a batch.
Creative Ways to Personalize Your Shower Melts
Once you are comfortable with the basic method, you can make your DIY shower melts visually match your bathroom or gift-giving style. The lavender color of the melts makes them especially attractive for a calming, spa-inspired theme.
Experiment With Shapes
Try different silicone molds to create seasonal or decorative designs. Simple geometric shapes work well for everyday use, while flowers or hearts can make the melts feel more special when packaged as homemade gifts.
Create a Spa-Inspired Gift Set
A small collection of homemade shower melts can be paired with practical spa-inspired items such as a soft washcloth, bath towel, or simple storage container. Keep the presentation clean and minimal for a thoughtful handmade gift.
Make Seasonal Variations
The same DIY concept can inspire different fragrance themes throughout the year. Lavender works beautifully for a floral, calming aesthetic, while other appropriately formulated fragrance combinations can create fresh, herbal, citrus, or seasonal variations.
Common Problems and Simple Fixes
The Mixture Will Not Hold Together
If the mixture falls apart when squeezed, it may need slightly more moisture. Add a very small amount of water, mix thoroughly, and test the consistency again. Avoid adding a large amount at once.
The Melts Are Crumbling After Removal
Crumbling can happen when the mixture was not packed firmly enough or when the tablets were removed before they were completely dry. Press the mixture more firmly during molding and allow additional drying time before unmolding.
The Melts Dissolve Too Quickly
Placement has a major effect on how quickly a shower melt dissolves. Try moving it farther away from the direct stream of water so that only occasional splashes reach the tablet.
The Fragrance Feels Too Strong
If the aroma is overpowering, reduce the amount of essential oil in future batches and make sure the shower has suitable ventilation. A pleasant fragrance should complement the shower rather than overwhelm the space.
How to Make This DIY Project More Enjoyable
DIY projects are most rewarding when the preparation itself feels enjoyable. Set up a clean workspace, gather all ingredients before mixing, and use a silicone mold that makes the process easy. A few minutes of preparation can turn a basic household project into something creative and useful.
These shower melts are also a fun project for organizing your self-care routine. Make a batch, allow it to dry completely, and store the finished tablets where they are easy to access. Having them ready means you can enjoy a spa-inspired shower without making a new batch every time.
At a Glance
- Mix the dry ingredients thoroughly.
- Add fragrance and moisture gradually.
- Press the mixture firmly into silicone molds.
- Dry completely before removing and storing.
- Place one melt where it receives gentle shower splashes.
Conclusion
Easy DIY lavender shower melts are a simple, creative way to bring a little spa-inspired comfort into an everyday shower. Their compact shape makes them convenient to prepare in batches, while the lavender fragrance adds a fresh floral touch to the shower environment.
The key to successful homemade shower melts is keeping the mixture controlled from beginning to end. Add moisture gradually, press the mixture firmly into the mold, allow the tablets to dry completely, and store them away from humidity. With those basics in place, you can create attractive shower melts that are easy to keep ready for your next relaxing shower.
Whether you are looking for a beginner-friendly DIY project, a homemade self-care idea, or a simple handmade gift, lavender shower melts are an appealing option. Keep the process safe, use fragrance ingredients responsibly, and enjoy turning an ordinary shower into a more intentional part of your daily routine.
Tags
DIY Shower Melts Lavender Shower Melts Easy DIY Homemade Self Care Lavender DIY Shower Ideas DIY Spa Ideas Homemade Shower Products