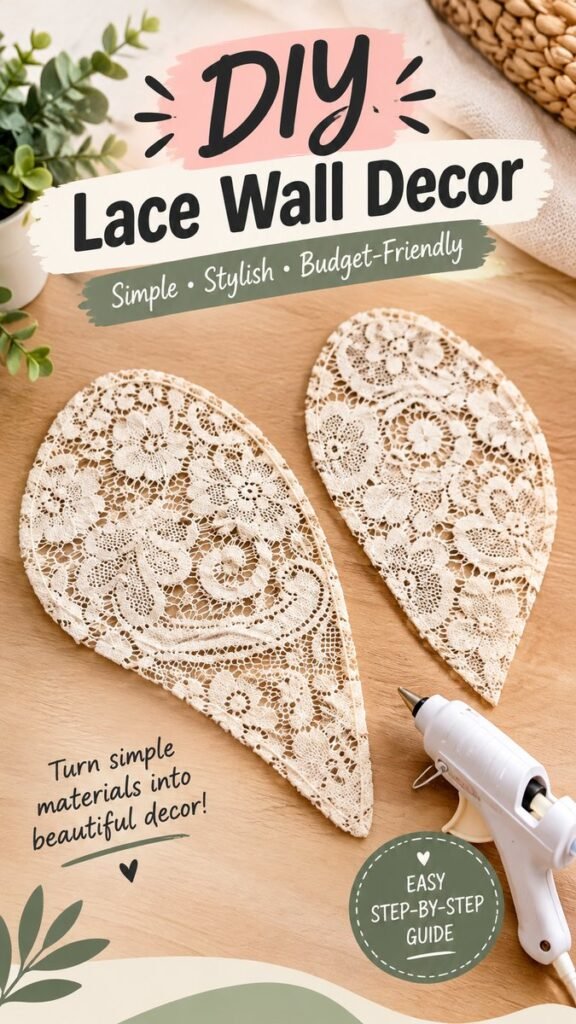
Turn delicate lace into beautiful handmade angel wings with this charming DIY project. Using simple materials, a lightweight wire frame, lace fabric, and a hot glue gun, you can create elegant wing-shaped decor that feels creative, soft, and surprisingly easy to make. This project is a wonderful way to repurpose lace and transform an ordinary craft material into a decorative piece for a bedroom, nursery, party display, photography prop, costume accessory, or whimsical home accent.
The beauty of DIY angel wings is their flexibility. You can keep the design simple and natural, or personalize it with ribbons, trim, fabric layers, beads, flowers, or other decorative details. The basic construction shown in this style of project gives you a practical starting point while leaving plenty of room for your own creativity.
Key Takeaways
- Lightweight lace works beautifully for creating soft, textured DIY wings.
- A simple wire outline can provide structure while keeping the finished piece easy to handle.
- Hot glue is useful for securing lace and reinforcing small sections during assembly.
- Neutral cream and white tones create an elegant, versatile handmade look.
- The finished wings can be customized for decor, photography, celebrations, or creative displays.
- Careful measuring and trimming help create a balanced pair of wings.
How to Make DIY Angel Wings With Lace
This lace angel wings project begins with one of the most important elements of the design: the wing shape. Rather than trying to build a complicated structure, focus on creating two lightweight, symmetrical forms. Lace adds visual interest immediately because its open pattern creates dimension without making the wings look heavy.
The reference style uses a warm neutral lace with an intricate floral pattern. That type of fabric is especially effective because the repeating details become part of the decoration. When placed over a simple frame, the lace creates an airy appearance while still clearly defining the shape of each wing.
Before you start gluing anything, take a few minutes to plan the proportions. Place both wing outlines next to one another and compare their size and curves. They do not need to be mathematically perfect, but they should look balanced as a pair.
Materials You May Need
You do not need an extensive craft collection for this project. The exact materials can vary depending on whether you want decorative wings, a wall hanging, or a wearable design.
- Decorative lace fabric
- Flexible craft wire
- Hot glue gun and glue sticks
- Sharp fabric scissors
- Cardboard or paper for creating a template
- Ribbon, trim, or decorative accents if desired
- Optional backing material for additional stability
Choose materials according to the final use. For wall decor, you can focus primarily on appearance. If the wings will be handled frequently, extra reinforcement around the edges and center connection can make the finished project more durable.
Important: When working with a hot glue gun, protect your work surface and handle the glue carefully. Allow freshly glued sections to cool before adjusting the lace or wire.
Step 1: Create a Simple Wing Template
A template makes the project much easier, especially when you want two wings that look similar. Draw a long, curved wing shape on paper or cardboard. Think about the silhouette rather than the internal details. A rounded upper section that gradually narrows toward the bottom creates a graceful wing profile.
Cut out the template and use it as a guide when shaping your wire. You can also place the template over your lace before cutting so you have a clear idea of how much fabric you need.
Keep the Shape Natural
Do not worry about making every curve perfectly identical. Handmade projects often look more appealing when they retain a little character. What matters most is that the two wings have a similar overall scale and direction.
Step 2: Shape the Wire Frame
Use flexible craft wire to trace the outside edge of your template. Bend the wire slowly rather than making sharp corners. Smooth curves will help the lace sit naturally over the frame and give the finished wings a softer appearance.
Once one outline is complete, create the second wing. Compare both frames before moving forward. If one side is noticeably larger or more curved, adjust it while the wire is still easy to manipulate.
Leave a small amount of extra wire near the inner edge if you plan to connect the wings together. This central area is important because it can become the strongest point of the finished design.
Step 3: Cut the Lace Carefully
Lay the lace flat on your work surface and position the wire frame over it. Cut around the shape while leaving a small border of fabric beyond the wire. This extra material gives you something to fold around the frame and secure.
Intricate lace can be delicate, so use sharp scissors and make controlled cuts. Avoid pulling aggressively on the fabric because stretching can distort the pattern.
If your lace has a strong floral or repeating pattern, consider how that pattern will appear on each wing. Rotating or positioning the fabric intentionally can make the finished pair look more polished.
Expert Insight
The lace is more than a covering. Its open texture creates the visual character of the wings, so choose a pattern that remains recognizable when stretched over the frame. Floral, geometric, or vintage-inspired lace can each create a different mood.
Step 4: Attach the Lace to the Frame
Place the lace over the wire and begin securing it in small sections. A hot glue gun can be useful here because you can work gradually rather than trying to attach the entire edge at once.
- Position the lace so the wire follows the outer edge.
- Apply a small amount of glue to one section of the frame.
- Fold the lace neatly around the wire.
- Press the fabric into place carefully.
- Continue around the perimeter in short sections.
Working slowly helps prevent wrinkles and keeps the fabric evenly distributed. Too much glue can create visible bumps, especially underneath light-colored lace, so small amounts are usually preferable.
Trim the Edges
After the glue has cooled completely, inspect the perimeter. Trim loose threads and excess fabric with sharp scissors. Take your time around curves because uneven trimming can make the finished wing look less refined.
Step 5: Connect the Wings
Once both individual wings are covered, bring them together at the center. The exact connection method depends on how you plan to use the project. For decorative purposes, the central sections can be secured with additional wire, strong adhesive, ribbon, or another suitable craft material.
Position the wings so they open outward naturally. A slight angle can make the pair look more dimensional than two completely flat shapes.
Pro Tip: Assemble the wings on a flat surface first, then step back and look at them from a distance. Small adjustments to the angle or center connection can make a surprisingly big difference to the overall silhouette.
Easy Ways to Customize Lace Angel Wings
One of the best parts of this DIY is how easily you can change the final appearance. The lace and wire provide the foundation, but the finishing details can reflect your personal style.
Try Different Lace Patterns
Cream lace gives the project a soft vintage-inspired appearance, while bright white lace can feel cleaner and more contemporary. A denser lace creates a more substantial look, while open lace emphasizes lightness and texture.
Add Ribbon or Decorative Trim
Ribbon can be used around the outer edge, through the center, or at the connection point. Choose a narrow trim if you want the lace to remain the main focus. A slightly wider ribbon can add more visual definition.
Create a Layered Look
For extra depth, consider adding a second layer of lace. Position the layers carefully so their patterns complement rather than completely hide one another. This technique can make simple materials look much richer.
Creative Ways to Use Your Finished Wings
DIY angel wings do not have to serve just one purpose. Their soft lace texture makes them suitable for many creative settings.
- Wall decor: Display the wings as a handmade accent in a bedroom, craft room, or creative space.
- Party decoration: Use them as part of a whimsical celebration display.
- Photo props: Their recognizable silhouette can add interest to creative photography.
- Seasonal displays: Incorporate neutral lace wings into decorative arrangements.
- Craft projects: Adapt the shape and scale for other handmade decor ideas.
The lightweight construction also makes the project easy to personalize. You can make a large statement piece or create smaller versions for shelves and decorative arrangements.
Common Mistakes to Avoid
Simple craft projects can still benefit from a little planning. One common mistake is cutting the lace too close to the wire. Without enough fabric to fold around the edge, securing the material becomes much harder.
Another issue is using too much adhesive. Excess glue can show through delicate fabric and make the edges feel bulky. Apply small amounts and build up the attachment gradually.
It is also worth checking the wing shape before permanently connecting the two sides. Once the central area is secured, making major changes can be more difficult.
At a Glance
- Start with a simple, balanced wing template.
- Shape flexible wire into smooth curves.
- Cut lace with a small allowance around the frame.
- Secure the fabric gradually with small amounts of glue.
- Customize with trim, ribbon, or additional lace layers.
Conclusion: Make Your Own Lace Angel Wings
Creating DIY angel wings from lace is a lovely example of how simple craft supplies can become something visually striking. The combination of delicate fabric, a lightweight frame, and careful shaping creates an elegant handmade piece without requiring complicated techniques.
Start with a basic silhouette, focus on clean edges, and let the lace provide most of the decorative detail. Once you understand the basic construction, you can experiment with different sizes, fabrics, trims, and finishes to create a version that fits your own decorating style.
Whether you make them for a creative display, a photography setup, a celebration, or simply as a handmade home decor project, these lace wings offer plenty of room for personalization. Gather your materials, sketch your shape, and enjoy turning an ordinary piece of lace into a beautiful DIY creation.
Tags
DIY Angel Wings Lace Crafts DIY Home Decor Handmade Decor Lace Wall Decor Easy Craft Projects Budget DIY Creative Home Accents