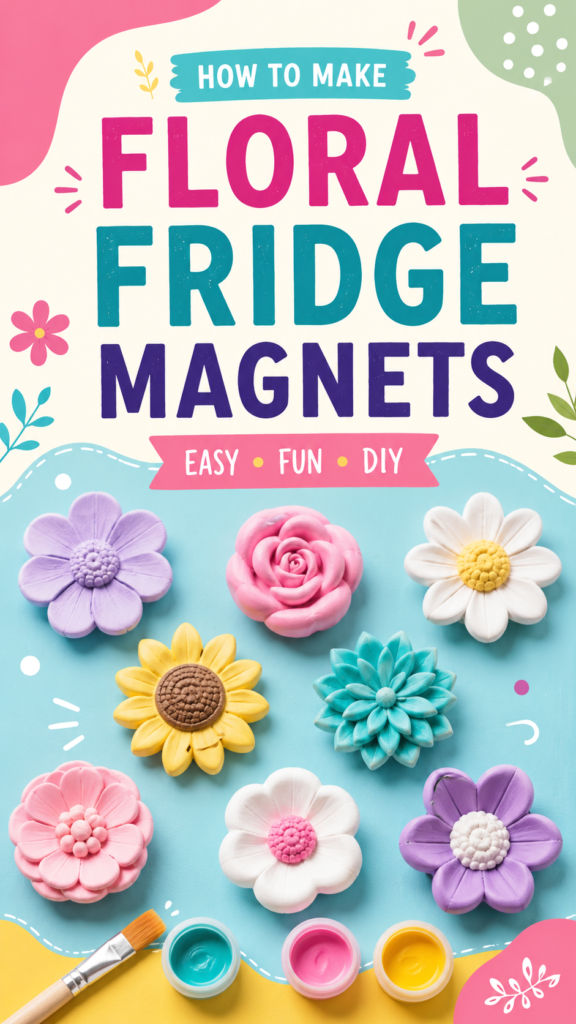
Give your kitchen a cheerful handmade touch with a collection of colorful floral fridge magnets. These simple DIY fridge magnets combine creativity, color, and everyday usefulness in one easy craft project. Whether you want to brighten a plain refrigerator, hold shopping lists in place, decorate a workspace, or make a small handmade gift, flower magnets are a fun project to try.
The colorful design shown here pairs handmade flower shapes with soft pastel shades, playful paint supplies, and a bright craft-friendly background. The result is a project that feels approachable rather than complicated. You can experiment with different flower shapes, colors, sizes, and finishes to create a set of magnets that matches your kitchen decor or personal style.
Key Takeaways
- Floral fridge magnets are a simple way to personalize your kitchen.
- Mix different flower shapes and colors to create a playful collection.
- Small craft details can make handmade magnets look polished and decorative.
- Painted flowers work especially well with cheerful pastel or bright color palettes.
- DIY magnets can be adapted for notes, reminders, photos, lists, and small artwork.
Why Make Your Own Fridge Magnets?
Fridge magnets may be small, but they can have a surprisingly big impact on a kitchen. A refrigerator often becomes a place for grocery lists, reminders, children’s drawings, photographs, invitations, recipes, and little notes. Instead of relying on generic magnets, making your own gives you the opportunity to turn those practical items into part of your decor.
DIY fridge magnets are also a great project when you want something creative without committing to a large craft. A handful of flower shapes can become an entire coordinated collection. You can make several magnets in one sitting, experiment with different colors, and adjust the design as your ideas develop.
Another advantage is personalization. A floral magnet can be soft and minimalist, bright and playful, or colorful and whimsical. The same basic idea can suit many different decorating styles simply by changing the palette and details.
Important: The most appealing handmade magnets do not need to be perfectly identical. Small variations in petal shapes, colors, and painted details can give the finished collection a charming handmade character.
Materials for Floral Fridge Magnets
The exact supplies can vary depending on the type of flower shapes you want to create. The colorful craft setup suggests a project built around decorative flower pieces, paint, and a small brush. Choose materials that are easy for you to shape, paint, and decorate.
- Flower-shaped craft pieces or a suitable moldable craft material
- Small magnets with enough strength to hold lightweight notes
- Craft paint in your favorite colors
- Small paintbrushes for details and finishing touches
- Palette or small containers for mixing colors
- Craft glue suitable for the materials you are using
- Optional small decorative tools for texture and patterns
- Paper or a protected work surface for painting
You do not need an enormous collection of supplies to get started. A few flower shapes, several complementary paint colors, and basic brushes are enough to create a visually interesting set. If you already have leftover craft materials at home, this is an excellent way to use them.
Choosing a Color Palette
Color is one of the easiest ways to make DIY floral magnets stand out. The example design uses a cheerful mix of pink, lavender, white, yellow, and blue-green tones. This type of palette creates a playful look while allowing every flower to feel slightly different.
For a soft kitchen aesthetic, try blush pink, lavender, cream, pale blue, and muted yellow. If you prefer something more energetic, combine turquoise, bright pink, sunny yellow, coral, and purple. For a modern look, keep the flowers mostly white or neutral and use just one or two stronger accent colors.
Try a Coordinated Palette
Choose three to five colors that work well together instead of painting every flower a completely unrelated shade. Repeating colors throughout the collection helps the finished magnets look intentional and coordinated.
Create Contrast With Flower Centers
A contrasting center can make a simple flower shape much more noticeable. For example, a white flower with a yellow center feels bright and classic, while a turquoise flower with a lighter center creates a more contemporary effect.
How to Make Floral Fridge Magnets
Once your materials and colors are ready, the project can be completed in a series of simple stages. The key is to allow each part to be finished properly before moving on to the next step.
1. Prepare the Flower Shapes
Start by gathering the flower shapes you want to turn into magnets. If you are creating the flowers from a moldable material, shape each piece carefully and give attention to the petals and center. If you are using ready-made craft pieces, check that their surfaces are clean and ready for paint.
Mixing different flower designs can make the finished set much more interesting. Include large blooms alongside smaller flowers, and consider using different petal arrangements to create visual variety.
2. Add the Base Color
Paint each flower with your chosen base color. Depending on the material and paint, you may need more than one thin coat to achieve an even finish. Thin layers are often easier to control than applying a very thick amount at once.
Let the surface dry between coats. This helps prevent smudging and makes it easier to add small decorative details later.
3. Decorate the Petals and Centers
This is where the magnets can really become personal. Add a contrasting center, subtle lines, dots, highlights, or other simple details. You do not have to decorate every flower in exactly the same way.
A textured center can give a flower more dimension, while a simple color contrast can keep the design clean. If you enjoy detailed crafting, use a fine brush for small accents. For a quicker project, let the flower shape itself provide most of the visual interest.
Expert Insight
Think of the entire set as one collection rather than treating every magnet as a completely separate project. Repeating a few colors or decorative details creates a cohesive look while still leaving plenty of room for creativity.
4. Attach the Magnets
Once the decorative pieces are completely dry, attach a small magnet to the back of each flower using an adhesive appropriate for both surfaces. Position the magnet centrally when possible so the flower sits evenly against the refrigerator.
Follow the instructions for your adhesive and allow it to set fully before using the magnets. This is particularly important if the magnets will be used to hold paper, photographs, or several notes.
5. Test the Finished Magnets
Place each flower on a clean metal surface and check that it sits flat. Test how well it holds a lightweight piece of paper before using it for anything heavier. If a flower tilts or slides, repositioning the magnet may help improve its balance.
Creative Ways to Use Floral Fridge Magnets
Once your handmade flowers are finished, there are plenty of ways to use them beyond simply decorating the refrigerator. Their practical purpose makes them especially useful for organizing everyday kitchen life.
- Hold weekly meal plans on the refrigerator.
- Display grocery lists where they are easy to see.
- Secure favorite recipes or cooking notes.
- Arrange family photographs into a colorful display.
- Hold children’s drawings and artwork.
- Decorate a magnetic memo board.
- Create a cheerful workspace display if you have a magnetic surface.
- Give a small set as a handmade gift.
For a particularly attractive display, group flowers in different sizes rather than lining them up evenly. A loose arrangement can make the refrigerator feel more like a decorated surface than a purely functional appliance.
Pro Tip: Photograph your finished magnets together as a collection. A coordinated arrangement of colorful flowers is more visually striking than photographing one small magnet by itself, especially when sharing your DIY project online.
Tips for Better DIY Magnet Results
Keep the Layers Light
When painting small craft pieces, several light layers can produce a cleaner result than one heavy layer. This is especially helpful around petal edges and textured surfaces.
Use Different Flower Sizes
A collection made entirely from identical flowers can look repetitive. Combining larger blooms with smaller designs creates a stronger visual rhythm and gives you more options when arranging the magnets.
Do Not Overdecorate
Simple details can often have the greatest impact. If the flower already has an interesting shape or texture, a clean coat of paint and a contrasting center may be all it needs.
Match the Magnets to Your Space
Consider the colors already present in your kitchen. Repeating a shade from nearby accessories, storage containers, artwork, or textiles can make your handmade magnets feel like a deliberate part of the room.
Easy Variations to Try
Once you have made your first set, it is easy to adapt the same concept into different themes. Try monochrome flowers for a simple modern look, rainbow flowers for a playful display, or seasonal colors for a rotating kitchen decoration.
You can also experiment with the flower centers. Use contrasting colors, layered shapes, small dots, or textured effects to give each design its own personality. Another option is to create a set where every flower uses the same center color, tying the entire collection together.
For a gift, make several matching magnets and package them as a small handmade set. A collection of colorful flowers can be a thoughtful addition to a housewarming gift, craft basket, or homemade kitchen-themed present.
At a Glance
- Choose lightweight flower shapes for easy handling.
- Use a small coordinated palette for a polished collection.
- Let painted layers dry before adding decorative details.
- Attach magnets securely and test them with lightweight items.
- Arrange different flower sizes together for a lively display.
Conclusion
DIY floral fridge magnets are a simple, colorful way to turn an everyday kitchen essential into something personal. With a few flower shapes, craft paint, brushes, adhesive, and small magnets, you can create a collection that adds character to your refrigerator while still serving a useful purpose.
The beauty of this project is its flexibility. You can keep the designs soft and pastel, make them bright and playful, or coordinate them with the colors already in your home. Change the flower shapes, experiment with centers, and combine different sizes until you find an arrangement you love.
Whether you are looking for an easy weekend craft, a creative kitchen decor idea, or a handmade gift project, floral fridge magnets are a fun place to start. Gather your favorite colors, put on your creative hat, and make a set that brings a little more color to your everyday routine.
Tags
Fridge Magnets DIY DIY Magnets Floral Crafts Flower Magnets Kitchen Decor Easy DIY Crafts Handmade Home Decor Craft Ideas