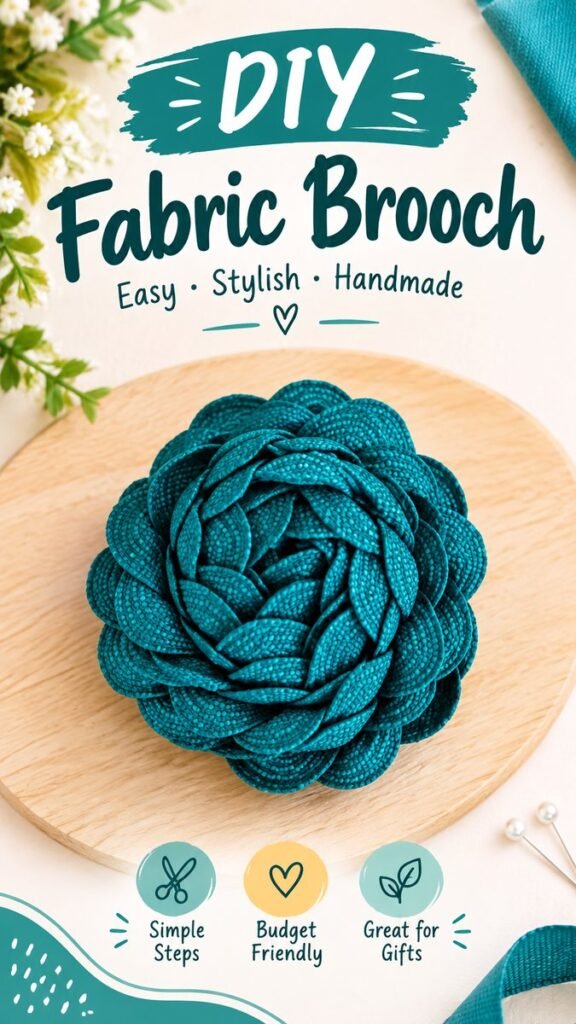
A handmade brooch can turn a simple outfit into something personal, creative, and full of character. This brooch DIY idea combines fabric, texture, and an eye-catching floral shape to create a beautiful accessory that can be worn on jackets, scarves, bags, hats, or even used as a thoughtful handmade gift. If you enjoy easy sewing projects, fabric crafts, or creative ways to use leftover materials, this project is a wonderful place to start.
The featured design has a rich teal tone and layered, petal-like texture that gives the brooch a dimensional appearance. It looks decorative and sophisticated while still being approachable for a home crafter. You can recreate the general concept with fabric scraps and adapt the colors, size, and shape to match your own style.
Key Takeaways
- A fabric brooch is a simple project with plenty of room for creativity.
- Layered fabric pieces can create a full, flower-inspired texture.
- Teal and other rich colors make handmade accessories especially eye-catching.
- Fabric scraps can be transformed into useful and attractive accessories.
- The finished brooch can decorate clothing, bags, scarves, and gifts.
Why Try a Brooch DIY Project?
DIY accessories are a great way to experiment with crafts without needing a large workspace or an extensive collection of supplies. A brooch is particularly convenient because it is small, portable, and easy to customize. You can make one while working on another sewing project, use fabric left over from previous crafts, or create several designs in different colors.
Unlike mass-produced accessories, a handmade brooch can reflect your personal taste. You choose the fabric, color, dimensions, texture, and finishing details. That makes every finished piece feel unique.
Important: The most appealing part of this style is its layered texture. Rather than relying on complicated decoration, overlapping fabric pieces create visual depth and make a simple accessory look much more detailed.
Materials for a Handmade Fabric Brooch
You do not need a long list of specialty supplies to explore this brooch DIY idea. The exact materials can vary depending on the technique you prefer, but the basic concept can be created with common craft and sewing supplies.
- Fabric scraps in your chosen color
- Fabric scissors or sharp craft scissors
- Needle and coordinating thread
- A brooch pin or suitable backing
- Fabric glue, if desired for certain finishing steps
- Small amounts of stuffing or felt, depending on the construction
- Pins or clips for temporarily holding layers
The fabric choice will have a major effect on the final appearance. A textured fabric can make the layered design look especially interesting, while smooth cotton or lightweight material can produce a softer and more delicate result. If you are using fabric from your existing craft supplies, experiment with small pieces before committing to the entire brooch.
How to Make a DIY Fabric Brooch
The beauty of this project is that you can adapt the construction method to your preferred crafting style. The finished design shown here has a rounded floral appearance with many overlapping sections. The following approach focuses on creating that layered effect rather than following a rigid pattern.
1. Choose Your Fabric and Color
Start by selecting a fabric that works well with the look you want. A deep teal, like the featured design, creates a bold statement, but you can easily choose another shade. Jewel tones, neutrals, pastels, or contrasting combinations can all work beautifully.
For a coordinated accessory, consider choosing a color that already appears in your wardrobe. If you want the brooch to stand out, select a shade that contrasts with the clothing or bag where you plan to wear it.
2. Prepare the Fabric Pieces
Cut several small fabric pieces that can be shaped into rounded or pointed petal-like forms. Try to keep the pieces relatively consistent in size, but do not worry if they are not perfectly identical. Small variations can actually make the finished brooch look more organic.
If you want a fuller brooch, prepare more pieces. For a smaller or flatter accessory, use fewer layers. Keeping the pieces organized before assembly can make the construction process easier.
3. Build the Layered Shape
Arrange the fabric pieces around a central point, overlapping one another as you work toward the outside. The goal is to create a circular or flower-like form with visible layers. You can adjust the direction of each piece to make the surface appear more dynamic.
Work gradually instead of attaching everything at once. This gives you an opportunity to check the balance of the shape and reposition pieces if one area looks too crowded or too thin.
4. Secure the Layers
Once you are happy with the arrangement, secure the layers using stitching, suitable fabric adhesive, or a combination of both. Sewing generally provides a dependable finish for a wearable accessory, while fabric glue can be useful for positioning or reinforcing small areas.
Take your time at this stage. A secure construction is important because a brooch will be handled frequently when it is attached to and removed from clothing or bags.
5. Add the Brooch Backing
When the front is complete, attach a brooch pin or suitable accessory backing to the rear. Check that it is centered and firmly secured. Allow any adhesive to cure according to its instructions before using the finished piece.
Pro Tip: Before attaching the backing permanently, place the brooch against a jacket, scarf, or bag to check its balance and size. A small adjustment at this stage can make the finished accessory much easier to wear.
How to Customize Your Brooch DIY
One of the best things about making a fabric brooch yourself is the number of ways you can personalize it. The basic layered concept can become a completely different accessory simply by changing the fabric, proportions, or finishing details.
Experiment With Different Colors
A single-color brooch creates a polished appearance similar to the featured teal design. For something more playful, combine two or three complementary fabrics. You could also create a soft ombré effect by arranging lighter and darker shades around the design.
Change the Size
A large brooch can become the focal point of a plain coat or cardigan, while a smaller version can add a subtle accent to a scarf or handbag. Make a few different sizes and use them for different outfits and occasions.
Add Your Own Decorative Details
You can introduce beads, buttons, embroidery, contrasting thread, or small decorative fabric pieces if they suit your style. Keep the details balanced so they complement the layered texture instead of hiding it.
Where to Wear a Handmade Fabric Brooch
A DIY brooch is more versatile than it may initially appear. Its small size makes it easy to move from one item to another, allowing one handmade accessory to refresh several pieces in your wardrobe.
- Jackets and coats: Add a bold handmade accent to a plain outer layer.
- Scarves: Use a brooch to add decoration while helping hold a scarf in position.
- Handbags: Attach the design to a fabric bag for a personalized touch.
- Cardigans: Use a colorful brooch to brighten a simple knit outfit.
- Hats: A lightweight version can add an artistic detail to a simple hat.
- Gift wrapping: Attach a handmade brooch to a wrapped gift for a reusable decorative surprise.
Why This Matters
A small accessory can have a surprisingly big effect on an outfit. Because a handmade brooch is removable, you can change its placement whenever you want and reuse the same piece across different looks.
Tips for a Neat and Professional Finish
A successful fabric craft is not only about the design on the front. The finishing work also determines how polished and durable the final accessory feels. Before calling your brooch complete, inspect the edges, attachment points, and overall shape.
- Use sharp scissors to create cleaner fabric edges.
- Keep the central area secure so the layers do not shift easily.
- Trim loose threads before attaching the backing.
- Check that the brooch pin sits securely on the reverse side.
- Keep the overall shape balanced without requiring perfect symmetry.
- Test the finished accessory gently before wearing it outside the home.
If you are new to sewing, do not worry about achieving a flawless result on your first attempt. Handmade projects often become more attractive when they retain a little of their handcrafted character. Focus on secure construction and a pleasing overall shape rather than absolute perfection.
Creative Ways to Use Fabric Scraps
This brooch DIY project is also a practical way to give small pieces of leftover fabric a second life. Sewing and craft projects often leave behind scraps that are too small for larger creations but still too useful to throw away. Small accessories are ideal for those pieces.
Try sorting scraps by color, texture, or pattern. You can create coordinated brooches from one collection or combine contrasting materials for a more eclectic look. This approach can turn leftover materials into a small collection of handmade accessories without requiring a large amount of new fabric.
Brooch DIY Ideas for Handmade Gifts
Handmade accessories can make thoughtful gifts because they combine usefulness with personal creativity. A fabric brooch can be made in a color that suits the recipient, packaged with a scarf or bag, or included as a small handmade extra with another present.
You can also make several matching pieces for friends or family members while changing the colors slightly for each person. Because the project is compact, it is convenient for creating multiple handmade gifts without taking up much workspace.
At a Glance
- Choose textured fabric for a dimensional finish.
- Layer small pieces to create a full floral-inspired shape.
- Customize the color and size to match your wardrobe.
- Secure the backing carefully for comfortable wear.
- Use fabric scraps to make an affordable handmade accessory.
Conclusion
This brooch DIY project is a simple, creative way to turn fabric into a stylish handmade accessory. The layered design creates plenty of texture and visual interest, while the compact size makes the finished brooch practical for everyday styling. Whether you are an experienced sewing enthusiast or just beginning to explore fabric crafts, you can adapt the idea to suit your skills and personal taste.
Start with one color, a few fabric pieces, and a simple brooch backing. As you become more comfortable with the technique, experiment with different shapes, textures, sizes, and color combinations. Before long, you can have a collection of handmade brooches ready to decorate jackets, scarves, bags, and gifts.
Make it your own: The best DIY accessories are the ones that reflect your creativity. Save this idea, gather your favorite fabric scraps, and create a brooch that feels completely yours.