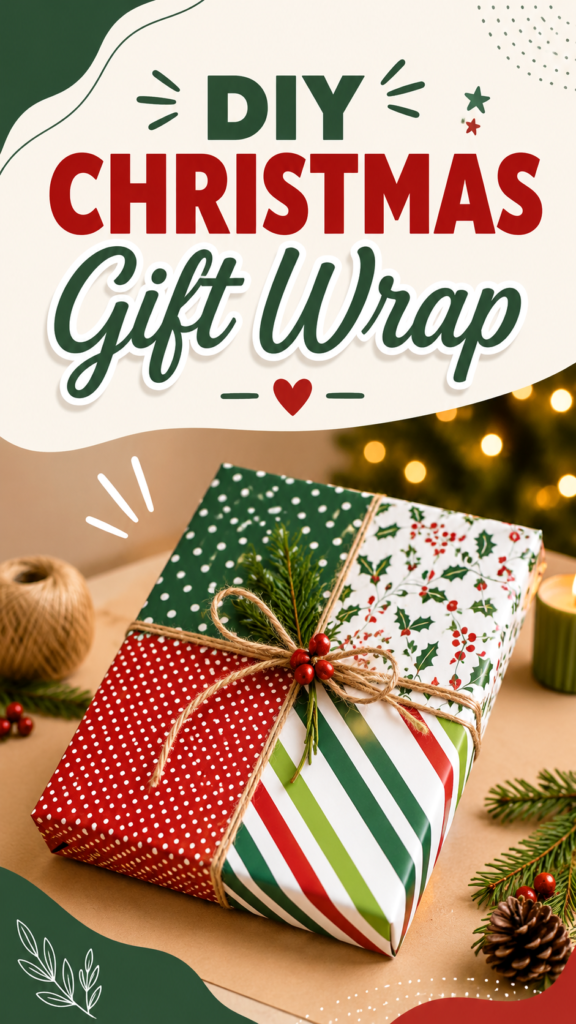
Beautiful gift wrapping does not have to be complicated or expensive. A few coordinating sheets of patterned paper can transform an ordinary present into something that feels thoughtful, festive, and completely personal. The inspiration here comes from a cheerful mix of Christmas patterns, including classic red and green, playful polka dots, plaid, and holly-inspired botanical prints. Together, these designs create a cozy holiday look while keeping each package visually interesting.
DIY wrapping paper is an especially fun project when you want your Christmas gifts to feel more handmade. Instead of relying on one traditional roll of paper, you can mix patterns, layer simple details, and finish each package with natural accents such as twine or greenery. The result is a collection of presents that looks coordinated without being perfectly matched.
Key Takeaways
- Combine two or three Christmas wrapping paper patterns for a layered look.
- Use red, green, white, and natural tones to create a cohesive holiday palette.
- Polka dots, plaid, stripes, and botanical prints work beautifully together.
- Simple twine and greenery can make basic wrapping look handmade.
- Choose patterns that complement one another rather than trying to make every package identical.
Why DIY Wrapping Paper Makes Christmas Gifts More Special
Gift wrapping is often the first part of a present that someone sees. Before the box is opened, the colors, patterns, ribbon, and finishing touches create a little moment of anticipation. That is what makes creative Christmas wrapping so rewarding. You are not simply covering a package. You are creating part of the gift-giving experience.
DIY wrapping paper also gives you freedom to experiment. You can choose a traditional Christmas palette, mix modern prints with classic patterns, or use leftover paper from previous craft projects. Even small changes can make each package look distinctive.
Important: The secret to attractive DIY gift wrapping is not using more decorations. It is choosing a few complementary elements and repeating them throughout your packages. A consistent color palette can make completely different patterns look like part of the same collection.
Choose a Festive Color Palette
The easiest place to start is with color. The classic combination of red, green, and white instantly creates a Christmas-inspired atmosphere. Natural brown tones from kraft paper or jute twine can soften the brighter colors and add a cozy handmade quality.
The featured combination uses several variations of this traditional palette. Bright red adds energy, deep green creates balance, and white gives the patterns enough visual space to remain fresh. Small touches of darker green can help connect the different designs.
Classic Red and Green
Red and green are dependable choices for Christmas gift wrapping because they immediately communicate a festive mood. A red patterned paper can become the visual focal point, while green polka dots or botanical designs provide contrast.
If you are wrapping several gifts, consider using one color as the dominant shade and the other as an accent. This keeps the finished collection from feeling too busy.
Add Neutral Tones
Neutral colors are useful when working with several bold Christmas prints. Cream, white, kraft brown, and natural twine can give the eye a place to rest. They also make bright red and green patterns look more intentional.
A neutral base is particularly helpful if your wrapping paper has multiple motifs. You can then add a colorful ribbon, bow, tag, or small botanical accent without overwhelming the package.
Mix Christmas Wrapping Paper Patterns
Pattern mixing is one of the easiest ways to create beautiful DIY Christmas wrapping paper combinations. Instead of choosing several papers that look almost identical, look for designs that have different scales and shapes but share a few colors.
For example, a small polka dot print can pair nicely with a larger plaid pattern. A botanical holly print can add an organic shape next to a geometric stripe. A tiny repeating Christmas motif can balance a larger, more expressive design.
Polka Dots
Polka dots are playful and versatile. A green-and-white dotted paper can add movement without introducing another complicated illustration. Because the pattern is simple, it works well beside floral, botanical, plaid, and striped wrapping paper.
Plaid and Checkered Prints
Plaid gives Christmas packages a cozy, traditional feeling. Red, green, and white checks are especially useful for creating a classic holiday look. If the plaid is bold, pair it with a simpler paper rather than another large-scale pattern.
Botanical and Holly-Inspired Designs
Leaves, berries, and evergreen-inspired patterns bring a natural quality to gift wrapping. These motifs are particularly attractive when combined with twine or fresh-looking greenery. They can make a package feel warm and handcrafted without requiring elaborate embellishments.
Expert Insight
When mixing wrapping paper, repeat at least one visual element across the designs. Matching colors are the easiest option, but you can also repeat a motif such as greenery, dots, stripes, or berries. This creates harmony even when every sheet has a different pattern.
How to Create a DIY Gift-Wrapping Look
You do not need complicated craft equipment to recreate this kind of festive wrapping style. The most important materials are attractive paper and a few simple finishing supplies.
Materials to Gather
- Christmas wrapping paper in two or more coordinating patterns
- Scissors
- Clear tape or double-sided tape
- Natural twine, ribbon, or decorative string
- Small pieces of greenery or festive botanical accents
- Optional gift tags or simple handwritten labels
Before wrapping, place all of your supplies on a clear surface. This makes it easier to compare patterns and decide which combinations work best. If you are wrapping multiple gifts, lay the papers next to one another first rather than choosing them one package at a time.
Step 1: Pick Your Main Pattern
Start with the paper that you like most. This becomes the anchor for your color palette. If your favorite paper has a busy botanical pattern, choose simpler papers for the remaining packages. If your favorite is a simple dot or stripe, you can introduce a more detailed print alongside it.
Step 2: Measure Before Cutting
Place the gift on the paper and estimate how much material is needed to cover all sides. Avoid using significantly more paper than necessary because excess material can create bulky corners. A neat fold is one of the easiest ways to make DIY gift wrapping look polished.
Step 3: Fold the Edges Neatly
Make clean folds along the edges and press the creases gently with your fingers. Keep the paper smooth as you work. For a more refined appearance, use double-sided tape where possible so adhesive remains hidden.
Step 4: Add Twine or Ribbon
Once the gift is wrapped, add twine or ribbon around the package. Natural jute-style twine is especially effective with red and green paper because it introduces a warm, rustic contrast.
Try wrapping the twine vertically and horizontally to create a simple cross pattern. You can tie the final knot or bow near the center, then tuck a small decorative element underneath.
Step 5: Finish With a Small Accent
A tiny finishing detail can completely change the appearance of a wrapped gift. Consider adding a small evergreen sprig, a berry accent, a paper tag, or a simple decorative bow. Keep the embellishment proportional to the size of the package.
Pro Tip: If your wrapping paper already has a strong pattern, keep the finishing details simple. A piece of natural twine and one small greenery accent can be more effective than several layers of ribbon and decorations.
Creative Ways to Personalize Christmas Gifts
The beauty of DIY wrapping is that you can adjust every package to suit the recipient. Someone who loves traditional Christmas style might appreciate red plaid and greenery, while a friend with a more playful taste may prefer polka dots and bright colors.
Create a Coordinated Gift Collection
For a beautifully styled Christmas tree or gift table, use several different papers from the same color family. The presents do not need to match exactly. In fact, slight differences make the display more interesting.
Try selecting three or four designs and rotating them across your gifts. For example, use red patterned paper on one package, green polka dots on another, plaid on a third, and botanical print on a fourth. Repeat the same twine or ribbon style across the collection to tie everything together.
Use Leftover Materials
DIY wrapping paper is also a practical way to use leftover craft supplies. Small scraps of patterned paper can become gift tags, belly bands, decorative strips, or layered accents. Old ribbon, twine, paper cutouts, and small pieces of greenery can also find a second use.
This approach makes holiday gift wrapping more creative while helping you avoid unnecessary waste. It is also an easy project to work on gradually instead of trying to wrap every gift at once.
Tips for Better-Looking DIY Wrapping Paper
- Limit your palette. Two or three main colors are usually enough for a cohesive Christmas look.
- Mix pattern sizes. Combine small motifs with larger checks, stripes, or botanical prints.
- Keep folds crisp. Neat corners can make inexpensive paper look much more polished.
- Repeat finishing details. Using the same twine or ribbon across several packages creates visual consistency.
- Do not overdecorate. Let beautiful wrapping paper remain the star of the package.
DIY Wrapping Paper for a Cozy Christmas Display
Once the presents are wrapped, think about how they will look together. A group of patterned gifts can become part of your Christmas decor, especially when placed near a tree, on a console, or beside a cozy holiday display.
The combination of patterned paper, warm lighting, greenery, and natural textures creates a welcoming atmosphere. You can enhance that feeling by keeping the surrounding decorations relatively simple. The gifts themselves become colorful decorative elements.
For a more relaxed look, combine different package sizes and rotate the patterns rather than arranging identical gifts together. This creates the casual, collected feeling often associated with handmade holiday decorating.
Why Pattern Mixing Works So Well
Pattern mixing works because contrast creates visual interest. A polka dot pattern has a different rhythm from plaid, while botanical motifs introduce softer organic shapes. When those patterns share colors, the contrast feels intentional rather than chaotic.
The same principle can be applied to Christmas decorations, table settings, party details, and handmade crafts. Choose a common color story, vary the pattern scale, and give the eye a few quieter areas to balance the more decorative elements.
Quick Points
- Start with a simple red, green, and white palette.
- Pair bold prints with quieter patterns.
- Use twine or ribbon to unify different papers.
- Add one small natural accent for a handmade finish.
- Let the wrapping paper provide most of the visual impact.
Final Thoughts on DIY Christmas Wrapping Paper
DIY wrapping paper is a simple way to make Christmas gifts feel more personal, creative, and memorable. You do not need elaborate techniques or expensive supplies. A thoughtful combination of festive patterns, coordinated colors, neat folds, and a few small details can create an impressive result.
Use classic red and green when you want a traditional holiday mood, or experiment with different shades and patterns to make the look your own. Polka dots, plaid, stripes, and botanical prints can all work together when they share a consistent color palette.
Most importantly, have fun with the process. Gift wrapping is an opportunity to slow down and add a little creativity to the holiday season. Whether you are preparing one special present or wrapping an entire collection, handmade details can make even a simple package feel thoughtfully chosen.
Remember: Great DIY Christmas wrapping does not depend on perfection. Focus on a cohesive palette, attractive pattern combinations, and one or two thoughtful finishing touches. The result will feel festive, warm, and uniquely yours.
Tags
DIY Wrapping Paper Christmas Gift Wrapping DIY Christmas Crafts Holiday Wrapping Ideas Creative Gift Wrapping Christmas Paper Crafts Handmade Gift Ideas Festive Gift Wrap