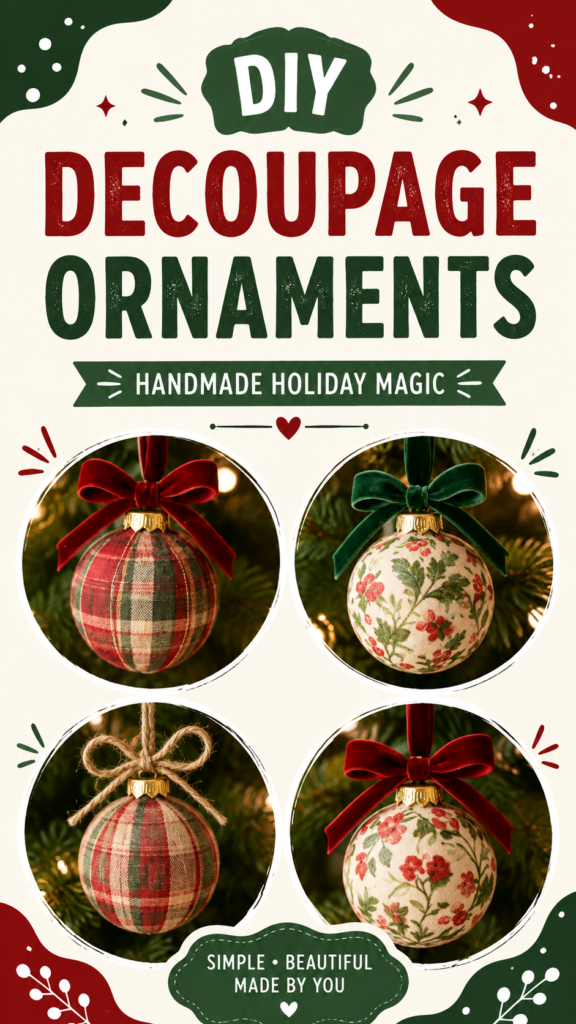
Handmade Christmas decorations have a special way of making the holiday season feel warmer, more personal, and more creative. DIY decoupage ornaments are an especially beautiful option because they can transform simple baubles into decorative pieces with fabric-inspired patterns, botanical details, classic plaid, and elegant ribbon accents. With a few basic materials and a little creativity, you can create ornaments that look thoughtfully designed while still feeling handmade.
The ideas featured here combine traditional holiday colors with timeless patterns. Red and green plaid ornaments create a cozy seasonal look, while floral designs bring a softer cottage-inspired feel. Velvet bows, natural twine, and decorative greenery complete the presentation, making these ornaments suitable for Christmas trees, gift wrapping, holiday centerpieces, or handmade gifts.
Key Takeaways
- Decoupage is an easy way to personalize plain Christmas ornaments.
- Plaid and botanical patterns create a classic handmade holiday aesthetic.
- Ribbon, velvet bows, and twine can completely change an ornament’s appearance.
- A coordinated color palette helps handmade decorations look polished.
- DIY ornaments can be used for decorating, gifting, or seasonal displays.
Why DIY Decoupage Ornaments Are Worth Making
Store-bought ornaments are convenient, but handmade Christmas ornaments offer something that ready-made decorations often cannot: personality. You can choose patterns that match your existing holiday decor, experiment with different textures, and make each ornament slightly different from the next.
Decoupage is particularly appealing for holiday crafting because it allows decorative paper, napkins, fabric-inspired prints, and other lightweight designs to become part of the ornament surface. Instead of starting with a complicated woodworking or sewing project, you can focus on selecting beautiful patterns and combining them with simple decorative details.
Important: The most successful DIY ornaments are not necessarily the most complicated. A simple pattern paired with a well-chosen ribbon and neat finishing details can look more sophisticated than an ornament overloaded with decorations.
Choosing a Color Palette for Handmade Christmas Ornaments
Color is one of the easiest ways to create a cohesive Christmas decoration collection. The classic combination of deep red, forest green, cream, and natural brown works beautifully for a traditional holiday style. These colors also pair naturally with evergreen branches, warm lights, wooden accents, and neutral interiors.
For a cozy farmhouse or rustic Christmas look, consider combining red plaid with natural twine. The slightly earthy appearance of jute or rope gives the ornament a relaxed handmade quality. If you prefer a more elegant result, replace twine with velvet ribbon in burgundy, deep green, or another rich seasonal shade.
Floral patterns can introduce another layer of visual interest. Cream backgrounds with small red flowers and green leaves feel festive without relying entirely on traditional Christmas motifs. This makes botanical ornaments especially useful if your holiday decor leans toward vintage, cottage, or classic styles.
Materials You May Need
One of the advantages of this type of Christmas craft is that the material list can remain relatively simple. The exact supplies depend on the ornament base and decorative technique you choose, but the following items are useful starting points.
- Plain decorative baubles or smooth ornament forms
- Decoupage paper, decorative napkins, or lightweight patterned material
- Decoupage adhesive or craft glue suitable for the chosen surface
- A small soft brush for applying adhesive
- Ribbon for hanging and decorative bows
- Natural twine for rustic-style ornaments
- Scissors for trimming patterns
- Optional finishing sealer for added durability
Before beginning, organize your materials and decide which patterns will be used together. A little planning can prevent the finished collection from looking visually disconnected.
How to Make DIY Decoupage Ornaments
1. Prepare the Ornament Base
Start with a clean, smooth ornament surface. Remove dust and make sure the surface is dry before applying any decorative material. If the ornament has a removable cap or hanging hardware, take care around that area so the finished design remains neat.
A clean base gives adhesive a better surface to work with and helps prevent small particles from becoming trapped beneath the decorative layer.
2. Plan the Pattern
Think about how your chosen pattern will sit around the curved ornament. Plaid designs may create a more structured appearance, while small floral motifs can be arranged more freely. If your material has a directional pattern, decide which way you want the design to face before attaching it.
For a coordinated set, you do not have to use exactly the same pattern on every ornament. Instead, choose designs that share at least one or two colors. This creates variety while keeping the collection visually connected.
3. Apply the Decorative Material
Apply a thin layer of suitable adhesive to the ornament and carefully position the decorative material. Work slowly around curved areas, smoothing the material as you go. Small sections are often easier to manage than trying to cover the entire ornament at once.
Avoid using too much adhesive. Excess glue can make lightweight paper or napkins difficult to control and may leave an uneven finish. A light, even application generally makes the crafting process easier.
4. Smooth and Let It Dry
Once the material is positioned, gently smooth it over the surface. Pay particular attention to wrinkles, overlapping sections, and the edges of the design. Allow the ornament to dry completely before adding additional decorative layers or handling it extensively.
Patience is important during this stage. Moving the ornament before the adhesive has set can disturb the pattern and create marks that are difficult to correct later.
5. Finish With a Decorative Bow
The bow is one of the details that gives these ornaments their finished appearance. A wide velvet ribbon creates a luxurious look, while natural twine produces a rustic effect. You can also coordinate the bow with the colors already present in the ornament.
For example, a red plaid ornament looks naturally festive with a deep red bow. A botanical ornament can be paired with green ribbon for a traditional appearance, while twine can soften the look and add a farmhouse-inspired touch.
Expert Insight
- Keep patterns small enough to remain recognizable on a curved ornament.
- Repeat colors across several ornaments to create a coordinated collection.
- Use the bow as a finishing accent rather than competing with the main pattern.
Creative Design Ideas to Try
Classic Red Plaid Ornaments
Red plaid is a natural choice for traditional Christmas decorating. It instantly creates a warm seasonal feeling and pairs beautifully with evergreen branches. Add a velvet bow for a polished finish or use twine for a more relaxed rustic style.
Botanical Floral Ornaments
Floral patterns offer a softer alternative to bold Christmas prints. Look for designs featuring small red flowers, green leaves, and neutral backgrounds. These ornaments can work especially well alongside natural greenery and warm white lights.
Mixed Pattern Collections
There is no need to choose only one pattern. Combining plaid and floral designs can make a Christmas tree feel collected and personal. The key is to maintain a consistent color story. If every ornament uses a completely different palette, the overall display can become visually busy.
Pro Tip: Create three or four related ornament designs instead of making every piece identical. Repeating the same ribbon colors or decorative accents will make the entire collection feel intentionally designed.
How to Style Your Finished Ornaments
Once your DIY Christmas ornaments are finished, the decorating possibilities go beyond the Christmas tree. Use them wherever you want a small seasonal accent or a handmade touch.
- Hang them on a Christmas tree alongside evergreen branches.
- Tie one onto a wrapped gift for a reusable decoration.
- Place several ornaments in a decorative bowl or basket.
- Use them as part of a holiday table centerpiece.
- Hang them from a seasonal garland or decorative branch.
- Give personalized ornaments as thoughtful handmade gifts.
Grouping ornaments in odd numbers can create a naturally balanced display. You can also vary the ribbon lengths and ornament sizes to add movement. If your decorations already contain many patterns, use a few simpler ornaments to give the eye a place to rest.
Tips for a More Polished Handmade Finish
The difference between a rushed craft and a polished handmade ornament often comes down to small finishing details. Trim excess material carefully, keep adhesive application even, and give every layer enough time to dry.
It is also helpful to step back periodically while working. Looking at the ornament from a short distance can reveal areas where the pattern feels uneven or where an additional decorative accent might improve the balance.
When making several ornaments, photograph or arrange them together before placing them on your tree. This makes it easier to see whether the colors, patterns, and ribbon choices work as a group.
Making DIY Ornaments a Holiday Tradition
One of the best things about handmade ornaments is that they can become part of a yearly holiday tradition. Each season can introduce a new pattern, color combination, or decorative technique. Over time, the collection becomes more than seasonal decor. It becomes a visual record of creative projects and memorable holidays.
This also makes DIY ornaments a fun project for families and friends. Different people can choose their own patterns and finishing details while working within the same general color palette. The result is a collection that feels coordinated without losing the individuality of each handmade piece.
If you are preparing handmade gifts, personalized ornaments can also be an affordable way to create something meaningful. A carefully selected pattern and a thoughtful ribbon can make a simple ornament feel special and intentional.
At a Glance
Quick Points
- Start with a clean, smooth ornament base.
- Choose patterns that share complementary colors.
- Apply decorative material in manageable sections.
- Let each layer dry thoroughly before continuing.
- Finish with ribbon or twine for a personalized touch.
Conclusion
DIY decoupage ornaments are a beautiful way to bring creativity into holiday decorating without requiring an overly complicated craft project. Plaid patterns, botanical prints, velvet bows, and natural twine can be combined in countless ways to create ornaments that feel warm, personal, and timeless.
Whether you prefer traditional red and green Christmas decor, rustic farmhouse details, or a softer botanical style, the basic idea can be adapted to suit your home. Start with a few simple ornaments, experiment with patterns and finishing touches, and build a collection that reflects your personal holiday style.
The best handmade Christmas decorations do not need to be perfect. They simply need to feel personal. Choose your favorite patterns, add a beautiful bow, and enjoy creating ornaments that you will be excited to bring out year after year.