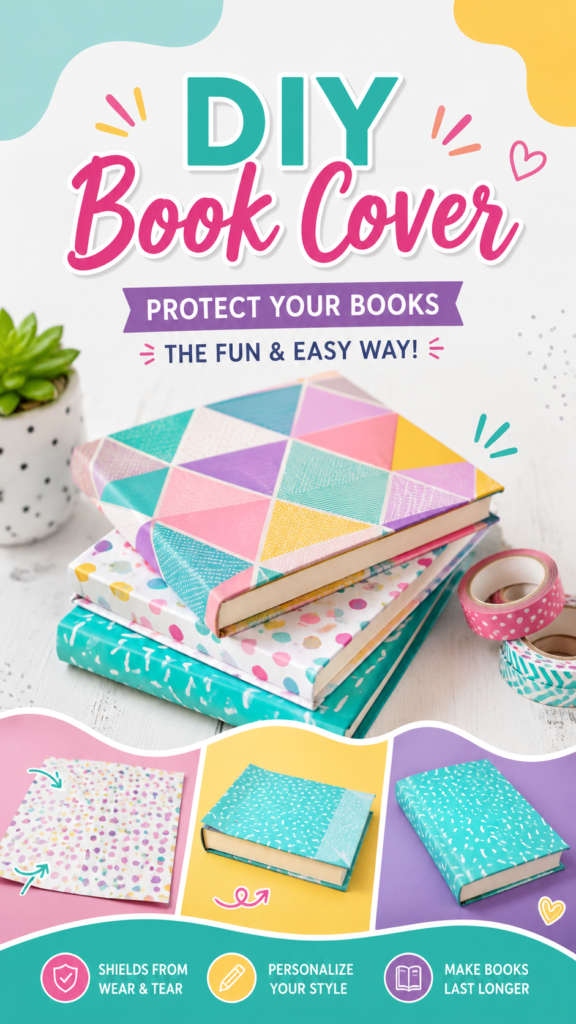
Giving your books a little extra protection does not have to mean buying expensive covers. A simple book cover DIY project can transform ordinary textbooks, notebooks, journals, and favorite books into colorful, personalized pieces while helping protect their covers from everyday wear. With patterned paper, decorative materials, and a few easy folding techniques, you can create a practical cover that looks cheerful and completely your own.
Key Takeaways
- DIY book covers can help shield books from scratches, scuffs, and everyday handling.
- Patterned paper gives ordinary books an instant decorative makeover.
- A well-folded paper cover can be made without permanently altering the original book.
- Colorful designs make it easier to personalize textbooks, notebooks, and journals.
- Simple materials make this a practical and budget-friendly craft project.
Whether you are preparing school textbooks, refreshing a collection of notebooks, or looking for a fun afternoon craft, making your own cover is an easy project to try. The colorful layered look of patterned covers can also turn a stack of books into an attractive display rather than something that simply sits on a shelf.
Why Try a Book Cover DIY Project?
Books often travel with us through busy days. They can be placed in backpacks, carried between rooms, stacked on desks, and handled repeatedly. Over time, corners can become worn, covers can collect marks, and decorative designs can lose their original freshness. A DIY cover creates an extra layer between the book and the outside world.
There is also a creative advantage. Instead of settling for a plain cover, you can choose colors and patterns that match your personality. Bright geometric prints, soft florals, playful illustrations, colorful checks, or simple solid paper can all create very different results.
A good DIY book cover should balance protection and flexibility. The material needs to be sturdy enough for regular handling while still being easy to fold around the book. Measuring carefully and avoiding overly tight folds are two of the simplest ways to make the finished cover both attractive and practical.
A Practical Project With Plenty of Personality
The beauty of this craft is that the basic idea is simple, but the final appearance can be completely different from one book to another. Use one pattern for a notebook, another for a textbook, and a third for a journal. A coordinated group of covers can even create a colorful study or reading corner.
This makes DIY book covers especially useful when you want something functional that still feels handmade. You are not simply covering a book. You are creating a small piece of personalized stationery.
Materials for an Easy DIY Book Cover
You do not need a complicated craft supply collection to get started. The exact materials depend on the type of cover you want, but the project can be kept wonderfully simple.
- Decorative paper: Choose patterned, colorful, or plain paper that is large enough to wrap around the book.
- Scissors: Useful when you need to trim excess paper or create neat edges.
- Ruler: Helps with measuring and keeping folds straight.
- Pencil: Light marks can help guide measurements before folding.
- Decorative tape: Washi tape or similar materials can add visual accents.
- Optional stickers or labels: These can help identify the book while adding another decorative element.
If you are covering several books, consider selecting papers that work together visually. A shared color palette can make different patterns look like part of the same collection.
Choosing the Right Paper
Paper choice can make a noticeable difference in the finished result. Very thin paper may look beautiful but can crease or tear more easily. Slightly heavier craft or wrapping paper can provide a more substantial feel while remaining easy to fold.
Think about how the book will be used. A notebook that stays on a desk may need less protection than a textbook that is carried around every day. For books that receive frequent handling, prioritize paper that feels durable and folds cleanly.
How to Make a DIY Book Cover
The process is straightforward once you understand the basic structure. The goal is to create a paper sleeve that wraps around the outside of the book while leaving the book itself accessible.
1. Prepare a Clean Work Surface
Start with a flat, clean surface where you can open the book completely. Smooth the decorative paper before measuring it. Creases or wrinkles underneath the book can make accurate folding more difficult.
Place the paper pattern-side down if you want the design to appear on the outside. Position the closed book near the center and leave enough material around each side to create the folds that hold the cover in place.
2. Measure Around the Book
Open and close the book gently while checking how much paper is needed. The paper should extend beyond the top and bottom edges and far enough past the front and back covers to form secure folds.
A little extra paper is usually easier to manage than too little. You can trim excess material later, but you cannot easily add missing paper once the folds have been made.
3. Create the Main Folds
With the book positioned on the paper, fold the excess material around the edges of the cover. Press the folds firmly but gently so they become crisp. Work from one side at a time and keep checking that the book can open and close naturally.
The key is to create folds that hold the book securely without squeezing it. A cover that is too tight may interfere with the book’s movement, while a cover that is too loose may slip out of position.
4. Check the Fit
Before adding decorations, close the book and inspect the cover from all sides. Make sure the corners are covered, the edges look reasonably even, and the book can open without excessive resistance.
This is the perfect stage to make small adjustments. Trim unnecessary excess paper, reinforce a weak fold, or reposition the paper if one side looks noticeably uneven.
5. Add Your Personal Touches
Once the basic cover fits properly, you can leave it minimal or decorate it. A simple label can make a textbook easier to identify. Washi tape can frame an edge, while small stickers can add personality without overwhelming the main pattern.
For a more coordinated look, choose decorative details that repeat one or two colors already present in the paper. This creates a polished appearance without requiring complicated crafting techniques.
Expert Insight
The most important part of a homemade book cover is not decoration. It is the fit. Measure generously, fold carefully, and test the cover by opening and closing the book before adding embellishments.
- Keep folds straight for a cleaner finish.
- Avoid making the cover so tight that it restricts movement.
- Use durable paper when the book will be carried frequently.
Creative Book Cover Ideas to Try
Once you have mastered the basic technique, there are plenty of ways to make each cover different. The colorful examples associated with this style of craft show how much impact a strong pattern can have, but you can take the idea in many directions.
Colorful Patterned Covers
Geometric patterns are a great choice when you want a bold, modern appearance. Triangles, blocks, stripes, dots, and abstract shapes can make a plain book look energetic and creative.
If the pattern is already busy, keep additional decorations simple. A small label or narrow strip of tape may be all you need.
Coordinated Notebook Covers
Cover several notebooks using papers from the same color family. You can choose different patterns while keeping one or two colors consistent. The result is a collection that looks organized without being boring.
This approach works particularly well for study materials. Different colors can help visually distinguish notebooks while still keeping the overall set cohesive.
Simple Minimalist Covers
DIY does not have to mean colorful or elaborate. Plain kraft paper, a soft solid color, or a subtle pattern can create a calm, understated cover. Add a small handwritten title or simple label for a clean stationery-inspired look.
Playful Covers for Kids and Teens
Bright colors, cheerful patterns, stickers, and decorative tape can make school books feel more personal. Let the design reflect the owner’s interests and favorite colors while keeping the main cover practical enough for regular use.
Tips for a Neater Finished Cover
A few small details can make a simple paper book cover look much more polished. First, take your time when measuring. Uneven measurements are one of the easiest ways to end up with awkward edges.
Next, create deliberate folds. Use a ruler or another smooth straight edge to help reinforce folds if needed. Avoid pressing so aggressively that you damage the paper, especially when working with decorative designs.
Finally, inspect the corners. Corners receive plenty of handling, so they should be folded neatly rather than left with loose flaps. If you are using tape for reinforcement, apply it smoothly and avoid large wrinkles.
Pro Tip: Make one inexpensive practice cover before working with your favorite decorative paper. It gives you a chance to understand the measurements and folding sequence without worrying about wasting a material you really like.
How to Make Your Covers Last Longer
Good care begins with choosing suitable materials, but everyday handling also matters. Try not to overload a covered book inside a bag, especially when other objects may press against its corners. Keeping the book reasonably clean can also help preserve the appearance of the paper.
If a fold starts to loosen, fix it early rather than waiting for the entire cover to shift. Small repairs are usually easier than rebuilding the cover from scratch.
For especially well-loved books, you can also make a spare cover using a similar design. This is useful when you want to keep a favorite pattern available after the original cover eventually shows signs of use.
Why DIY Book Covers Are Great for Everyday Organization
There is something satisfying about turning an ordinary object into something that feels intentional. A set of covered books can make a desk look more organized, while different colors and patterns can help separate subjects or categories at a glance.
For students, a personalized textbook cover can also make routine school supplies feel more enjoyable. For readers, decorative covers can bring a little extra character to a bookshelf. For crafters, the project provides an opportunity to experiment with paper, color, texture, and composition.
Most importantly, the project is accessible. You can begin with basic supplies and improve the design as you gain confidence. There is no need for advanced crafting experience to create something useful and attractive.
Why This Matters
A book cover can be both protective and decorative. Instead of treating function and creativity as separate goals, combine them by choosing durable paper, fitting it carefully, and using simple design details that make the finished book feel personal.
Common DIY Book Cover Mistakes to Avoid
Even an easy project can benefit from a little planning. One common mistake is cutting the paper too close to the book’s dimensions. Without enough extra material for the folds, it becomes difficult to create a secure cover.
Another mistake is making the folds too tight. The cover should sit comfortably around the book rather than pulling against it. Always test the fit before committing to your final decorative details.
It is also easy to overdecorate. If your paper already has a vibrant pattern, too many stickers, tapes, and labels can make the design feel cluttered. Choose a focal point and let the rest of the cover support it.
- Do not rush the measuring stage.
- Do not use paper that is too fragile for the intended use.
- Do not make folds excessively tight.
- Do not add decorations before confirming the cover fits.
Quick Points
- Protect: Add an extra layer around books that receive frequent handling.
- Personalize: Use patterns, colors, labels, and small decorative accents.
- Measure: Leave enough paper for secure folds around every edge.
- Test: Open and close the book before finalizing the decoration.
- Have fun: Mix different papers to create a collection that feels uniquely yours.
Conclusion
A book cover DIY project is a simple way to combine creativity with everyday practicality. With decorative paper, careful measurements, and a few well-placed folds, you can give textbooks, notebooks, journals, and other books an extra layer of protection while making them much more personal.
The best designs do not need complicated techniques. A bold pattern can make a statement on its own, while a minimalist cover can look just as polished with a simple label. The important thing is to choose materials that suit the book, create a comfortable fit, and take your time with the folds.
Whether you are refreshing school supplies, organizing your desk, or simply looking for an enjoyable paper craft, homemade book covers are an easy project worth trying. Pick a favorite pattern, gather your supplies, and turn an ordinary book into something colorful, useful, and uniquely yours.
Tags
Book Cover DIY DIY Book Cover Paper Crafts Book Crafts Notebook Covers School Crafts Creative DIY Book Protection