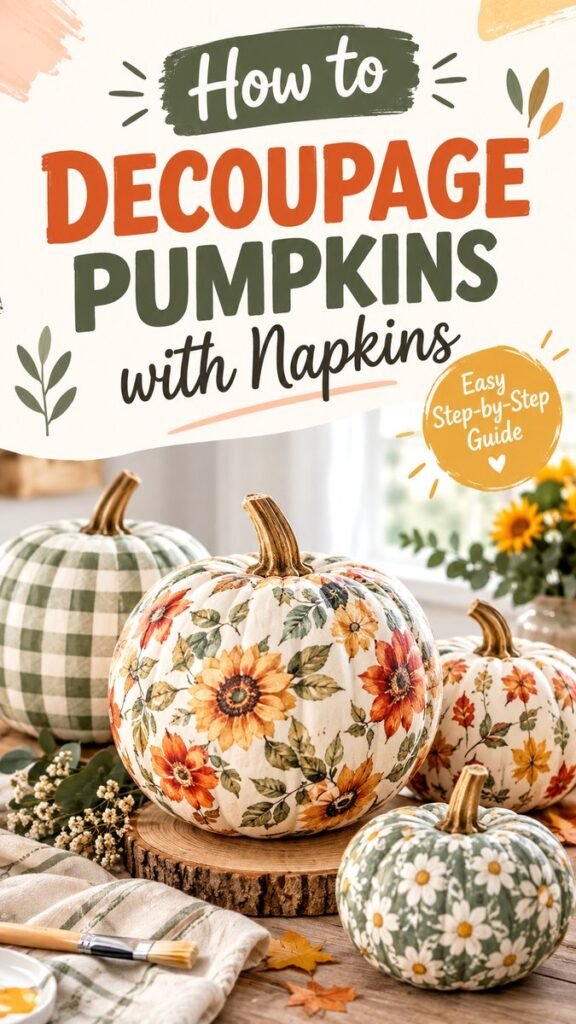
Decoupage DIY projects are a wonderful way to turn simple seasonal decorations into pieces that feel personal, decorative, and completely unique. One especially charming idea is to transform plain pumpkins with patterned napkins. The technique creates the look of delicate painted artwork without requiring advanced painting skills, making it a great project for beginners and experienced crafters alike.
Floral patterns, autumn leaves, warm botanical illustrations, and vintage-inspired designs work beautifully on pumpkins. The finished pieces can bring a soft handmade touch to a mantel, dining table, shelf, entryway, or seasonal display. With a few basic supplies and some patience, an ordinary pumpkin can become a beautiful focal point for fall decorating.
Key Takeaways
- Decoupage is an easy way to decorate plain pumpkins with patterned napkins.
- Floral and botanical designs create an especially beautiful autumn look.
- Thin napkin layers blend naturally with a light-colored pumpkin surface.
- Gentle brushing helps prevent wrinkles and tears during application.
- Different pumpkin shapes and patterns can be combined for a coordinated display.
- The same basic technique can be adapted for many seasonal DIY decor projects.
What Is Decoupage DIY?
Decoupage is a decorative craft technique that involves attaching paper, napkins, or other thin decorative materials to a surface using an adhesive or decoupage medium. Instead of covering an object with a single thick piece of paper, the material is usually applied in smaller sections and carefully smoothed over the surface.
For pumpkins, napkins are particularly useful because they are lightweight and flexible. Their thin construction allows them to follow the rounded curves of a pumpkin more easily than heavier paper. Once the adhesive dries, the pattern can appear almost painted onto the surface.
A decoupage DIY pumpkin can be rustic, elegant, colorful, vintage, minimalist, or playful depending on the napkin design. This makes the project easy to customize to different decorating styles.
Why Decoupage Pumpkins Make Great Fall Decor
Traditional carved pumpkins are fun, but decorated pumpkins can last longer as part of an indoor seasonal display and offer much more room for creativity. A decoupage pumpkin combines the recognizable shape of a pumpkin with decorative patterns that complement the rest of a room.
Floral napkins are particularly effective because they introduce the warm colors and natural motifs associated with autumn. Roses, leaves, berries, small branches, wildflowers, and foliage can all create a cozy seasonal appearance without relying on traditional orange-and-black Halloween colors.
Important: The most successful decoupage pumpkins usually have a simple base and a pattern that remains easy to see. A light or neutral pumpkin surface allows delicate napkin artwork to stand out while keeping the finished piece soft and elegant.
This approach also makes it easy to create a coordinated collection. Instead of decorating every pumpkin exactly the same way, you can use several related napkin patterns and mix different sizes for a layered arrangement.
Supplies for a Decoupage Pumpkin
You do not need a large craft collection to get started. The basic materials are simple and easy to adapt depending on the look you want.
- Plain pumpkins or decorative faux pumpkins
- Decorative paper napkins with floral, botanical, seasonal, or other patterns
- Decoupage medium or a suitable craft adhesive
- Soft flat paintbrushes
- Clean scissors for trimming larger napkin sections
- A small dish or palette for adhesive
- A clean, protected work surface
- Optional clear protective finish
White, cream, pale green, or other light-colored pumpkins are particularly useful when working with delicate napkin patterns. However, you can experiment with other colors if the napkin design has enough contrast to remain visible.
How to Decoupage Pumpkins With Napkins
Step 1: Choose Your Pumpkin
Start with a pumpkin that has a relatively clean, smooth surface. The size and shape are completely up to you. A round pumpkin creates a classic silhouette, while flatter or more unusual shapes can add visual variety to a display.
If you are using a reusable decorative pumpkin, make sure the surface is clean and free from dust. Dirt or loose particles can interfere with the adhesive and make it harder for the napkin to lie flat.
Step 2: Select a Napkin Pattern
The napkin is where most of the personality comes into the project. Look for patterns that match the mood you want to create. Soft florals can produce a romantic cottage-inspired finish, while leaves and branches can create a more natural woodland appearance.
For an autumn display, warm rust, muted orange, cream, brown, sage, and dusty green are easy colors to coordinate with other seasonal decorations.
Many decorative napkins contain multiple layers. Carefully separate the printed layer from the plain layers underneath before applying it to the pumpkin. The thinner printed layer is generally easier to work with because it blends more naturally into the surface.
Step 3: Prepare the Design
Instead of trying to cover the entire pumpkin with one large piece of napkin, consider working with smaller sections. Tear around flowers, leaves, and other individual motifs to create a softer edge. Torn edges can become less noticeable once the napkin is attached.
You can also combine several motifs to build your own composition. A large flower can become the focal point, while smaller leaves and branches can fill open areas around it.
Step 4: Apply a Thin Layer of Adhesive
Use a soft brush to apply a thin, even layer of decoupage medium to a small area of the pumpkin. Avoid covering the entire pumpkin at once. Working in sections gives you more control and makes it easier to position the delicate napkin.
Keep the adhesive layer smooth rather than overly thick. Too much product can make the napkin difficult to handle and may increase the chance of wrinkles or tearing.
Step 5: Place the Napkin Carefully
Lay the printed napkin section onto the prepared area and gently press it into place. Because the pumpkin is curved, some small folds may naturally appear. Do not try to force the paper completely flat in one movement.
Instead, work gradually from the center of the design toward the outer edges. A soft, clean brush can help smooth the material without putting too much pressure on it.
Step 6: Continue Around the Pumpkin
Repeat the process in small sections until the desired areas are covered. Take your time around the ridges because these curved sections require more careful placement.
You do not necessarily have to cover every inch of the pumpkin. Leaving some of the base visible can create an airy appearance and help the floral artwork look more intentional.
Step 7: Seal the Design
Once the napkin pieces are positioned and the surface has dried according to the adhesive instructions, you can apply another thin layer of decoupage medium over the design. This helps secure the paper and gives the finished pumpkin a more unified appearance.
Use light brush strokes and avoid repeatedly brushing the same area. Once the napkin becomes damp, excessive handling can disturb the design.
How to Avoid Wrinkles and Tears
Wrinkles are one of the most common challenges when learning napkin decoupage. The curved shape of a pumpkin naturally makes the process more difficult than decorating a flat surface.
- Use smaller napkin pieces instead of large sheets.
- Work slowly around deep pumpkin ridges.
- Apply adhesive in thin layers.
- Use a soft brush instead of pressing firmly with your fingers.
- Allow sections to settle before adding more adhesive.
- Avoid repeatedly lifting and repositioning damp napkin pieces.
Pro Tip: If a large floral design is difficult to position, separate the napkin into individual flowers and leaves. Smaller pieces can follow the pumpkin’s curves much more naturally and give you greater control over the final composition.
Choosing the Right Napkin Design
Pattern selection can completely change the character of a decoupage DIY pumpkin. Think about the rest of your seasonal decor before choosing your napkins.
Floral Napkins
Floral designs are ideal for creating an elegant and timeless appearance. Roses, wildflowers, chrysanthemums, and mixed botanical arrangements can give pumpkins a soft decorative finish.
Leaf and Botanical Prints
Leaf patterns are a natural choice for fall. Green, brown, muted orange, and earthy botanical designs can complement wooden trays, dried foliage, pinecones, and other natural textures.
Vintage-Inspired Prints
Vintage-style florals can create a cozy cottage or traditional autumn aesthetic. Look for slightly muted colors and detailed illustrations if you want the pumpkin to feel like a decorative heirloom.
Why This Matters
Pattern scale is just as important as color. Large motifs can make a bold statement on a large pumpkin, while tiny botanical prints work beautifully on smaller pumpkins. Mixing one larger pattern with two simpler patterns can create a balanced seasonal arrangement.
Creative Ways to Display Decoupage Pumpkins
Once your pumpkins are finished, the display becomes part of the project. A beautiful arrangement does not need to be complicated. Grouping pumpkins at different heights can instantly create depth.
- Arrange decorated pumpkins on a wooden tray with dried leaves and greenery.
- Place a floral pumpkin on a mantel beside neutral seasonal accessories.
- Create a centerpiece using pumpkins of different sizes and patterns.
- Combine decorated pumpkins with small plain pumpkins for contrast.
- Use a decoupage pumpkin as a decorative accent on an entryway table.
Natural textures are especially effective with this craft. Wood slices, woven baskets, linen fabrics, dried foliage, pinecones, and branches can complement the paper patterns without competing with them.
How to Create a Coordinated Pumpkin Collection
Rather than making every pumpkin identical, choose a shared color palette and let each pumpkin have its own pattern. For example, several designs can feature cream, rust, sage, and muted orange even if the individual prints are different.
Varying the size of the pumpkins also makes the arrangement more interesting. A large floral pumpkin can serve as the centerpiece while smaller patterned and plain pumpkins surround it.
Important: A little contrast keeps a handmade display from looking repetitive. Pair detailed decoupage pumpkins with one or two simple pumpkins so the patterned pieces remain the visual stars.
Common Decoupage Mistakes to Avoid
Even simple DIY crafts become easier when you know what to watch for. One common mistake is applying too much adhesive. A thin layer usually gives you better control than a heavy coating.
Another mistake is attempting to cover a curved pumpkin with a single large sheet. Large pieces are more likely to bunch around the ridges. Smaller sections make it easier to work with the natural shape.
It is also important to avoid rushing the drying process. Let each stage dry according to the product instructions before handling the pumpkin extensively or adding another layer.
Easy Variations for Your Next Decoupage DIY
Once you understand the basic method, there are countless ways to personalize the idea. Try using a monochromatic napkin for a sophisticated look, or experiment with colorful botanical patterns for a more playful display.
You can also decorate only one section of a pumpkin instead of covering the whole surface. A cluster of flowers placed across one side can create an artistic focal point while preserving the original pumpkin finish.
For a collection, consider making one large statement pumpkin, several medium patterned pumpkins, and a few small plain pumpkins. This combination gives the display a natural sense of rhythm and makes the arrangement feel collected rather than overly matched.
At a Glance
- Start with a clean, suitable pumpkin surface.
- Separate the printed napkin layer before applying it.
- Work with small sections for easier shaping.
- Brush gently and use thin layers of adhesive.
- Combine different patterns for a personalized autumn display.
Conclusion
Decoupage DIY pumpkins are an easy and creative way to give seasonal decorating a handmade touch. With decorative napkins, a few simple craft supplies, and a little patience, plain pumpkins can become beautiful pieces filled with floral, botanical, or autumn-inspired character.
The real appeal of this project is its flexibility. You can keep the design soft and neutral, bring in rich fall colors, create a vintage-inspired collection, or mix several patterns for a more eclectic arrangement. Small details such as dried leaves, wood textures, linen, and greenery can help tie the finished pumpkins into the rest of your decor.
Whether you are creating one statement piece or an entire collection, napkin decoupage is a rewarding craft that makes it easy to experiment with color and pattern. Choose a few favorite napkins, take your time with each section, and enjoy turning simple pumpkins into decorative accents that feel uniquely yours.
Tags
Decoupage DIY Pumpkin Crafts Napkin Decoupage Fall DIY Pumpkin Decor DIY Home Decor Fall Crafts span style=”display:inline-block;background:#f5e5d8;color:#8b4f32;border-radius:20px;padding:7px 12px;margin:4px;font-size:14px;”>Floral Pumpkin