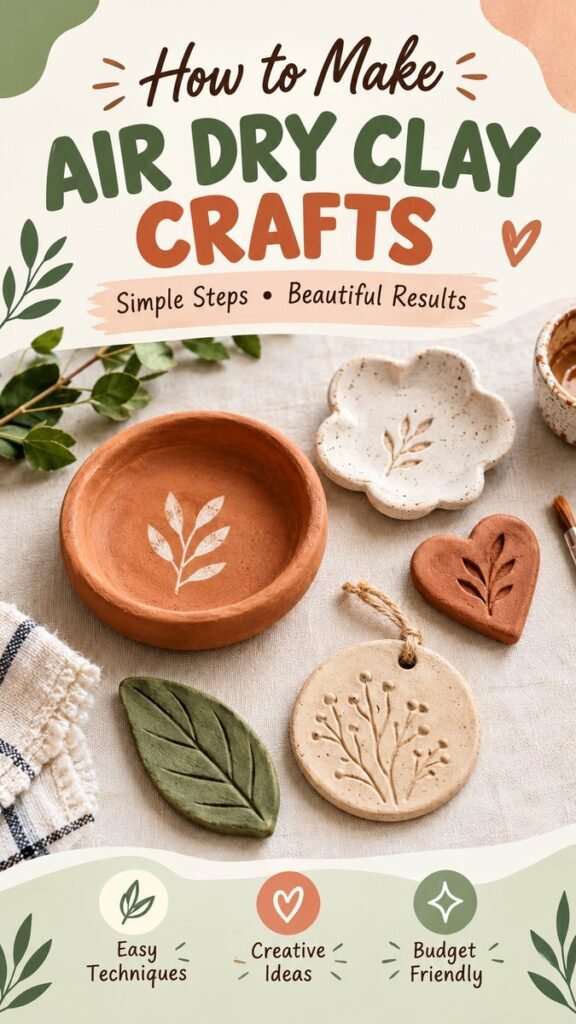
There is something wonderfully satisfying about turning a simple piece of clay into a useful or decorative object with your own hands. Cute DIY crafts made with air dry clay are an approachable way to explore creativity without needing a pottery wheel, kiln, or complicated equipment. From small dishes and heart shapes to botanical ornaments and textured clay pieces, these projects can be customized to suit almost any decorating style.
Air dry clay is especially appealing for beginners because it can be shaped by hand and left to dry naturally. The finished pieces have a warm, handmade character that works beautifully with earthy colors, natural textures, and simple home decor. Whether you want a relaxing weekend activity, a thoughtful handmade gift, or a few charming accessories for your home, these cute clay crafts offer plenty of inspiration.
Key Takeaways
- Air dry clay is a simple material for beginner-friendly DIY crafts.
- Small dishes, ornaments, hearts, and leaf shapes are easy to personalize.
- Natural textures can make handmade clay projects look more detailed.
- Earthy shades such as terracotta, cream, and muted green create a cozy aesthetic.
- Simple tools and household textures can add character without complicated techniques.
- Finished clay pieces can become decor, keepsakes, or handmade gifts.
Why Air Dry Clay Is Perfect for Cute DIY Crafts
Air dry clay gives crafters plenty of freedom to experiment. Unlike traditional pottery, these projects do not require a kiln to get started. You can roll, press, cut, shape, and texture the clay using basic craft supplies, then allow the finished piece to dry according to the clay manufacturer’s directions.
The material also has a naturally soft appearance that pairs well with the current handmade and organic craft aesthetic. Slight imperfections can make a project feel more personal rather than less polished. A shallow clay dish, for example, does not need perfectly symmetrical edges to look attractive. The handmade shape can actually become part of its charm.
Important: The best beginner clay projects are often the simplest ones. Focus on smooth surfaces, comfortable shapes, and a few intentional decorative details rather than trying to make every piece perfectly symmetrical.
Cute Clay Dishes and Trinket Bowls
Small dishes are one of the most useful air dry clay crafts to try. Start with a manageable amount of clay and shape it into a rounded form. Press the center gently to create a shallow bowl, then work around the edges until you achieve the depth and shape you want.
These little dishes can be designed in many ways. Keep the surface completely smooth for a minimalist look, or add a pressed leaf pattern for an organic finish. You can also experiment with uneven handmade edges to create a rustic appearance.
Once dry, a small clay dish can be used as a decorative catchall for lightweight everyday items, a desk accent, or part of a larger styled display. If you plan to use a finished piece for a particular purpose, always follow the clay manufacturer’s recommendations for sealing, moisture exposure, and safe use.
Heart-Shaped Clay Crafts
Heart shapes instantly add a cute and playful quality to handmade projects. They can be made as flat decorations, small ornaments, gift embellishments, or decorative accents. A simple heart cutter can create consistent shapes, while shaping the outline by hand gives each piece a more organic appearance.
For an extra handmade touch, press a subtle pattern into the surface before the clay dries. Leaves, fabric, lace, small stamps, or other textured objects can create interesting impressions. Keep the pattern relatively shallow so the finished design remains clean and easy to see.
Adding a small hole near the top turns a clay heart into a hanging ornament. A piece of natural-looking cord can complement warm clay colors and reinforce the cozy handmade aesthetic.
Easy Air Dry Clay Shapes to Try
You do not need an elaborate project plan to begin making cute clay crafts. Simple silhouettes can be surprisingly attractive when combined with thoughtful textures and a cohesive color palette.
- Leaf shapes: Cut or sculpt simple leaves and add veins with a blunt tool.
- Rounded ornaments: Create flat circles or organic shapes with a small hanging hole.
- Mini trays: Shape shallow dishes with gently raised edges.
- Hearts: Make decorative pieces for gifts, shelves, or seasonal displays.
- Textured plaques: Press natural patterns into a smooth clay surface.
- Small rings or accessory dishes: Create compact pieces for decorative organization.
Adding Botanical Details
Botanical textures are particularly effective for creating cute DIY clay projects with a natural look. A real leaf can sometimes be pressed gently into clay to create an impression, while a simple craft tool can be used to draw leaf veins by hand.
Try arranging leaves in different directions or placing one botanical motif in the center of a dish. You can also create several small pieces using related shapes so they look like a coordinated collection.
Expert Insight
Texture does much of the visual work in simple clay projects. A basic shape can look thoughtfully designed when you add one clear detail, such as a leaf imprint, subtle pattern, or softly uneven edge.
How to Make Simple Clay Crafts
The exact process depends on the project, but a basic workflow makes most beginner air dry clay crafts easier to manage. Before starting, prepare a clean work surface and gather the clay, rolling tool, shaping tools, texture materials, and any cutters you plan to use.
- Condition the clay: Knead and soften a small portion until it becomes easier to shape.
- Roll the clay: Create an even slab if you are making flat decorations or dishes.
- Cut or shape: Form your desired silhouette using a cutter or your hands.
- Add texture: Press patterns or draw simple details while the clay is workable.
- Refine the edges: Smooth rough areas gently with your fingers or an appropriate tool.
- Allow it to dry: Follow the drying instructions supplied with your particular clay.
- Finish the piece: Once completely dry, paint or seal it if appropriate for your intended use.
Pro Tip: Work slowly around thin edges and delicate details. Keeping your clay thickness reasonably consistent can help create a more even finished piece and makes small designs easier to handle.
Choosing Colors for a Cozy Handmade Look
Color can completely change the personality of a clay craft. Warm terracotta tones create an earthy appearance, while cream and soft beige shades give projects a light minimalist feel. Muted greens can complement botanical designs and natural textures.
You can keep an entire collection within one palette for a coordinated display. Another option is to create contrast by pairing a darker clay-colored piece with lighter neutral designs. Small painted accents can also highlight texture without covering the handmade surface completely.
Keep the Finish Simple
A simple finish often works best for cute DIY crafts. Instead of covering every surface with multiple colors, consider highlighting one feature. A painted leaf, lightly brushed edge, or small accent can add enough visual interest while allowing the clay texture to remain visible.
Creative Ways to Personalize Clay Crafts
The most enjoyable part of handmade crafts is making each project your own. Once you are comfortable with basic shapes, experiment with different textures, proportions, and decorative arrangements.
- Press fabric into clay for a soft woven texture.
- Use botanical shapes for a nature-inspired collection.
- Combine circles, hearts, leaves, and organic silhouettes.
- Add hanging holes to transform flat shapes into ornaments.
- Create matching sets of small dishes in different earthy shades.
- Experiment with intentionally irregular edges for a handmade appearance.
These ideas can also be adapted to different seasons and occasions. Neutral pieces work throughout the year, while shapes and colors can be changed to create seasonal decorations or personalized gifts.
Common Beginner Tips for Better Results
Patience makes a noticeable difference when working with air dry clay. Avoid rushing through shaping or handling a piece before it has fully dried. If an edge becomes rough, gently refine it while the clay is still workable when possible, or follow the manufacturer’s recommendations for smoothing after drying.
It is also helpful to begin with small projects. A tiny ornament or shallow dish lets you practice rolling, shaping, texturing, and finishing without committing to a large piece. As your confidence grows, you can combine several techniques in one project.
Think in Collections
Rather than making one isolated craft, consider creating a small collection around a common theme. Several clay leaves, hearts, trays, or textured ornaments can be displayed together and will naturally feel more intentional.
Using the same two or three colors is an easy way to create consistency. You can vary the shapes and textures while keeping the overall palette connected. This approach is especially useful when making handmade gifts or refreshing a small area of home decor.
Quick Points
- Start with simple shapes.
- Use texture to make basic designs stand out.
- Choose a small, cohesive color palette.
- Let each piece dry completely before finishing.
- Make small collections for a polished handmade look.
Cute DIY Crafts Worth Trying
Air dry clay opens the door to countless creative possibilities, but you do not need complicated techniques to make something beautiful. A softly rounded dish, botanical ornament, heart-shaped decoration, or textured clay plaque can become a charming handmade accent with only a few thoughtful details.
The warm, earthy character of clay makes these projects especially appealing for cozy interiors and natural-inspired decor. More importantly, the process gives you room to slow down, experiment, and create something that feels personal.
Conclusion
Cute DIY crafts made with air dry clay are a simple and rewarding way to bring handmade creativity into everyday life. With basic shapes, natural textures, and a carefully chosen palette, even a beginner can create pieces that feel decorative and intentional.
Start small, enjoy the process, and do not worry about making every edge perfectly uniform. The little variations are often what give handmade clay crafts their personality. Try a simple dish, leaf, heart, or hanging ornament first, then build your own collection as you discover the techniques you enjoy most.
Save these cute craft ideas for your next creative afternoon and let a little air dry clay become something beautiful, useful, and uniquely yours.
Tags
Cute DIY Crafts Air Dry Clay Clay Crafts Easy DIY Beginner Crafts Handmade Decor Clay Ideas Creative Crafts