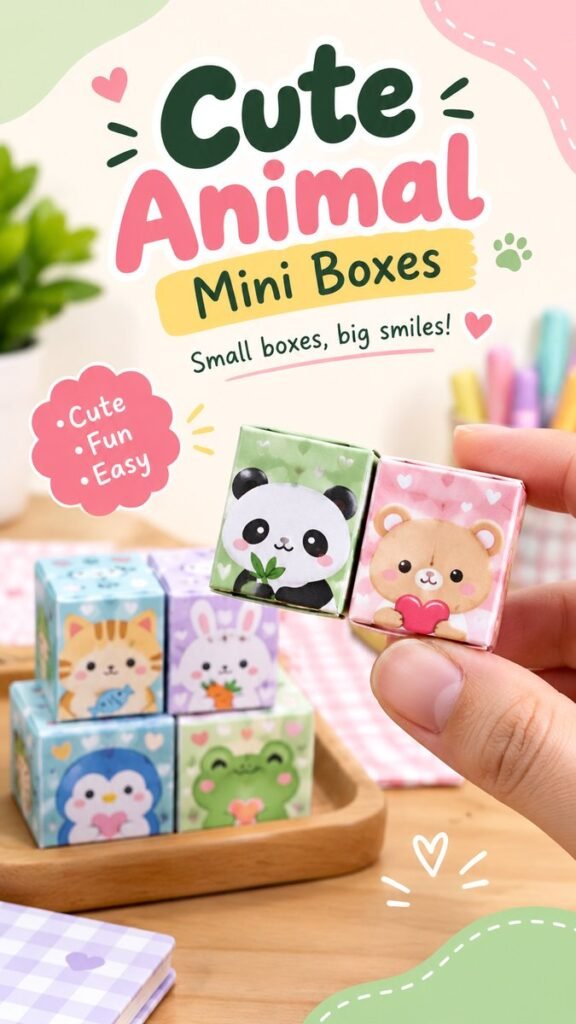
Blind box DIY projects are a delightful way to turn simple paper crafts into tiny surprises filled with personality. These cute mini boxes combine playful animal designs, soft pastel colors, charming illustrations, and a handmade feel that makes every piece look special. Whether you are creating a small gift box, decorating a craft collection, or simply looking for a fun weekend project, a DIY blind box offers plenty of room for creativity.
Key Takeaways
- Blind box DIY projects can turn simple paper into charming miniature packages.
- Pastel colors and cute animal illustrations create an instantly playful look.
- Small decorative details can make each box feel unique and collectible.
- Simple materials such as paper, scissors, adhesive, and coloring supplies are enough to begin.
- Personalized designs make these mini boxes useful for gifts, crafts, displays, and creative projects.
What Makes Blind Box DIY Projects So Fun?
The appeal of a blind box comes from the combination of creativity and surprise. Instead of making a plain container, you can transform a tiny box into a character-inspired design with its own colors, facial expression, patterns, and personality. The finished project becomes more than packaging. It becomes part of the experience.
A cute animal theme works especially well for miniature boxes because animals naturally lend themselves to simple shapes and expressive features. Rounded ears, tiny eyes, rosy cheeks, hearts, flowers, and playful patterns can instantly give a handmade box a cheerful personality.
Important: The most effective blind box designs do not need complicated decoration. A simple color palette, one recognizable character, and a few carefully placed details can create a much stronger result than an overcrowded design.
The Charm of Cute Animal Mini Boxes
Animal mini boxes are a natural fit for blind box crafts because every box can feature a different creature. One design might have a panda, another a bear, while additional boxes could feature a cat, bunny, penguin, frog, or another favorite animal.
This variety makes the project feel like a miniature collection. You can use similar box dimensions while changing the artwork on the front. The result is a coordinated group that still gives every box its own identity.
Pastel backgrounds are particularly effective for this style. Soft green, pink, blue, lavender, yellow, and cream can create a gentle kawaii-inspired appearance without making the design feel too busy. Small hearts, dots, stars, flowers, or simple patterns can add texture while keeping the animal illustration as the main focus.
Materials for a Simple Blind Box DIY
You can keep the supply list surprisingly simple. The exact materials depend on how detailed you want your finished boxes to be, but a basic project can begin with common paper-crafting supplies.
- Lightweight cardstock or sturdy decorative paper
- Scissors or a craft cutting tool
- Paper-safe glue or double-sided adhesive
- Pencil and ruler for measuring
- Colored pencils, markers, or pens
- Small stickers or decorative paper pieces
- Printed animal illustrations or handmade drawings
- A flat surface for folding and assembling
If you want the boxes to look polished, choose paper with enough structure to hold its shape after folding. A slightly thicker sheet can help miniature packaging feel more substantial while still being easy to cut and fold.
Choosing the Right Paper
Paper selection affects both appearance and durability. Smooth cardstock is useful when you want crisp folds and clear illustrations. Decorative scrapbook paper can provide an attractive background without requiring much additional decoration.
For a coordinated collection, consider selecting several colors from the same family. For example, soft pink, pale green, cream, and light blue can work together while allowing each animal box to stand apart.
How to Design Your Own Blind Box
Before cutting anything, decide what you want your collection to look like. A little planning can make the finished boxes appear much more cohesive.
- Choose an animal theme. Pick a few friendly animal characters that can be simplified into recognizable shapes.
- Select a color palette. Choose two or three main colors for each box and repeat small accents throughout the collection.
- Plan the front panel. Place the animal illustration where it will remain visible after the box is assembled.
- Add small decorative details. Hearts, dots, flowers, stars, leaves, or tiny patterns can fill empty areas.
- Create the box template. Mark the panels, folds, and adhesive tabs carefully before cutting.
- Fold and assemble. Score the fold lines gently, then secure the tabs with adhesive.
- Check the finished shape. Make sure the box closes neatly and that the artwork remains properly aligned.
Keep the Character Design Simple
Miniature surfaces do not provide much room for detailed artwork. Simple shapes are usually easier to see and reproduce. A circular face, two ears, a small nose, and a pair of expressive eyes may be enough to communicate the entire character.
Think about the design as a tiny logo rather than a large illustration. Strong silhouettes and clear facial features tend to remain recognizable even when the box is very small.
Creating a Kawaii-Inspired Look
The visual style of cute animal blind boxes often depends on friendly proportions and soft details. Rounded shapes, gentle expressions, tiny blush marks, and playful accessories can make a character feel warm and approachable.
You can also experiment with patterned backgrounds. Small hearts, clouds, dots, leaves, or simple geometric shapes can give the box a finished appearance. Keep the pattern relatively subtle so the animal remains the visual focal point.
Expert Insight
When decorating miniature boxes, think about visual balance. If the animal illustration is detailed, use a simpler background. If the character is very minimal, a soft repeating pattern can provide additional interest without overwhelming the design.
Adding Personality to Every Box
The best part of making a blind box collection is giving each box a slightly different personality. You can vary facial expressions, accessories, poses, or background patterns while keeping the overall dimensions consistent.
For example, one animal might hold a tiny heart while another could have a flower, bow, leaf, or small decorative object. These details do not have to be complicated. Even one small change can make a character feel different from the others.
Another approach is to create a color identity for each animal. A panda could use soft green, a bear could use blush pink, a bunny could use lavender, and a frog could use a gentle mint shade. Repeating one accent color in the illustrations and background helps the collection look intentional.
Pro Tip: Photograph or display several finished boxes together. A collection of coordinated mini designs can look much more eye-catching than a single box and makes the handmade details easier to appreciate.
Creative Ways to Use Mini Blind Boxes
Once your boxes are complete, there are plenty of ways to use them. They can simply become part of a miniature craft display, but they can also be incorporated into other creative projects.
- Small gift packaging: Use a decorated mini box for a tiny handmade surprise.
- Craft collections: Display several animal designs together on a tray or shelf.
- Party decorations: Coordinate the colors with a playful party theme.
- Desk décor: Arrange miniature boxes around notebooks, pens, or other craft supplies.
- Creative challenges: Make one new animal design whenever you want a quick crafting project.
The boxes can also be a fun way to practice illustration. Because the canvas is small, you can experiment with different expressions and color combinations without committing to a large artwork.
Tips for Making Cleaner Miniature Boxes
Small crafts reward patience. Taking a few extra moments during measuring, folding, and gluing can make a noticeable difference in the final appearance.
Measure Before Cutting
Use a ruler and pencil to mark your template before making any cuts. Consistent panel sizes help the finished box close properly and keep the artwork aligned.
Make Crisp Folds
Gently score the fold lines before assembling the box. Clean folds make the miniature structure look more professional and reduce accidental creases in the decorated areas.
Use Adhesive Sparingly
Too much glue can wrinkle paper or leave visible marks. A small amount applied to the tabs is usually enough. Double-sided adhesive can also be useful when you want a cleaner finish.
Plan the Artwork Around the Folds
Keep important facial features away from fold lines and adhesive tabs. Before assembling the box, fold the paper lightly to see where each part of the illustration will land.
Making Your Blind Box Collection Feel Cohesive
A collection looks more polished when the boxes share a few visual elements. This does not mean every box needs to look identical. Instead, choose a consistent design language and allow each character to have its own personality.
You might use the same border style across every box, repeat a tiny heart motif, or keep all backgrounds within a pastel color range. Consistent typography can also help if you decide to add small labels or collection names.
Try limiting each box to a few major visual elements. One character, one background pattern, and a handful of accents can create an attractive result without making the miniature surface difficult to read.
A Fun Project for Different Skill Levels
Blind box DIY is flexible enough for beginners and experienced crafters. Beginners can start with a simple template and pre-drawn animal faces. Once comfortable with the construction process, you can begin creating original characters, custom patterns, and more detailed decorations.
Children and families can also adapt the concept into a simple paper craft, provided age-appropriate tools and adult supervision are used where necessary. Designing the characters can be just as enjoyable as assembling the boxes.
For experienced paper crafters, the project can become a miniature design exercise. You can explore packaging proportions, paper textures, illustration styles, and coordinated collections while keeping each individual project small and manageable.
Why Handmade Details Make a Difference
One of the most appealing qualities of a DIY blind box is that small imperfections can add to its handmade character. A slightly different expression or a hand-drawn accent can make one box feel distinct from another.
Rather than trying to make every detail perfectly identical, focus on creating a collection that feels intentional. Consistent colors and construction provide structure, while small variations give the characters personality.
At a Glance
- Choose a simple animal theme.
- Build each box around a coordinated pastel palette.
- Keep miniature illustrations clear and expressive.
- Use small decorative details for personality.
- Display several finished boxes together for a playful collection.
Final Thoughts on Blind Box DIY
Blind box DIY projects combine paper crafting, illustration, decoration, and a little element of surprise in one charming activity. Cute animal characters and pastel colors make the finished boxes especially appealing, while the small scale keeps the project approachable and fun.
Start with a simple box shape, choose a handful of friendly animal designs, and build your collection one character at a time. Experiment with colors, patterns, expressions, and tiny accessories until each box feels unique. You do not need an elaborate supply collection or advanced crafting skills to create something eye-catching.
Whether you make these mini boxes as decorative pieces, tiny gifts, or simply as a creative project, the possibilities are easy to expand. Save your favorite ideas, gather your paper supplies, and start designing a collection of adorable handmade blind boxes that reflects your own style.
Tags
Blind Box DIY DIY Blind Boxes Kawaii Crafts Paper Crafts Miniature Crafts Cute Animal Crafts DIY Gift Boxes Kawaii DIY Ideas