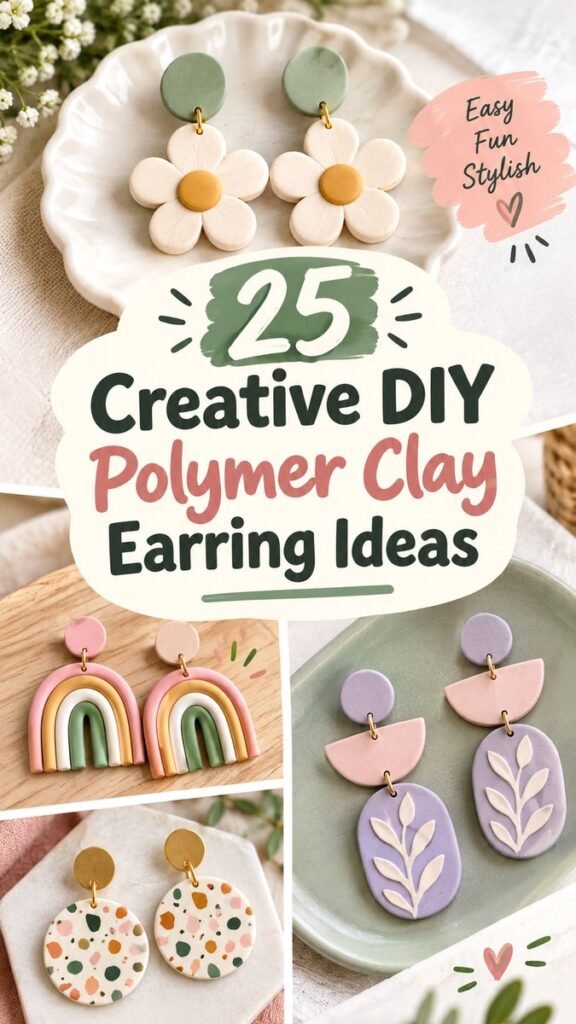
Making your own jewelry is a fun way to turn simple materials into accessories that feel completely personal. Clay earrings DIY ideas are especially appealing because polymer clay can be shaped into colorful arches, flowers, geometric forms, textured patterns, and playful statement pieces. The designs shown here highlight how a few carefully chosen colors and simple shapes can create earrings that look polished while still having a handmade character.
From soft pastel combinations to bold patterned pieces, there are countless ways to experiment with clay earrings. You can keep your designs minimal and modern, add decorative details, or combine several shapes to create a more dimensional look. Whether you are new to polymer clay crafts or already enjoy making handmade jewelry, these ideas can provide plenty of inspiration for your next project.
Key Takeaways
- Use simple geometric shapes to create stylish polymer clay earrings.
- Combine soft pastels with neutral shades for a modern handmade look.
- Try rainbows, florals, terrazzo patterns, and layered designs for variety.
- Texture and small decorative details can make simple clay pieces stand out.
- Plan your color palette before shaping the clay for a more cohesive collection.
- Experiment with proportions to create both everyday and statement earrings.
Why Clay Earrings Are So Fun to Make
Polymer clay is a creative material that gives jewelry makers plenty of freedom. Instead of relying on complicated forms, you can begin with circles, arches, half circles, ovals, strips, and other basic shapes. These simple elements can then be combined into earrings with completely different personalities.
The visual appeal of clay earrings often comes from the balance between shape and color. A pair of simple arches can feel playful when made in several pastel colors, while a single neutral shape can look sophisticated with a subtle texture. This flexibility makes DIY clay earrings suitable for many different personal styles.
One of the biggest advantages of working with clay is that you do not need an elaborate design to create something attractive. Clean shapes, thoughtful color combinations, and careful finishing can make a simple pair look intentionally designed.
Creative Polymer Clay Earring Ideas to Try
The designs in this style of jewelry collection show several directions you can explore. Instead of copying one specific pair, use the concepts as starting points and change the colors, proportions, patterns, and shapes to create something that feels like your own.
1. Colorful Rainbow Earrings
Rainbow-inspired earrings are a great example of how repeated shapes can create an eye-catching design. Layer several curved clay pieces in complementary colors, leaving a little space between each section or stacking them closely together.
Pastel pink, cream, sage, peach, yellow, and soft blue can create a gentle color story. For a bolder version, use brighter shades and stronger contrast. You can also make the rainbow compact for an everyday accessory or enlarge it for a statement piece.
2. Geometric Clay Earrings
Geometric earrings are perfect if you prefer a clean, contemporary aesthetic. Circles, semicircles, rectangles, arches, ovals, and curved bars can be combined in many ways. Try layering two or three shapes with small metal jump rings between them for added movement.
A useful approach is to select one dominant shape and then add a smaller contrasting shape underneath. For example, a round stud can connect to a semicircle and then a small rectangle. Keeping the shapes simple allows the color palette and proportions to become the main design features.
3. Floral Polymer Clay Earrings
Flower designs bring a softer, more playful quality to handmade jewelry. A basic flower can be created from several rounded clay petals surrounding a contrasting center. You can make the petals identical for a neat appearance or slightly vary them for a more organic handmade feel.
White or cream petals paired with a mustard, peach, or terracotta center can create a warm look. Alternatively, experiment with pink, lavender, sage, or blue. Floral earrings also work beautifully as seasonal accessories because the color palette can easily be changed throughout the year.
4. Terrazzo Pattern Earrings
Terrazzo-style clay earrings are a fun way to use small pieces of leftover clay. Begin with a neutral base and add tiny irregular pieces in several colors. Press the accents gently into the surface, then shape the clay into your desired earring form.
This technique creates visual interest without requiring complicated carving or sculpting. Use three or four accent colors for a coordinated result, or choose contrasting shades for a more energetic design.
5. Textured and Botanical Designs
Another beautiful option is to add texture to a simple clay shape. Leaf-inspired details, subtle lines, dots, impressions, and other surface patterns can turn an otherwise plain oval or circle into a decorative piece.
Keep the base shape relatively simple when using texture. This helps the pattern remain visible and prevents the finished earring from looking overly busy. A lavender oval with cream botanical details, for example, can create a soft and elegant handmade appearance.
Choosing a Color Palette for DIY Clay Earrings
Color is one of the easiest ways to give a collection of handmade earrings a consistent visual identity. The examples shown feature soft, earthy, and pastel shades that work well together without overwhelming the shapes.
For a calm palette, combine two or three muted colors with cream or another warm neutral. Sage green, blush pink, lavender, and off-white are particularly versatile choices. If you want more contrast, introduce mustard yellow, terracotta, caramel, or a deeper green as an accent.
Before conditioning your clay, arrange small pieces of your chosen colors next to each other. This makes it easier to see whether the shades complement one another. It is much simpler to adjust the palette before the earrings are shaped.
Expert Insight
A cohesive color palette can make several different earring designs look like part of the same handmade collection. Choose a few recurring shades and use them in different proportions across your pieces.
Basic Supplies for Polymer Clay Earrings
You do not need a huge collection of equipment to begin exploring clay earrings DIY ideas. A small selection of basic craft supplies can cover many beginner-friendly projects.
- Polymer clay in your chosen colors
- A smooth work surface suitable for clay crafting
- Acrylic roller or clay rolling tool
- Clay cutting tools or shape cutters
- Small tools for adding texture and detail
- Earring posts or hooks
- Small jump rings for connecting components
- Jewelry pliers
- An appropriate baking surface and oven for curing the clay according to its package instructions
The exact tools you need depend on the designs you want to make. Simple earrings can often be created with basic cutters and shaping tools, while more detailed projects may benefit from texture tools and precision blades.
How to Plan Your Earring Design
Before cutting your clay, take a few minutes to sketch or arrange your design. This small step can save time and help you create balanced earrings.
- Choose the main shape. Decide whether you want a circle, arch, oval, flower, half circle, or another silhouette.
- Select your colors. Pick a small palette that works well together.
- Decide on the proportions. Consider how large the main component should be compared with the stud or connector.
- Add decorative details. Use patterns, textures, layers, or small contrasting shapes where appropriate.
- Check symmetry. Compare both earrings before curing them so they have a similar overall appearance.
Planning is especially helpful when making layered earrings. Several components need to work together visually, so arranging them before permanently assembling the pieces gives you a chance to adjust the design.
Tips for Shaping and Working With Polymer Clay
Good preparation can make the clay easier to handle and can improve the final appearance of your earrings. Work on a clean surface and keep your hands and tools as free from dust as possible, particularly when using pale colors.
Condition the clay according to the manufacturer’s instructions before shaping it. Properly prepared clay is generally easier to roll, cut, and manipulate. When creating repeated components, try to use similar amounts of clay so the finished pair looks balanced.
For clean geometric designs, press cutters firmly and remove excess clay carefully. For organic shapes such as flowers and leaves, small variations can add charm, but try to keep the overall dimensions reasonably consistent.
When making earrings with several layers, avoid making every component equally large. A larger focal shape supported by smaller details usually creates a clearer visual hierarchy and helps the design feel intentional.
Creating Different Styles From One Basic Shape
You can create an entire collection from one simple shape by changing the surface treatment and color combination. For example, a basic oval can become a minimalist earring in one neutral color, a botanical design with raised leaf details, or a terrazzo piece covered with colorful clay fragments.
A semicircle can be used alone, layered with another semicircle, or combined with an oval. Arches can become rainbow-inspired earrings, while circles can work as studs or as larger decorative components.
This approach is useful when you want to practice without constantly learning a new construction method. Once you are comfortable with one silhouette, changing the palette and surface details can make it feel completely different.
Why This Matters
- Simple shapes are easier to repeat consistently.
- Changing color and texture creates variety without complicated construction.
- Building around a few core shapes can help a handmade collection feel cohesive.
Ideas for Making Your Designs More Personal
The best part of DIY jewelry is the opportunity to customize every detail. If you love soft colors, build a collection around blush, cream, sage, lavender, and muted yellow. If your style is more dramatic, introduce deeper shades and stronger contrasts.
You can also personalize earrings through texture. Try subtle floral impressions, repeated dots, small lines, abstract marks, or layered clay accents. Even tiny differences can give a handmade piece its own character.
Another option is to create coordinated sets. Make several pairs that share the same color palette but use different silhouettes. One pair could feature rainbows, another flowers, and another geometric layers. Because the colors repeat, the designs can still feel connected.
Finishing and Caring for Handmade Earrings
After shaping your designs, follow the curing instructions provided with your polymer clay. Avoid guessing at curing temperatures or times because different clay products can have different requirements.
Once the pieces have cooled completely, inspect the surfaces and edges. Look for rough spots or unwanted marks and finish them carefully using tools appropriate for the material. Attach the jewelry findings securely so the finished earrings are comfortable and practical to wear.
Store handmade clay earrings in a clean, dry place where they will not be crushed beneath heavier items. Keeping individual pairs separated can also help protect delicate details and preserve their finished appearance.
Beginner-Friendly Clay Earring Project Ideas
If you are looking for an easy place to start, choose designs that rely on a few basic components. A simple round stud with a larger geometric drop is a good exercise in proportion. A flower with a contrasting center is useful for practicing repeated shapes. A small rainbow design is ideal for learning how to layer curved pieces.
For a slightly more advanced project, experiment with terrazzo patterns or botanical textures. These designs allow you to focus on surface decoration while keeping the underlying silhouette simple.
- Easy: Round studs, simple arches, basic ovals, and single-color shapes.
- Intermediate: Layered rainbows, floral designs, and two-piece geometric earrings.
- Creative challenge: Terrazzo patterns, detailed textures, and multi-layered compositions.
There is no need to start with the most complicated design. Building confidence with basic shapes often makes more detailed projects much easier later.
At a Glance
- Choose a small, coordinated color palette.
- Start with simple shapes and build from there.
- Use texture and patterns to add personality.
- Keep layered designs balanced through varied proportions.
- Follow the clay manufacturer’s curing instructions.
Conclusion: Turn Simple Clay Into Creative Jewelry
Clay earrings DIY ideas offer an approachable way to explore handmade jewelry while giving you almost unlimited room for creativity. The designs can be soft and minimal, colorful and playful, geometric and modern, or richly textured with botanical details. Starting with basic shapes makes it easy to experiment without needing an elaborate technique.
The most inspiring approach is to treat each design as a starting point rather than a strict template. Change the colors, adjust the proportions, combine shapes, and experiment with patterns until the earrings reflect your own style. A simple palette can become a coordinated collection, while one familiar shape can lead to dozens of different designs.
Whether you are creating your first pair or expanding a growing handmade jewelry collection, polymer clay provides plenty of opportunities to try something new. Gather a few favorite colors, choose a simple silhouette, and let your next pair of earrings become a small creative project you can enjoy from start to finish.