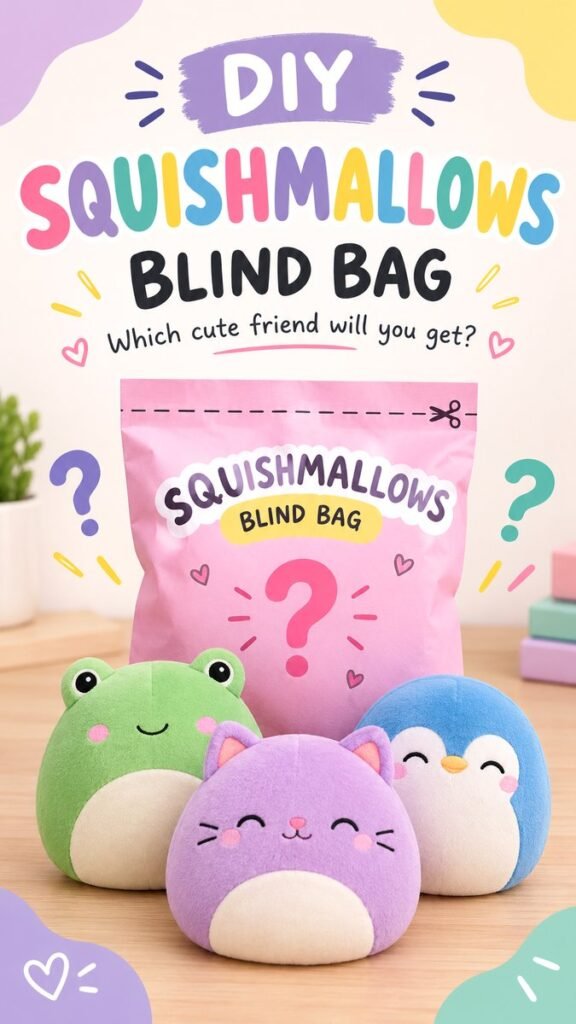
There is something extra exciting about a mystery craft, especially when the finished project is colorful, cute, and easy to personalize. A blind bag ideas paper DIY printable project turns simple paper into a playful surprise activity that can be enjoyed at home, during craft time, at parties, or whenever you want a creative project with a little mystery. With a printable-style design, bright pastel colors, adorable characters, and a question-mark surprise theme, you can create your own paper blind bags without needing complicated crafting skills.
The concept is simple: make a small paper bag or envelope, decorate it with cheerful details, and keep the contents hidden until the bag is opened. The mystery element makes the activity especially fun because you can prepare several bags and decide later what surprise belongs inside each one. It is also a wonderful way to combine paper crafts, printable DIY projects, mystery bags, and creative play in one activity.
Key Takeaways
- Paper blind bags are simple, colorful projects that are easy to customize.
- Printable templates can make cutting, folding, and decorating more convenient.
- Pastel colors, playful lettering, hearts, and question marks create a fun mystery theme.
- Small paper surprises can make each bag feel different and exciting.
- Blind bags work well for craft sessions, parties, rainy days, and creative play.
- You can adapt the design to match almost any cute character or collection theme.
What Is a Paper Blind Bag DIY?
A paper blind bag is a handmade surprise package designed so the person opening it does not know what is inside. Instead of buying a ready-made package, you can create the outer design yourself using paper, printable elements, scissors, adhesive, and simple decorative supplies.
The visual appeal comes from the mystery. A large question mark, playful label, or covered character can immediately communicate that the contents are a surprise. Cute pastel colors can make the project feel soft and cheerful, while colorful lettering gives the finished craft the appearance of a miniature collectible package.
Unlike a complicated paper craft, this project can remain very approachable. The focus is not on creating a technically perfect package. It is about making something attractive, personal, and fun to open.
Why Printable Paper Designs Are So Useful
Printable designs are especially helpful when you want a consistent look across several blind bags. Instead of drawing every label by hand, you can prepare the main elements in advance and concentrate on cutting, folding, assembling, and decorating.
A printable can also provide a starting point for beginners. Once the basic layout is printed, you can add your own colors, stickers, doodles, names, numbers, or tiny illustrations. This gives you the convenience of a template while still leaving plenty of room for creativity.
Materials for a Cute Paper Blind Bag
You do not need a large collection of supplies to make a charming blind bag. Most of the materials are easy to find and can be adapted to whatever you already have at home.
- Printable paper or lightweight cardstock
- Scissors or a paper trimmer
- Glue, double-sided tape, or paper-safe adhesive
- Colored pencils, markers, or gel pens
- Small stickers or decorative paper shapes
- Ruler for creating neat folds
- Optional ribbon, washi tape, or paper embellishments
If you want a sturdier package, cardstock can be a useful option. For a softer, lightweight design, regular printable paper is often easier to fold. The best choice depends on how large the bag will be and what you plan to place inside.
Important: The most successful blind bag designs balance decoration with empty space. Keep the main title and mystery element easy to see, then use smaller accents around them instead of filling every area with details.
How to Create a Blind Bag Ideas Paper DIY Printable
Creating your own paper blind bag can be broken into a few straightforward stages. The exact construction can vary depending on the template, but the overall process remains simple.
1. Choose Your Printable Design
Start with a printable layout that has enough room for the main title and decorative elements. A vertical design works particularly well for Pinterest-inspired crafts because it provides a clear visual hierarchy from top to bottom.
Look for a layout with a recognizable mystery theme. Question marks, hearts, stars, tiny sparkles, and cute character illustrations can instantly make the purpose of the craft clear.
2. Print and Prepare the Pieces
Print the design on suitable paper and check that the page is positioned correctly before cutting. If you are making multiple blind bags, printing several copies at once can make the preparation process faster.
Use sharp scissors for the cleanest edges. If the template contains straight lines, a ruler and paper trimmer can help create a more polished result.
3. Fold Along the Main Lines
Fold the paper carefully along the areas that form the sides, bottom, and top of the package. Lightly scoring the fold lines first can help when working with thicker cardstock.
Take your time with this stage. Neat folds make a handmade paper package look much more finished, even when the construction itself is very simple.
4. Secure the Edges
Apply a small amount of glue or double-sided tape to the appropriate flaps. Press each section firmly and allow the adhesive to hold before moving to the next part.
Avoid using too much glue because excess adhesive can wrinkle thin printable paper. Small, even applications usually give a cleaner finish.
5. Add the Mystery Element
The mystery is what makes a blind bag different from an ordinary paper pouch. Add a large question mark, a covered character, or a phrase such as “Mystery Inside” to make the purpose obvious.
You can also create a collection by giving every bag a slightly different design. Try changing the background color, character, decorative shapes, or small label while keeping the overall layout consistent.
Cute Design Ideas for Paper Blind Bags
The visual style can be completely customized. A pastel palette is a natural choice for a soft and playful look, but there are many other directions to explore.
Pastel Character Collection
Use gentle pink, lavender, mint, blue, yellow, and peach tones. Give every blind bag its own cute character while keeping the typography and package shape consistent. This creates the feeling of a small collectible series.
Rainbow Mystery Bags
For a brighter design, use a different cheerful color for each package. Rainbow lettering, stars, dots, and colorful question marks can make the collection feel energetic and playful.
Mini Food Characters
Turn the mystery collection into a paper food theme. Cute fruit, desserts, drinks, or snack-inspired characters can become the artwork on the front. This is a fun option when you want a recognizable collection without making every package identical.
Seasonal Surprise Bags
Change the decorations according to the season. Pastel flowers can work for spring, warm leaves for autumn, snow-inspired details for winter, and bright sunshine motifs for summer. The same basic printable concept can therefore become a year-round craft.
Why This Matters
A good blind bag is more than a container. The outside design builds anticipation before the package is opened. Clear lettering, a strong mystery symbol, and a few well-placed decorative details can make a simple paper craft feel much more exciting.
What Can You Put Inside a Paper Blind Bag?
The surprise does not have to be complicated. Small lightweight items work well, especially when the project is intended for creative play. You can even keep the entire activity paper-based by making the surprises yourself.
- Mini character cards
- Small paper stickers
- Hand-drawn collectible cards
- Tiny paper accessories
- Short positive notes
- Simple coloring cards
- Paper tokens or badges
- Mini craft challenges
For a collection-style activity, prepare several different surprises and assign one to each bag. Keep the contents hidden while decorating the outside. This creates a genuine reveal moment when each package is opened.
Pro Tip: Make the outside packages look similar while changing the hidden contents. The contrast between familiar packaging and an unknown surprise makes the opening experience more engaging.
Making the Printable Look More Professional
A few small design decisions can dramatically improve the finished appearance. Start with a strong headline that can be read quickly. Large rounded lettering can give the project a friendly craft-room feel, while a simple supporting phrase keeps the layout from becoming crowded.
Use contrast to separate the most important elements. For example, a colorful title can sit above a darker secondary heading, while the mystery bag itself becomes the main visual focus lower on the page.
Decorative elements should support the theme rather than compete with it. Hearts, sparkles, question marks, dots, and simple hand-drawn lines can fill empty areas without overwhelming the main design.
Keep the Typography Easy to Read
Since Pinterest users often discover ideas on mobile devices, readability matters. Choose bold fonts for the primary phrase and keep supporting text short. Avoid placing tiny words over busy illustrations or complicated patterns.
A useful layout might have three visual levels: a small “DIY” label, a large “Blind Bag” headline, and one short phrase explaining the surprise concept. This creates a clear path for the viewer’s eyes.
Use Color With Intention
Pastel colors are ideal for a cute printable aesthetic because they create a soft, friendly mood. Pairing several pastel shades with dark lettering can preserve readability while keeping the overall design playful.
You can also select one accent color for repeated details. For example, the same pink or lavender tone can appear in hearts, underlines, borders, and question marks. Repeating an accent creates visual consistency across the package.
Fun Ways to Use Blind Bag Crafts
Paper blind bags are versatile enough for many different occasions. They can become a simple afternoon activity or part of a larger themed craft session.
- Craft time: Let everyone design and decorate their own mystery package.
- Party activities: Prepare a collection of handmade surprise bags for a creative activity.
- Rainy-day projects: Combine cutting, folding, drawing, and decorating in one screen-free activity.
- Collection games: Create several designs and turn each opening into a small reveal.
- Gift packaging: Use a decorated paper bag to hide a tiny handmade surprise.
The activity can also be adapted to different skill levels. Younger crafters may enjoy coloring and decorating prepared pieces, while older children and adults can design their own characters, packaging, and collectible themes from scratch.
Easy Customization Ideas
One of the best parts of a DIY printable is the ability to make it your own. Even a basic template can become completely different with a few changes.
- Change the main color palette.
- Add a personalized collection name.
- Draw your own mystery characters.
- Replace hearts with stars, flowers, dots, or bows.
- Create numbered bags for a collection series.
- Add a “Which one will you get?” style message.
- Decorate the edges with washi tape or small paper shapes.
For an especially cohesive collection, choose one design rule and repeat it across every bag. You might use the same headline placement, border shape, or character style while changing only the colors and mystery contents.
Tips for Better Results
Clean construction is helpful, but creativity should remain the priority. If your folds are not perfect on the first attempt, use the experience to adjust the next version. Paper crafts become easier with practice.
Before assembling a large batch, make one test bag. This lets you check the size, fold placement, adhesive points, and overall appearance. Once you are happy with the test version, repeat the process for the remaining pieces.
Keep the decorative design simple enough that the central mystery element remains visible. A crowded package can make the headline difficult to read, while too much decoration can hide the character artwork.
Most importantly, make the project enjoyable. The charm of a paper blind bag comes from the combination of handmade details and surprise. There is no need for every package to look identical or professionally manufactured.
At a Glance
- Choose a cute printable layout.
- Print, cut, fold, and secure the paper.
- Use question marks and bright accents to create mystery.
- Fill each bag with a small handmade surprise.
- Customize colors and characters for your own collection.
Final Thoughts on Blind Bag Ideas Paper DIY Printable
A blind bag ideas paper DIY printable project is a simple way to turn ordinary paper into an exciting creative experience. The colorful packaging, mystery question marks, cute characters, and playful typography create an inviting design, while the printable format makes the activity approachable and easy to customize.
Whether you create one special surprise bag or an entire collection, the possibilities are wide open. Experiment with pastel colors, different character themes, handmade inserts, and decorative details until you find a style that feels uniquely yours.
The best part is the anticipation. A decorated paper package can look adorable on the outside while keeping its surprise hidden inside. That small moment of mystery gives this easy paper craft its special charm and makes it a project worth saving for your next creative afternoon.