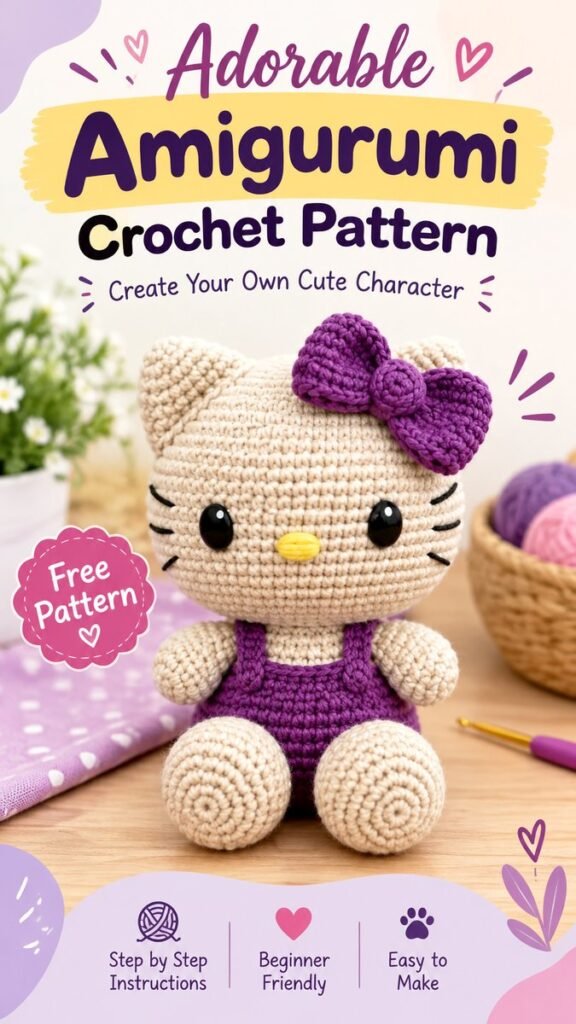
Hello Kitty DIY projects are a charming way to combine creativity, crochet, and kawaii-inspired crafting in one satisfying handmade project. This adorable amigurumi-style character features a soft cream body, rounded ears, a bright bow, tiny black eyes, a yellow nose, and a playful purple outfit. The result is a cute handmade piece that feels both nostalgic and modern, making it a fun project for crochet lovers, gift makers, and anyone who enjoys character-inspired crafts.
Key Takeaways
- A Hello Kitty DIY crochet project can become a cute handmade decoration, gift, or collectible.
- Amigurumi construction relies on simple rounded shapes that can be assembled into a character.
- Color choices can completely change the personality and style of the finished piece.
- Small details such as the bow, facial features, and clothing make the character instantly recognizable.
- Careful stuffing and consistent stitches help create a neat, polished amigurumi finish.
Why Hello Kitty DIY Crafts Are So Popular
There is something especially appealing about turning a familiar character style into a handmade project. Instead of simply buying a finished item, a DIY craft gives you the opportunity to choose the colors, textures, proportions, and finishing details yourself. Crochet adds another layer of charm because every stitch contributes to the soft, handcrafted appearance.
The design shown here uses a classic amigurumi approach. The body is made from compact crochet stitches, while the head, arms, legs, and ears are built from rounded forms. A contrasting bow and outfit add color without overwhelming the simple character design.
Hello Kitty DIY ideas also work well for different skill levels. Beginners can use the overall design as inspiration for practicing basic amigurumi shapes, while more experienced crocheters can experiment with clothing, accessories, facial expressions, and alternative color combinations.
Understanding the Amigurumi Design
Amigurumi is known for turning yarn into small stuffed figures using crochet or knitting techniques. The visual style often features rounded proportions, simple facial details, and tightly worked stitches. That makes it particularly suitable for cute character-inspired projects.
The central feature of this design is the oversized rounded head. Its proportions create the sweet, toy-like appearance associated with kawaii crafts. Small arms and large rounded feet balance the head, while the compact body keeps the figure looking cuddly rather than elongated.
The Head and Ears
The head is the visual focal point, so maintaining a smooth shape is important. Even tension helps keep the crochet fabric consistent and prevents unwanted gaps. The ears should sit evenly at the top of the head, creating the familiar cat-inspired silhouette.
When working rounded amigurumi pieces, stuffing should be added gradually rather than all at once. This makes it easier to distribute the filling evenly and maintain the intended shape. Overstuffing can distort stitches, while too little stuffing may leave the finished piece looking flat.
The Face and Signature Details
Minimal facial details can have a major visual impact. The design uses dark oval eyes, a small yellow nose, and short whisker-like accents. Because these details are simple, their placement matters. Symmetry helps the finished character look polished and balanced.
The bow is another important feature. A contrasting purple shade makes it stand out against the cream-colored body and creates a strong visual accent near the top of the figure. A similar color is repeated in the outfit, giving the entire design a coordinated appearance.
Important: In character-inspired crochet, the smallest details often make the biggest difference. Take time to position the eyes, nose, whisker details, bow, and clothing evenly before securing everything permanently.
Choosing Yarn and Crochet Supplies
A soft, smooth yarn is a practical choice for amigurumi because it allows the stitches to remain visible while creating a comfortable finished texture. Cotton or cotton-blend yarns are commonly useful for small crochet figures because they tend to hold their shape well.
You will also need a crochet hook that works well with your chosen yarn. Amigurumi is generally worked with a relatively tight tension so the stuffing does not show through the stitches. Always consider the yarn label recommendations as a starting point, then adjust your hook size according to the fabric you want to create.
Helpful Materials
- Cream or light-colored yarn for the main character.
- Purple yarn or another contrasting shade for the bow and outfit.
- Black materials for the eyes and facial accents.
- Yellow yarn or embroidery material for the nose.
- Polyester fiberfill or suitable stuffing.
- A crochet hook appropriate for the selected yarn.
- A yarn needle for sewing pieces together.
- Scissors and stitch markers.
The exact materials can be adjusted to suit what you already have in your craft collection. One of the best parts of a Hello Kitty DIY project is the freedom to personalize the colors and accessories while keeping the recognizable rounded character style.
How to Approach a Hello Kitty DIY Crochet Project
If you are following an amigurumi pattern, read through the instructions before beginning. Understanding how the separate components fit together can make the process much easier. Rather than treating the project as one large task, think of it as a collection of smaller shapes that eventually become one character.
- Gather your yarn, hook, stuffing, needle, and other supplies.
- Begin with the main rounded pieces according to your chosen pattern.
- Keep your stitch tension consistent as you work each section.
- Add stuffing gradually as closed shapes become large enough to fill.
- Complete the smaller pieces such as arms, feet, ears, bow, and clothing.
- Arrange the pieces before sewing them together so you can check proportions.
- Attach the facial details carefully and check symmetry from several angles.
- Finish loose ends securely and give the completed figure a gentle final shaping.
Keep Your Stitch Tension Consistent
Consistent tension is one of the most useful skills for successful amigurumi. If some rounds are significantly looser than others, the finished shape may become uneven. Practice with a small sample if you are new to working tightly in the round.
It is also helpful to count stitches regularly. A small change in stitch count can gradually alter the shape of a rounded piece, especially when increases and decreases are used to form the head, body, or feet.
Build the Character in Stages
Trying to finish everything at once can make a crochet project feel complicated. Working in stages keeps the process manageable. Complete the main body components first, then move on to decorative details. This approach also gives you more opportunities to check proportions before permanently attaching pieces.
Why This Matters
A polished amigurumi figure is not only about following stitches. Shape, placement, color balance, and finishing all work together. Taking a few extra minutes to check symmetry before sewing can make the final character look much more professional.
Creative Ways to Personalize Your Hello Kitty DIY
Once you understand the basic construction, there are many ways to make your project feel personal. The purple-and-cream combination shown here creates a soft and playful look, but you do not have to stop there.
Experiment With Color
Try pastel pink, soft blue, mint, lavender, or cheerful yellow for the clothing and bow. You can also create seasonal combinations with warm autumn shades or bright colors for a summer-inspired character.
Repeating one accent color in multiple areas usually creates a more coordinated result. For example, using the same shade for the bow and overalls creates visual unity while keeping the cream-colored body as the main focus.
Change the Outfit
The clothing can become an entire creative feature of the project. A simple pair of overalls can be adapted into a dress, skirt, sweater, or another tiny handmade outfit. You can also add small crochet accessories for a more customized finish.
Create Different Sizes
A larger version can become a soft decorative piece, while a smaller version may work well as a shelf accent or handmade gift. Changing yarn weight and hook size can influence the finished scale, although it is important to adjust your technique so the stitches remain secure.
Common Mistakes to Avoid
Small crochet figures are rewarding, but a few common issues can affect the final appearance. The good news is that most are easy to prevent with careful preparation.
- Loose stitches: Tight, even stitches help keep stuffing from showing.
- Uneven stuffing: Add small amounts gradually and shape the piece as you go.
- Misplaced facial details: Use pins or temporary markers to test placement first.
- Uneven attachment: Compare both sides before permanently sewing arms, legs, or ears.
- Overcomplicated colors: A simple palette often keeps the character looking clean and cohesive.
Pro Tip: Photograph your figure from the front before finishing the final attachments. A quick photo can reveal small alignment issues that are easy to miss while holding the project close.
Fun Uses for a Handmade Crochet Character
A finished amigurumi character can be much more than a crochet practice piece. It can add personality to a craft room, bedroom shelf, desk, or cozy reading corner. Its compact size also makes it easy to display alongside other handmade creations.
These projects can also become thoughtful handmade gifts. A personalized color palette can make the item feel especially intentional. If you are making one for someone else, consider choosing colors that match their favorite shades or creating a tiny accessory that reflects their style.
For crochet enthusiasts, character-inspired amigurumi can also be part of a larger handmade collection. You might create several figures using different outfits and color combinations, then display them together as a playful craft arrangement.
Tips for a Neat Finished Result
Finishing is just as important as the crochet itself. Before calling your project complete, inspect the stitches, seams, facial details, and overall shape. Gently adjust the stuffing if one side looks fuller than the other.
Make sure yarn ends are secured appropriately and that sewn components feel stable. If your project will be handled frequently, pay particular attention to attachments such as the bow, arms, and facial decorations.
Finally, step back and look at the entire figure. The goal is not necessarily perfect mathematical symmetry. Handmade projects have character because they are created by hand. What matters most is a clean, intentional appearance and a finished piece that feels charming and cohesive.
At a Glance
- Use tight, consistent crochet stitches.
- Build the character from simple rounded components.
- Choose two or three coordinated colors for a clean look.
- Check facial detail placement before securing it.
- Personalize the bow and outfit to make the project your own.
Conclusion
A Hello Kitty DIY crochet project is a delightful combination of creativity, patience, and playful design. The rounded amigurumi construction makes the project visually appealing, while details such as the oversized bow, tiny nose, expressive eyes, and colorful outfit give the finished character its personality.
Whether you are an experienced crocheter or just discovering amigurumi, this style of project offers plenty of room to learn and experiment. Start with a simple construction, focus on consistent stitches, and take your time with the finishing details. Once the basic character comes together, you can explore new colors, outfits, sizes, and accessories to create a handmade version that feels uniquely yours.
The best DIY projects are the ones that make you want to keep creating. Gather your favorite yarn, choose a cheerful color palette, and enjoy the process of turning simple stitches into an adorable handmade character.
Tags
Hello Kitty DIY Hello Kitty Crochet Amigurumi Crochet DIY Amigurumi Crochet Kawaii Crafts Crochet Patterns Handmade Crafts