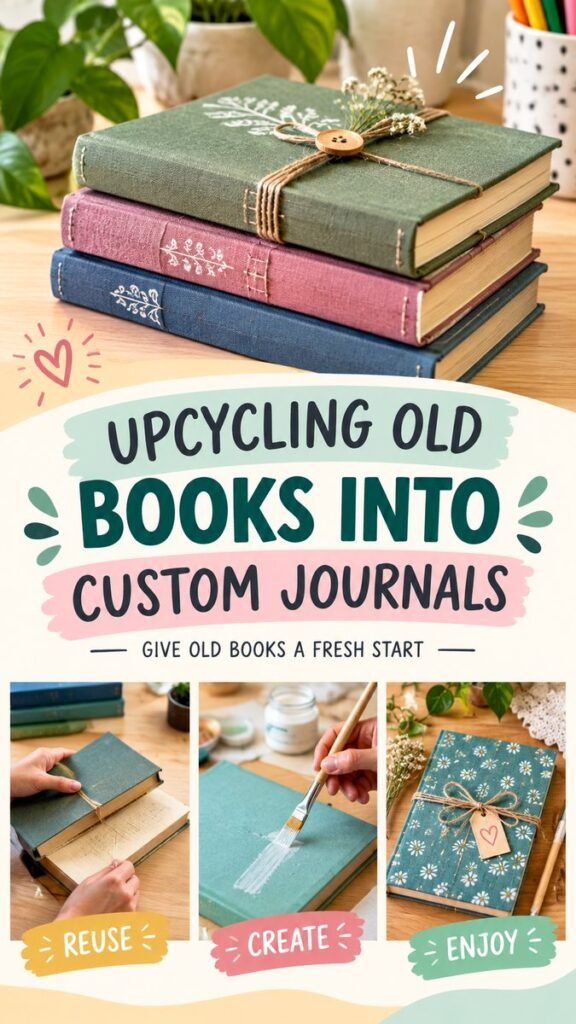
Turning old books into handmade journals is a creative way to give forgotten materials a fresh purpose. With a little imagination, an ordinary book can become a beautiful journal with a personalized cover, decorative details, and plenty of room for notes, sketches, lists, memories, or creative writing. The finished journals shown in this DIY concept have a warm, handcrafted character that makes them especially appealing for anyone who loves paper crafts, upcycling, and thoughtful handmade projects.
Key Takeaways
- Repurpose old books into useful handmade journals.
- Personalize covers with fabric, paint, paper, ribbon, or natural details.
- Choose simple materials that make the project approachable for beginners.
- Use decorative details to create journals that feel personal and unique.
- Make several styles for writing, sketching, planning, gifting, or keepsakes.
Why Handmade Journals DIY Projects Are So Appealing
There is something special about a journal made by hand. Unlike a mass-produced notebook, a handmade journal can reflect the personality, colors, textures, and interests of its creator. Every choice can become part of the finished design, from the condition of the original book to the material used on the cover and the small embellishments added at the end.
Upcycling also adds another layer of creativity. Instead of throwing away an old book or leaving it unused on a shelf, you can transform it into something practical. The process encourages you to look at familiar materials differently and discover new possibilities in things you already have.
Important: The beauty of a handmade journal does not come from making every detail perfect. Small variations, visible stitching, textured surfaces, and slightly imperfect decorations can give a finished journal the charm that makes handmade crafts feel authentic.
How to Choose an Old Book for a DIY Journal
The foundation of an upcycled journal is the book you choose. Look for a book with a sturdy cover and pages that are still reasonably secure. Hardcover books can be especially useful because their existing structure provides a strong base for decoration and personalization.
Consider the size before starting. A compact book can become a convenient journal for carrying in a bag, while a larger book offers more space for sketches, longer entries, collages, and creative layouts.
What to Look For
- A firm, stable cover
- Pages that are not excessively damaged
- A size that suits the intended use
- A spine that still feels reasonably secure
- A surface that can accept the type of decoration you want to use
If the original pages are not suitable for writing, you can think of the old book primarily as a cover or structural starting point. Fresh paper can then be incorporated according to the style of journal you want to create.
Materials for Handmade Journals DIY
One of the best things about this project is that the materials can be adapted to your craft supplies. You do not need a huge collection of specialty tools to create something attractive. Start with a sturdy old book and a few basic supplies, then add decorative materials based on your preferred aesthetic.
Basic Supplies
- An old hardcover book
- Paper or replacement journal pages if needed
- Scissors or a craft knife
- Ruler and pencil
- Craft glue suitable for paper
- Paint and brushes
- Decorative paper or fabric
- Ribbon, twine, buttons, or similar embellishments
- Clips or weights for holding materials in place while adhesive dries
For a more natural look, consider adding twine, pressed-looking botanical decorations, wooden buttons, kraft paper, or neutral fabrics. For a colorful journal, patterned paper, bright paint, stickers, and decorative ribbons can create a playful finish.
Step-by-Step Handmade Journal Ideas
The reference style of this project combines finished journals with glimpses of the crafting process. That makes it easy to imagine the transformation from an ordinary old book into a personalized piece. You can follow a similar creative sequence while adapting each stage to your own materials.
1. Prepare the Book
Begin by cleaning the cover and removing loose dust or debris. Examine the spine and corners so you know which areas may need extra attention. If the book has pages you want to keep, protect them while working on the exterior.
Take a moment to decide whether you want a fully covered journal or a design that allows some of the original book surface to remain visible. Both approaches can look attractive.
2. Plan Your Cover Design
Before applying glue or paint, arrange your decorative materials on the cover. Try different combinations of colors, textures, and shapes. A simple arrangement often looks more polished than one with too many competing elements.
You might use a single fabric panel, a painted surface, a strip of patterned paper, or a combination of several materials. The goal is to create a cover that feels intentional while still showing the handmade character of the project.
3. Add Color and Texture
Paint can completely change the appearance of an old book. Soft greens, dusty blues, muted pinks, warm neutrals, and earthy tones create a cozy handmade look. You can also use contrasting colors for a more contemporary journal.
Allow each layer to dry before adding another material. Thin, even applications generally make it easier to maintain a clean surface and prevent excessive buildup around edges.
4. Personalize the Details
This is where the journal can become truly individual. Add a small ribbon, a piece of twine, a button, a paper label, or a simple painted motif. You can also create a closure by wrapping decorative cord around the book.
Small details are particularly effective when they complement the main color palette instead of overwhelming it. A single decorative strip or carefully positioned embellishment can become the focal point.
Expert Insight
- Choose two or three main colors before decorating.
- Use texture to add interest without overcrowding the cover.
- Leave some open space so the finished design remains easy on the eyes.
5. Finish and Protect the Journal
Once the decoration is complete, inspect the edges and corners. Make sure loose pieces are secured and that any adhesive has dried completely. If the journal will be handled frequently, pay particular attention to areas that receive repeated contact, such as the spine and cover edges.
A final inspection is also a good opportunity to add a title label or small decorative mark. You can leave the journal minimal or continue adding details as your style develops.
Creative Ways to Use Your Handmade Journal
A handmade journal does not have to serve only one purpose. The same basic design can become a practical notebook, creative sketchbook, memory book, planner, recipe notebook, or thoughtful handmade gift.
For Everyday Writing
Keep a handmade journal beside your desk for notes, daily thoughts, lists, or ideas. A personalized cover can make ordinary writing feel more enjoyable and encourage you to return to the notebook regularly.
For Creative Projects
Artists and makers can use these journals for sketches, color palettes, craft ideas, inspiration collections, and project planning. Combining handwritten notes with drawings and paper scraps can turn the journal itself into a creative work.
For Handmade Gifts
A customized journal can make a thoughtful gift because the design can be adapted to the recipient. Choose colors and decorative elements that reflect their personality, then leave the pages simple enough for them to make the journal their own.
Pro Tip: If you are making journals as gifts, create a small collection using different cover colors and decorations. The designs can share the same overall style while still feeling individually made.
How to Make Your Journal Look More Professional
A polished handmade journal is usually less about expensive supplies and more about thoughtful composition. Consistent spacing, coordinated colors, clean edges, and restrained decoration can make even simple materials look intentional.
Keep the Color Palette Consistent
Choose a small group of colors and repeat them across the cover. For example, muted green paired with dusty pink and natural kraft tones creates a soft, welcoming palette. Deep blue with cream and brown can create a classic appearance.
Create One Focal Point
Give the eye one main detail to notice first. This might be a painted design, a fabric strip, a decorative button, or a handmade label. Supporting elements should enhance that focal point rather than compete with it.
Pay Attention to the Edges
Neat edges can make a dramatic difference. Trim paper and fabric carefully, press down loose corners, and avoid applying too much adhesive near the outer edges. Taking extra time here can make the finished journal feel considerably more refined.
Easy Handmade Journal Variations to Try
Once you have completed one journal, experiment with different styles. The same basic upcycling idea can produce very different results depending on the materials and decorative approach.
- Botanical style: Use muted greens, natural twine, floral patterns, and simple botanical motifs.
- Vintage style: Combine kraft paper, neutral colors, textured fabric, and classic labels.
- Colorful style: Mix cheerful painted covers with bright patterned paper and playful embellishments.
- Minimal style: Choose one main color, a small label, and a single subtle decorative detail.
- Nature-inspired style: Pair earthy tones with wood, twine, fabric, and botanical-inspired decoration.
Common Mistakes to Avoid
DIY journal making is flexible, but a few simple precautions can make the process easier. Avoid adding too many thick embellishments if you want the journal to close comfortably. Excessive layers can also place unnecessary pressure on the spine.
It is also helpful to test unfamiliar adhesives or paints on a scrap piece of material first. Different papers, fabrics, and painted surfaces can react differently, so a quick test can prevent unwanted results on the finished cover.
Finally, resist the temptation to keep decorating simply because there is still space available. A balanced cover often looks more sophisticated than one filled from edge to edge.
Quick Points
- Start with a sturdy old book.
- Plan your colors before decorating.
- Use texture and small accents to add personality.
- Keep the design balanced and practical.
- Let every layer dry fully before moving to the next step.
Conclusion: Give Old Books a Creative New Life
Handmade journals DIY projects are a wonderful combination of creativity, personalization, and upcycling. An old book can become the starting point for something useful and beautiful, especially when you take time to choose a thoughtful color palette, add tactile materials, and keep the design balanced.
Whether you prefer soft botanical covers, colorful craft designs, simple minimalist details, or cozy vintage textures, there is plenty of room to make the project your own. Start with materials you already have, experiment with different combinations, and let the character of each journal develop naturally.
Handmade journals are more than notebooks. They are small creative projects that can turn overlooked materials into something useful, personal, and worth keeping. Save your favorite ideas and try your own version when you are ready to create.
Tags
Handmade Journals Journal DIY Upcycling Ideas Book Crafts DIY Journals Paper Crafts Creative DIY Handmade Crafts