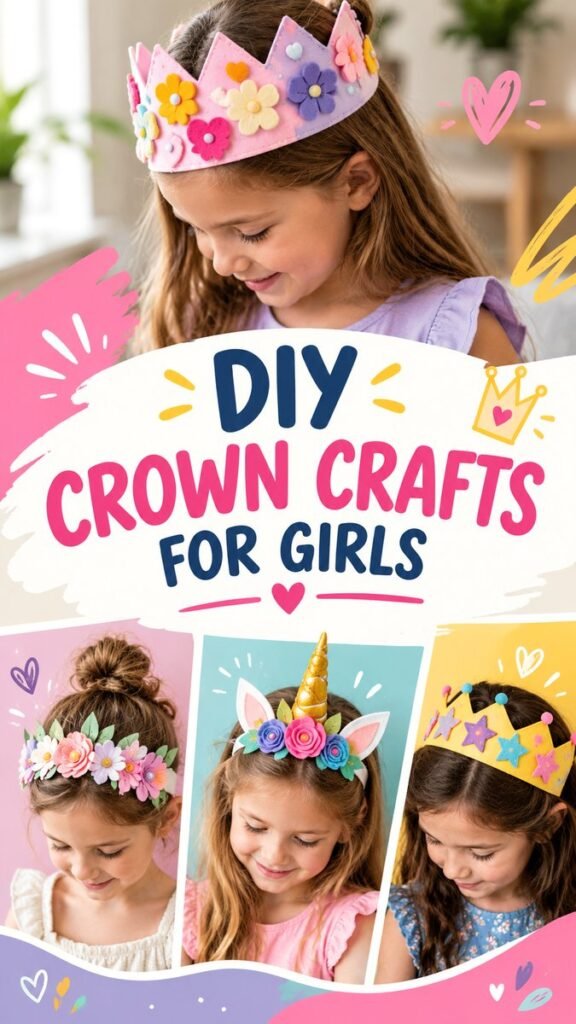
There is something wonderfully playful about a handmade crown. A simple crown can turn an ordinary afternoon into a creative adventure, whether it is made for dress-up, a birthday celebration, pretend play, a photo session, or simply a fun craft project at home. These crown DIY ideas combine bright colors, cheerful decorations, flowers, stars, hearts, and imaginative details to create accessories that feel special without requiring complicated crafting skills.
The designs featured here show how flexible a DIY crown can be. From soft pastel crowns decorated with colorful shapes to floral headpieces and fantasy-inspired styles, there are plenty of ways to create a crown that matches a child’s personality and favorite colors. With a few basic craft supplies and some imagination, you can make a memorable accessory that looks charming and feels personal.
Key Takeaways
- DIY crowns are easy to personalize with colors, flowers, stars, hearts, and other playful decorations.
- Lightweight materials can make handmade crowns more comfortable for children to wear.
- Felt, paper, fabric, ribbon, and craft embellishments offer many creative possibilities.
- Crown crafts work well for birthdays, dress-up activities, pretend play, and creative afternoons.
- A simple base can become a completely different design with a few decorative details.
- Saving a collection of crown DIY ideas makes it easier to plan future craft projects.
Why Crown DIY Projects Are So Much Fun
A crown is more than a decorative accessory. For children, it can become part of a story, costume, game, or imaginative world. A handmade crown can represent a princess, fairy, flower queen, birthday star, or any character a child dreams up. The creative process is just as enjoyable as wearing the finished piece.
Crown DIY projects are also approachable because the basic shape does not need to be complicated. A simple band with a few points can provide the foundation. From there, the design can be decorated with colorful craft pieces, flowers, ribbons, stickers, buttons, pom-poms, or painted details.
Important: The most successful DIY crown is not necessarily the most complicated one. A simple crown with a clear color palette and a few carefully chosen decorations can look polished, playful, and completely unique.
Choosing a Style for Your DIY Crown
Before gathering supplies, decide what kind of mood you want the crown to have. The colorful examples shown in this craft theme demonstrate several directions, from soft floral designs to bright fantasy crowns. Choosing a style first can make the rest of the project much easier.
Colorful Felt Crown
Felt is a wonderful material for a soft, colorful crown. It can be cut into simple crown shapes and decorated with flowers, stars, hearts, circles, or other small pieces. Pastel pink, lavender, blue, yellow, and green work beautifully together for a cheerful children’s craft.
Try selecting two or three main colors instead of using every color available. A focused palette helps the decorations stand out while keeping the finished crown visually balanced.
Floral Crown
A floral crown creates a softer, nature-inspired look. Fabric flowers, paper flowers, artificial leaves, or carefully arranged lightweight craft flowers can be attached around a simple headband or crown base. Different flower sizes can add depth while small leaves help fill empty spaces.
For a playful result, combine several flower colors while keeping the base relatively simple. For a more delicate look, choose flowers from the same color family and add a few green leaves.
Fantasy-Inspired Crown
Fantasy-themed crowns are ideal for imaginative play. Unicorn-inspired colors, stars, colorful shapes, and playful textures can transform a basic crown into something that feels magical and exciting. A simple pointed crown can also be adapted into a character accessory by changing the decorations and color combination.
For example, pastel shades can create a dreamy look, while brighter colors make the crown feel energetic and festive. Decorative elements should be lightweight so the crown remains comfortable to wear.
Nature-Inspired Crown
A nature-inspired crown can use leafy shapes, flowers, twigs, paper foliage, or other craft elements that suggest a garden or woodland theme. This style works especially well for outdoor pretend play and spring or summer craft sessions.
For younger children, choose artificial or craft materials rather than sharp or brittle natural pieces. The goal is to keep the project creative while making the finished accessory comfortable and practical.
Why This Matters
A good crown balances creativity with comfort. Keep decorations lightweight, avoid sharp edges, and make sure the crown fits comfortably before adding lots of embellishments. A thoughtfully designed base makes the final craft much easier to enjoy.
Supplies for a Simple Crown DIY
You do not need a large collection of specialist supplies to begin. The exact materials depend on the style you want, but many crown crafts can be made from inexpensive items that are already found in a typical craft box.
- Felt, cardstock, craft foam, or sturdy paper for the crown base
- Child-friendly scissors
- Craft glue or another suitable adhesive
- Ribbon or elastic for securing the crown when appropriate
- Fabric or paper flowers
- Foam or felt stars and hearts
- Pom-poms and small decorative shapes
- Washable markers or paint for additional details
- Stickers and lightweight embellishments
- A ruler or flexible measuring tape for sizing
Keep the materials consistent with the age and activity. For younger children, an adult can prepare cutting, gluing, or other steps that require extra care. Older children can participate more directly in measuring, decorating, and assembling their designs.
How to Make a Basic DIY Crown
The easiest way to create a crown is to begin with a simple band and build the design from there. This approach gives you a reliable foundation while leaving plenty of room for creativity.
1. Measure the Crown Base
Start by measuring around the intended wearer’s head. Add a small amount of overlap if you plan to connect the ends. Avoid making the band too tight. A comfortable fit is especially important when the crown will be worn during an extended craft activity or party.
2. Create the Crown Shape
Cut a long strip of felt, foam, cardstock, or another suitable material. Along the top edge, create a series of simple points. They can be tall and dramatic or short and rounded depending on the style you want.
If you are making several crowns, consider creating a reusable paper template first. The template can help keep the crown shapes consistent while allowing every child to choose their own colors and decorations.
3. Decorate the Crown
This is where the project becomes personal. Arrange your decorations before attaching them permanently. Try placing larger pieces first, then use smaller shapes to fill open areas.
- Choose the main color or background.
- Place the largest decorative elements.
- Add smaller flowers, stars, hearts, or circles.
- Check the spacing from several angles.
- Attach the decorations once the arrangement looks balanced.
4. Secure the Crown
Connect the ends of the crown band so it forms a comfortable circle. Depending on the material, this can be done with suitable adhesive, overlapping tabs, ribbon, or another secure method. Allow adhesives to dry completely before wearing the crown.
Pro Tip: Arrange every decoration before gluing it down. A quick dry layout lets you experiment with colors, spacing, and symmetry without having to remove pieces later.
Creative Decorations to Try
The decoration stage is where a basic crown can become completely original. Instead of trying to copy one exact design, use the visual ideas as inspiration and create a combination that feels personal.
Flowers and Leaves
Flowers instantly create a cheerful handmade appearance. Mix large and small flowers, or place a cluster on one side for an asymmetrical look. Small leaves can be added between flowers to create a fuller arrangement.
Stars and Hearts
Stars and hearts are simple shapes that work particularly well on children’s crowns. They can be cut from felt, foam, paper, or other lightweight craft materials. Use contrasting colors to make them noticeable or matching shades for a softer appearance.
Ribbons and Pom-Poms
Ribbons can add movement and texture, while small pom-poms bring a fun dimensional detail. Use them sparingly if the crown already has several decorative elements. A few well-placed accents can have more visual impact than covering the entire surface.
Personalized Details
Add an initial, favorite color combination, simple pattern, or handmade shape to make the crown feel unique. Personalization is especially fun when children are making their own crowns because they can choose exactly how the finished accessory should look.
Crown DIY Ideas for Parties and Playtime
Handmade crowns are a natural fit for birthday parties and children’s craft gatherings. Instead of giving everyone an identical finished accessory, prepare a selection of blank crown bases and let each child decorate one.
Set out materials in small groups so it is easy to see the available colors and shapes. A simple craft station might include crown bases, flowers, stars, hearts, ribbons, markers, and adhesive. Children can choose their favorite combinations and create something that reflects their personality.
Crowns can also become part of pretend play after the crafting session. A floral crown might inspire a garden-themed story, while a colorful pointed crown could become part of a royal adventure. The finished craft becomes both an accessory and a starting point for imaginative activities.
Tips for Making Crowns Comfortable
A beautiful crown should also be pleasant to wear. Keep the base flexible enough to sit comfortably without pressing against the head. Avoid excessive weight, especially when using layered flowers or three-dimensional decorations.
- Keep decorative pieces lightweight.
- Cover or smooth any potentially rough edges.
- Check that the crown is not too tight.
- Allow glue and paint to dry fully before use.
- Use age-appropriate craft materials and supervise young children during assembly.
Comfort also affects how the crown looks in use. A well-fitting crown stays in place more easily, allowing children to move, play, and enjoy their handmade accessory without constantly adjusting it.
Easy Ways to Make Each Crown Look Different
If you are creating several crowns from the same basic template, small changes can make every piece look completely different. Switch the main color, change the decoration placement, or use a different combination of shapes.
One crown might feature a central flower arrangement, while another uses colorful stars across the points. A third could use hearts and pastel circles. You can also experiment with symmetrical and asymmetrical layouts to create different visual effects.
A useful design trick is to choose one focal point first. Once the eye-catching element is positioned, build smaller decorations around it instead of giving every part of the crown equal visual weight.
How to Keep the Craft Process Simple
DIY projects are most enjoyable when there is enough freedom to experiment without becoming overwhelming. Prepare the basic crown shapes ahead of time if you are working with a group, then let the decorating stage become the main creative activity.
For a quick project, use pre-cut flowers and shapes. For a longer craft session, children can cut simple decorations from templates, create their own patterns, or combine several materials. The same crown DIY idea can therefore be adapted for different ages, skill levels, and amounts of available time.
It is also helpful to place a small selection of materials on the table rather than presenting an enormous collection. Too many options can make it harder to choose. A few coordinated colors and decorative shapes can encourage creativity while keeping the finished crowns visually cohesive.
At a Glance
- Start with a comfortable crown base.
- Choose a simple color palette.
- Arrange decorations before attaching them.
- Use lightweight flowers, shapes, and embellishments.
- Personalize every crown with creative details.
Conclusion: Make a Crown That Feels Special
A crown DIY project is a simple way to combine creativity, colorful design, and imaginative play. Whether you choose a floral crown, a pastel felt design, a star-covered accessory, or a completely original combination, the basic idea is easy to adapt.
The most enjoyable part is giving the project a personal touch. Let the colors, shapes, flowers, and decorations reflect the person who will wear the crown. With a comfortable base and a thoughtful arrangement of lightweight details, even a simple craft can become a favorite accessory.
Keep these crown DIY ideas nearby whenever you need an easy kids’ craft, a creative birthday activity, or a playful handmade accessory. Choose a design, gather a few supplies, and let the decorating begin.
Tags
Crown DIY DIY Crown Crown Crafts Kids Crafts Girls Crafts Pretend Play Birthday Crafts Handmade Crown