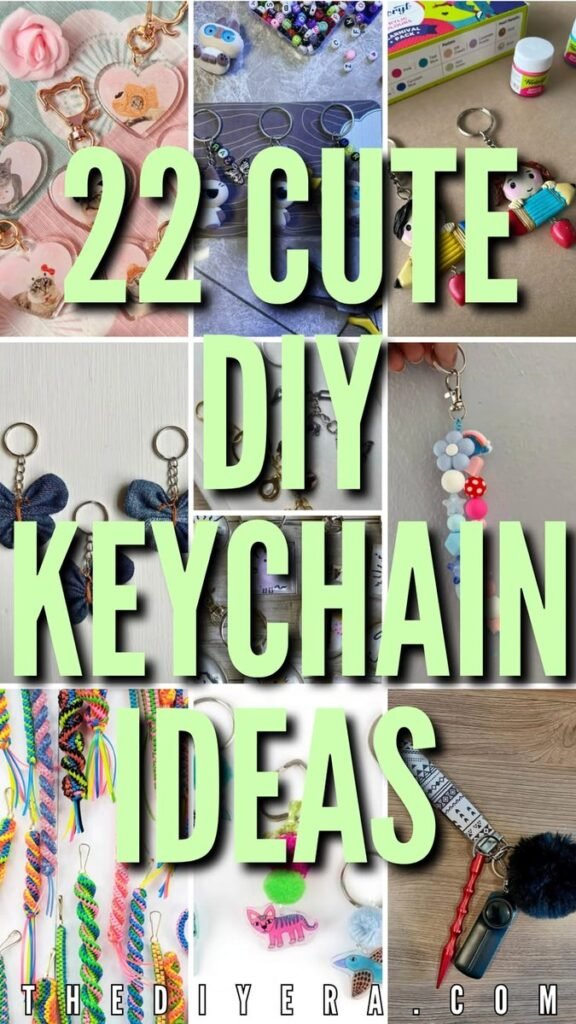
Handmade key chains are one of those small craft projects that can be simple, useful, and surprisingly personal. With a few basic materials, you can create colorful accessories that reflect your style while giving everyday items a creative touch. Whether you enjoy working with beads, charms, cords, yarn, or other craft supplies, key chains DIY handmade projects offer plenty of room for experimentation.
These little creations are not limited to keys. A handmade key chain can add personality to a backpack, purse, pencil case, luggage handle, or gift package. The best part is that you can adjust the colors, shapes, textures, and decorative details to create something that feels completely your own.
Key Takeaways
- Handmade key chains are practical projects for beginners and experienced crafters.
- Beads, charms, cords, yarn, and colorful findings can create many different looks.
- Personalized colors and details make DIY key chains thoughtful handmade gifts.
- Small projects are ideal when you want a creative activity without a large time commitment.
- Simple designs can be adapted for backpacks, purses, luggage, and other accessories.
Why Handmade Key Chains Make Great DIY Projects
A key chain is small enough to finish without committing to a complicated craft session, yet it provides plenty of opportunities for creativity. That makes it especially appealing when you want a quick handmade project with a useful result.
Unlike larger crafts, a key chain does not require a lot of space or an extensive collection of supplies. You can start with a simple base and gradually add decorative elements. This flexibility means you can make the project as minimal or as detailed as you like.
Important: The charm of a handmade key chain comes from its personal details. A thoughtful color combination, favorite charm, or unusual texture can make an otherwise simple design feel special.
A Creative Project With a Practical Purpose
Many crafts are made simply for decoration, but key chains combine creativity with everyday usefulness. Once finished, your project becomes something you can actually carry and use.
This practical quality also makes DIY key chains appealing as handmade gifts. You can create several variations for different people without making every piece identical. One person might prefer bright colors, while another might enjoy a softer, neutral design.
Choosing Materials for Key Chains DIY Handmade Projects
The materials you choose will influence the appearance, texture, and overall personality of your finished key chain. There is no single correct combination. Start with materials you already enjoy using and build the design around them.
- Beads: Useful for colorful patterns, initials, simple sequences, and playful designs.
- Charms: Small decorative pieces can become a focal point without requiring a complicated construction.
- Cord or string: Great for creating knotted, braided, or layered designs.
- Yarn: Adds softness and texture, especially for tassel-inspired projects.
- Key rings: Provide the practical attachment point for keys, bags, or other accessories.
- Decorative findings: Small connectors and hardware can help bring different materials together.
You do not need every type of supply. In fact, choosing just two or three complementary materials can produce a cleaner result. A simple combination of cord, beads, and one decorative charm may be all you need.
Think About Color Before You Start
Color is one of the easiest ways to give a handmade key chain a distinct identity. You could use contrasting colors for a playful look, similar shades for a softer appearance, or one main color with a small accent.
If you are making several key chains, try giving each one a slightly different palette. This keeps the projects visually connected while allowing each piece to feel unique.
Simple Key Chain DIY Ideas to Try
The beauty of handmade key chain projects is that the same basic supplies can be arranged in many ways. Here are several approachable directions to explore.
1. Beaded Key Chains
Beaded key chains are a natural starting point for beginners. Choose a small selection of beads and arrange them in a pattern before attaching them to the key ring. You can repeat one color, alternate two colors, or create a more playful mix.
For a personalized design, consider arranging beads to represent initials or a short word. Even a simple color pattern can make the finished piece feel intentional.
2. Charm-Based Designs
A charm can instantly give a handmade key chain a theme. Instead of filling the entire piece with decorations, let one small element take center stage.
Pair a charm with a simple cord or a few beads for a balanced design. Keeping the surrounding details understated can make the main decorative element stand out more clearly.
3. Braided and Knotted Key Chains
Cord-based designs are another versatile option. Braiding or knotting creates visual texture without requiring many additional decorations. Try combining two or three colors for an eye-catching result.
This approach is also easy to customize. You can experiment with the thickness of the cord, the number of strands, and the arrangement of colors until you find a combination you like.
4. Soft Tassel-Style Key Chains
Tassels can bring movement and texture to a simple key chain. Yarn or similar soft materials can be gathered into a compact decorative section and attached to a key ring.
Try different lengths and color combinations to change the overall appearance. A single-color tassel can look clean and simple, while multiple colors create a more playful accessory.
How to Create a Handmade Key Chain
Once you have selected your materials, the process can be broken into a few manageable stages. Planning first helps prevent the finished piece from becoming overcrowded.
- Choose your concept. Decide whether you want a beaded, braided, charm-based, or textured design.
- Select your color palette. Pick a few colors that work well together rather than using every color at once.
- Arrange the decorative elements. Lay everything out before attaching anything so you can see how the final design may look.
- Build the decorative section. Assemble the beads, cord, yarn, charms, or other selected components.
- Attach the key ring. Secure the finished decorative section to the hardware.
- Check the connections. Make sure the components are properly secured before using the key chain.
Pro Tip: Before finalizing your design, hold it up and look at it from several angles. Small adjustments to spacing or color order can make the finished key chain look much more balanced.
How to Make Your DIY Key Chain Look More Polished
A professional-looking handmade key chain does not necessarily require complicated techniques. The difference often comes down to proportion, consistency, and careful finishing.
Keep the Design Balanced
If one side of a key chain is visually heavy, the whole piece may look uneven. Consider where your largest or brightest element sits and use smaller details to support it.
Repeating a color or shape can also create visual consistency. For example, one accent color appearing in two or three small places may look more intentional than a collection of unrelated colors.
Avoid Overloading the Design
It can be tempting to keep adding beads, charms, and decorative details. However, leaving some breathing room can make the individual elements easier to appreciate.
A minimalist handmade key chain can be just as attractive as a highly decorated one. Let the purpose of the design guide how many elements you include.
Pay Attention to the Finish
The connection between the decorative section and the key ring deserves attention. Loose ends, uneven spacing, or poorly secured components can affect both appearance and durability.
Take an extra moment to inspect the finished piece. A neat final connection can make a simple craft feel much more thoughtfully made.
Why This Matters
The most memorable handmade accessories usually combine a clear idea with a few carefully chosen details. Instead of trying to use every craft supply available, focus on color, texture, and one feature that gives your key chain personality.
Personalizing Handmade Key Chains
Personalization is where DIY projects become especially meaningful. You can create designs around favorite colors, initials, patterns, hobbies, or simply a particular aesthetic.
For a personalized gift, think about the recipient before choosing materials. A colorful design might suit someone who enjoys playful accessories, while a simple combination of neutral shades may work better for someone with a minimalist style.
You can also make a coordinated set. Use the same basic construction for several key chains while changing the colors or decorative details. This is a simple way to create matching accessories without making every piece identical.
DIY Key Chains for Bags and Backpacks
Handmade key chains can become decorative bag accessories too. Attach one to a backpack zipper, purse handle, pencil pouch, or luggage handle for an easy way to add color and personality.
For larger accessories, you can experiment with slightly longer decorative elements or more visible textures. Just keep the attachment secure and make sure the finished piece is practical for its intended use.
Easy Crafting Tips for Beginners
If you are new to handmade accessories, start small. A basic design gives you an opportunity to practice assembling materials, creating a balanced color palette, and securing the finished piece.
- Prepare all materials before beginning.
- Test your color combination before attaching pieces permanently.
- Start with fewer decorative elements and add more only if needed.
- Keep your work area organized so small components are easier to handle.
- Inspect the finished connection before putting the key chain into regular use.
Most importantly, treat the first project as an experiment. Handmade crafts become more enjoyable when you give yourself permission to try different combinations rather than aiming for perfection immediately.
Creative Ways to Use Your Finished Key Chains
Once you have created a collection, you may find that there are many places to use them. A handmade key chain can serve a practical purpose while also becoming a small decorative statement.
- Attach one to your everyday key ring.
- Add one to a backpack or school bag.
- Decorate a purse or tote bag.
- Use a personalized design as a small handmade gift.
- Create matching versions for friends or family.
- Use different colors to help identify similar bags or key sets.
The small size also makes these projects easy to keep on hand for future crafting sessions. Once you understand the basic construction, you can experiment with new materials and designs whenever inspiration strikes.
At a Glance
- Choose a simple design before gathering supplies.
- Use color and texture to create personality.
- Leave enough space for each decorative element to stand out.
- Check every connection before using the finished key chain.
Conclusion: Make a Key Chain That Feels Like Yours
Key chains DIY handmade projects prove that a small craft can have plenty of personality. Whether you prefer colorful beads, simple cords, decorative charms, soft textures, or a combination of materials, there are countless ways to turn basic supplies into something useful and distinctive.
The easiest way to begin is to choose a simple concept, select a small group of materials, and focus on creating a balanced design. As your confidence grows, you can experiment with more colors, textures, patterns, and personalized details.
A handmade key chain does not need to be complicated to be beautiful. Sometimes a few carefully selected elements are enough to create an accessory that feels thoughtful, creative, and completely personal. Gather your favorite supplies, try a design that catches your eye, and enjoy the process of making something with your own hands.
Tags
Key Chains DIY Handmade Keychains DIY Keychain Crafts Beaded Keychains Handmade Accessories DIY Crafts Personalized Keychains