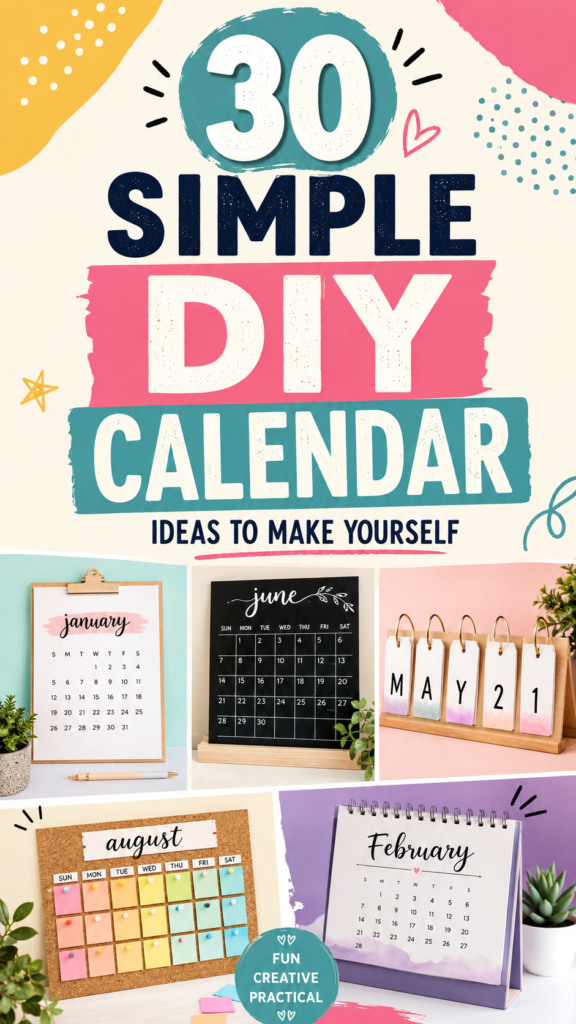
A DIY calendar can be much more than a place to track appointments and important dates. It can become a useful piece of home decor, a creative craft project, and a simple way to add personality to a workspace. From chalkboard-style monthly planners to colorful flip calendars, corkboard displays, and minimalist desk designs, handmade calendars offer plenty of opportunities to combine organization with creativity.
One of the best things about making your own calendar is the freedom to design it around your routine and style. You can choose the colors, materials, layout, size, and level of detail that work best for your space. A large wall calendar may be ideal for a busy family, while a compact desktop version can help keep a home office organized. A reusable design can also be updated month after month without starting from scratch.
This collection of DIY calendar ideas is all about creating something practical, attractive, and personal. Whether you enjoy simple paper crafts, modern home decor, colorful organization projects, or handmade gifts, there is a calendar style that can fit your needs.
Key Takeaways
- DIY calendars can combine practical planning with creative home decor.
- Reusable calendars are a great option for reducing waste and simplifying monthly updates.
- Paper, cork, chalkboard surfaces, clipboards, and binder rings can all become useful calendar materials.
- A clear layout and readable numbers are more important than complicated decoration.
- Handmade calendars can be customized for offices, kitchens, bedrooms, classrooms, and gifts.
- Small details such as color coding and interchangeable cards can make planning easier.
Why DIY Calendars Are Such a Fun and Practical Project
Calendars are everyday tools, which makes them a perfect starting point for a useful DIY project. Unlike purely decorative crafts, a handmade calendar can serve a purpose every day while still reflecting your personal style. It can be simple and minimal, bright and playful, rustic and handmade, or modern and polished.
Another advantage is flexibility. Store-bought calendars often come with fixed layouts, colors, and sizes. When you make your own, you can create a design that matches your actual planning habits. You may want a large monthly grid with plenty of writing space, a small desk calendar for quick date checking, or a reusable system that lets you change the month whenever needed.
Important: The most successful DIY calendar designs balance creativity with usability. Decorative details can make the project more appealing, but the dates, days, and monthly structure should always remain easy to read at a glance.
Choose a DIY Calendar Style That Fits Your Space
Before gathering supplies, think about where the finished calendar will live. The location can help determine the best size, materials, and format. A calendar placed above a desk may need a cleaner, more professional appearance, while a kitchen or craft room can be a great place for a colorful and playful design.
Wall Calendars
A wall calendar is a classic option because it is easy to see and can also work as part of the room’s decor. A simple monthly grid can be created with paper, a framed board, or a reusable writing surface. Larger wall calendars are especially useful when several people need to see upcoming dates.
Try leaving enough room inside each day square for appointments, birthdays, reminders, or notes. If the calendar is meant to be reused, consider using removable date cards or a surface that can be erased and updated.
Chalkboard-Style Calendars
A dark chalkboard-style calendar creates a striking contrast with white numbers and handwritten month names. This look works particularly well in offices, kitchens, and modern workspaces. The dark background makes the calendar easy to notice, while the simple grid keeps the overall design organized.
You can use a real chalkboard surface or create the same effect with dark cardstock, paint, or a reusable black board. A light-colored marker can help create clean lines and readable dates.
Flip Calendars
Flip calendars are playful, compact, and ideal for desks or shelves. Individual cards can display the month, date, or day, making the calendar interactive as well as decorative. Binder rings, metal loops, or small clips can hold the cards together.
This style gives you plenty of room to experiment with color. Bright monthly cards, neutral backgrounds, painted edges, and bold numbers can all create a fresh handmade look. For a reusable version, simply prepare cards that can be flipped into place each day.
Corkboard and Pinboard Calendars
A corkboard calendar adds texture and flexibility to your planning system. Instead of writing directly on a fixed surface, you can create movable date cards and attach them with push pins. This makes it easy to rearrange notes, events, and reminders.
A pinboard design is also useful for visual planners. Add small cards, colorful notes, or monthly sections to create a calendar that changes as your schedule changes.
Simple Materials for Making a Handmade Calendar
You do not need expensive craft supplies to make an attractive DIY calendar. Many projects can be created using basic materials that are already available at home.
- Cardstock or thick paper
- Poster board or foam board
- Small wooden boards or frames
- Corkboard
- Binder rings or metal loops
- Paint pens and permanent markers
- Rulers for drawing clean grids
- Clips, push pins, or adhesive strips
- Printed number cards
- Washi tape or simple decorative paper
The materials should support the style you want. For example, cardstock is perfect for a lightweight flip calendar, while a framed board may be better for a larger wall display. Reusing materials can also make the project more affordable. Old frames, cardboard packaging, paper scraps, and leftover craft supplies can often be transformed into something useful.
Quick Note
A DIY calendar does not need complicated materials to look polished. Consistent spacing, readable typography, and a limited color palette can often make a simple project feel more professional than an overly decorated design.
How to Plan the Layout Before You Start
A little planning can make the construction process much easier. Begin by deciding whether your calendar will show one month at a time, a full year, or a rotating set of monthly pages. Then choose the size of each date section.
- Measure the available space. Consider the wall, desk, shelf, or board where the calendar will be displayed.
- Choose the format. Decide between a grid, flip cards, removable tiles, or another simple structure.
- Create a basic sketch. Mark the month title, days of the week, and date areas before decorating.
- Leave room for notes. If you plan to write appointments, avoid making the day boxes too small.
- Choose a clear visual hierarchy. The month name should be easy to notice, followed by the day labels and dates.
Using a ruler and pencil for the first layout can help prevent uneven spacing. Once the structure looks balanced, you can add color, lettering, and decorative accents.
Keep the Typography Easy to Read
Typography has a major impact on a calendar’s usefulness. Decorative script can look beautiful for a month title, but it may be difficult to read when used for every number. A good approach is to mix one expressive style with one simple, bold style.
For example, use a handwritten font or brush-lettered style for the month name, then use clear block numbers for the dates. This creates contrast while keeping the calendar functional.
Creative DIY Calendar Ideas to Try
There are many ways to adapt the basic calendar concept. Start with the style that feels most useful for your routine and then add your own creative details.
1. Minimalist Monthly Board
Create a clean calendar with a neutral background, simple grid lines, and one accent color. This design works well in modern spaces and is easy to update. Keep the decoration subtle so the schedule remains the main focus.
2. Colorful Flip Card Calendar
Use individual cards for months or dates and arrange them on rings or a small stand. Choose several coordinated colors rather than using every color in your craft collection. Soft pinks, teal shades, warm neutrals, and bright accent tones can create a cheerful appearance.
3. Corkboard Monthly Planner
Divide a corkboard into a monthly grid and use colorful cards or notes for important dates. This format is easy to personalize and can be changed whenever your plans shift.
4. Framed Desk Calendar
A framed paper calendar can instantly look more finished and decorative. Choose a simple frame and insert a monthly sheet behind the front surface. This is a good option for a home office or study area where you want a calendar that feels polished without taking up much room.
5. Reusable Dry-Erase Calendar
For a long-term project, create a permanent monthly layout that can be erased and reused. This is especially useful for recurring schedules. Use clear labels and divide the board into spacious sections for notes.
Pro Tip: Build Around Your Actual Routine
Pro Tip: If you regularly track deadlines, meals, school events, or personal goals, build dedicated space for those categories into the calendar from the beginning. A beautiful design is even more valuable when it supports the way you actually plan your days.
Add Personality Without Making the Calendar Too Busy
Personalization is what makes handmade calendars special, but too many decorative elements can make a layout feel crowded. Choose a few accents that support the overall theme rather than filling every empty area.
Simple decorative ideas include:
- Painted brush strokes behind a heading
- Small doodles or hand-drawn lines
- Subtle dot patterns
- Paper cutouts and geometric shapes
- Seasonal color changes
- Minimal plant or nature-inspired illustrations
- Small tabs or labels for organization
Try repeating one or two design elements throughout the calendar. Repetition helps the project feel intentional and visually connected. For example, the same rounded shapes or accent color can appear on every monthly page.
Make Your DIY Calendar More Useful With Color Coding
Color coding can make a handmade calendar easier to use, especially when several types of events need to be tracked. You might assign one color to appointments, another to deadlines, and another to family or personal events.
Keep the system simple. Too many colors can become difficult to remember. Two to four categories are usually enough for a clear visual system.
Expert Insight: The best organizational systems are easy to understand in seconds. A small, consistent color key can turn a creative calendar into a more effective planning tool without adding unnecessary visual clutter.
DIY Calendars Also Make Thoughtful Handmade Gifts
A personalized calendar can be a meaningful handmade gift because it combines creativity with everyday usefulness. You can adapt the colors and style to suit the recipient’s home, office, or personality.
Consider making a desk calendar for someone who works from home, a wall calendar for a busy household, or a colorful flip calendar for a student. Handmade gifts do not need to be complicated. A clean, useful design with thoughtful details can feel personal and special.
How to Keep a Handmade Calendar Looking Fresh
If your calendar is meant to last, choose durable materials and protect frequently handled parts. Lamination can help preserve paper cards, while thicker cardstock can prevent bending. For reusable calendars, make sure the writing surface can be cleaned without damaging the layout.
Store extra monthly cards or replacement pieces in an envelope or small box. Keeping everything together will make it easier to refresh the calendar for a new month or year.
At a Glance
- Choose a calendar format that fits your available space.
- Prioritize readable dates and a clear monthly layout.
- Use a limited color palette for a polished handmade look.
- Add interactive or reusable features when they support your planning needs.
- Personalize with simple accents rather than excessive decoration.
Conclusion: Turn Everyday Planning Into a Creative DIY Project
Making a DIY calendar is a simple way to bring creativity into an everyday routine. Whether you prefer a sleek desk calendar, a colorful flip design, a large monthly board, or a flexible corkboard planner, the project can be adapted to your style and organizational needs.
The key is to begin with a clear purpose. Decide what information you need to see, choose a format that makes sense for your space, and then build the design around those needs. Once the structure is useful, add color, texture, lettering, and decorative details that make the calendar feel personal.
A handmade calendar can help organize busy days while also becoming a cheerful feature in your home or workspace. With a few basic materials and a little imagination, you can create a planning tool that is practical, reusable, and uniquely your own. Start simple, focus on readability, and let the design evolve into something that makes staying organized feel a little more creative.
Tags
DIY Calendar Calendar Ideas DIY Projects Home Organization Craft Ideas Handmade Decor Desk Calendar