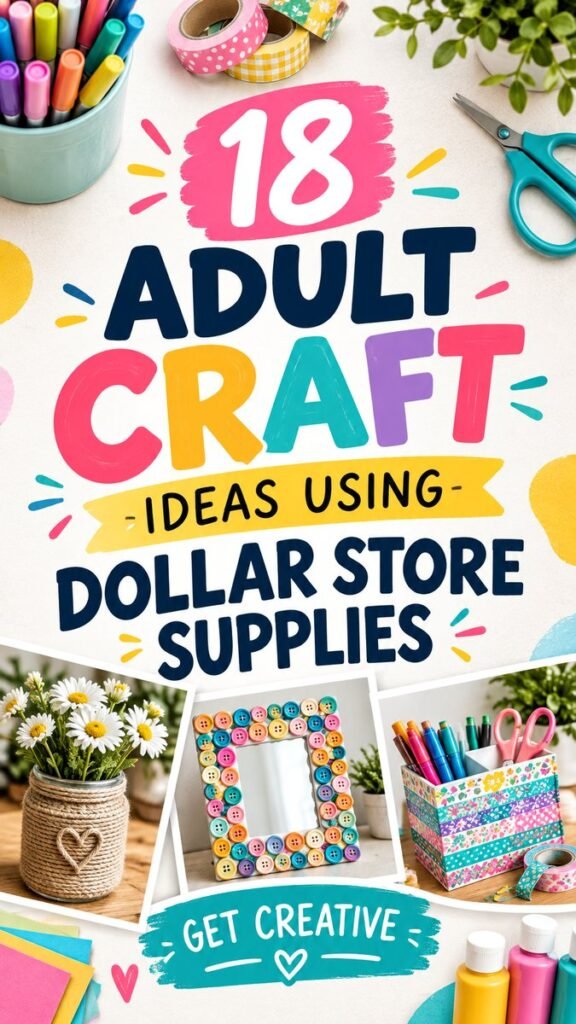
Creative projects do not have to be complicated or expensive to be rewarding. With a few inexpensive supplies, some imagination, and a willingness to experiment, you can turn ordinary materials into colorful pieces of decor, useful organizers, thoughtful gifts, and personalized accents. This collection of DIY ideas creative projects is all about making the most of simple dollar store supplies while keeping the process approachable and enjoyable.
The inspiration behind these projects combines bright colors, playful textures, practical craft materials, and easy decorating techniques. Think button-covered frames, twine-wrapped containers, colorful organizers, patterned paper, ribbons, markers, and other everyday supplies that can be transformed with a little creativity. Whether you are a beginner or already enjoy crafting, these ideas can help you discover new ways to make budget-friendly projects feel personal and stylish.
Key Takeaways
- Simple dollar store supplies can become attractive handmade projects.
- Color, texture, and repetition can make basic crafts look more polished.
- Practical items such as organizers can be both useful and decorative.
- Personalized details make inexpensive DIY projects feel more special.
- Mixing craft supplies encourages experimentation and fresh creative ideas.
Why Dollar Store Supplies Are Perfect for Creative DIY Projects
One of the most appealing parts of budget crafting is the freedom to experiment. When materials are inexpensive, there is less pressure to make everything perfect on the first attempt. You can try a new color combination, test a decorating technique, or completely change the direction of a project without worrying about wasting expensive supplies.
Dollar store aisles can also provide a surprisingly useful selection of craft-friendly materials. Containers, frames, baskets, glassware, stationery, ribbons, buttons, storage pieces, faux flowers, and colorful accessories can all become starting points for creative projects. The key is to look beyond the original purpose of an item and imagine what it could become.
Important: The most successful budget crafts are not necessarily the ones with the most materials. A simple project with a thoughtful color palette and a few carefully placed details can look more intentional than an overcrowded design.
Start With an Ordinary Item
Instead of searching for specialty craft products first, begin with something ordinary. A plain frame, basic container, small organizer, or undecorated box can serve as a blank canvas. Once you identify the shape and purpose of the item, think about how texture, color, or pattern could change its appearance.
For example, a plain container can become a decorative holder by adding twine, ribbon, paper, or small embellishments. A simple frame can gain personality when decorated with colorful buttons. A basic desk organizer can become more cheerful with patterned tape or paper accents. These transformations are simple, but they demonstrate an important DIY principle: creativity often comes from changing how you see an everyday object.
18 DIY Ideas Creative Crafters Can Explore
The visual inspiration for this theme centers on colorful, accessible crafts that are easy to customize. You can use the following ideas as starting points rather than strict instructions. Change the colors, materials, shapes, and finishing touches to create something that suits your own space or gifting style.
1. Button-Decorated Picture Frame
Give a plain picture frame a cheerful makeover with buttons in different sizes and colors. Arrange them around the outer edge, either randomly for a playful effect or in a repeating pattern for a more organized appearance. This is an especially flexible project because the button colors can be matched to a room, season, or favorite palette.
2. Twine-Wrapped Decorative Jar
Wrap a simple jar or container with natural-looking twine to create a textured decorative holder. A small embellishment can be added to the front for extra character. Use the finished piece for faux flowers, craft tools, pens, or other small items that need a stylish home.
3. Patterned Desk Organizer
Turn a basic storage box into a colorful desk accessory with patterned paper or decorative tape. Layer different patterns carefully rather than covering every surface with unrelated designs. This project is useful for organizing pens, scissors, markers, notes, and other small supplies.
4. Colorful Craft Supply Holder
Use small containers to organize markers, brushes, ribbons, buttons, or other supplies. Give each container a coordinated label or decorative accent. Keeping supplies visible and organized can make future crafting sessions easier and more inviting.
5. Decorated Storage Box
A plain storage box can become a decorative piece with paper, stickers, ribbon, fabric scraps, or washi tape. Choose one main color family and add one or two contrasting details. This approach creates a cohesive look while keeping the project easy to customize.
6. DIY Gift Container
Small boxes and containers can be transformed into handmade gift packaging. Add decorative paper, a ribbon, or a handmade tag to make the container feel more personal. The recipient can then reuse the container for storage, making the project practical as well as attractive.
7. Color-Coordinated Craft Tray
Use a simple tray to create a dedicated space for your current craft project. Add decorative accents along the edges or use patterned paper to create an attractive surface. A tray can also make it easier to move supplies from one workspace to another.
8. Handmade Flower Container
Bring a plain container to life with faux flowers, fabric flowers, or other decorative stems. Add texture around the base with twine, ribbon, or paper. This idea works particularly well when you want a small decorative accent without taking on a complicated craft.
9. Washi Tape Makeover
Decorative tape is one of the easiest ways to refresh ordinary objects. Cover sections of a container, notebook, box, or organizer with complementary patterns. Leave some of the original surface visible to prevent the finished design from becoming visually crowded.
10. Personalized Notebook Cover
Give a basic notebook a creative makeover using patterned paper, stickers, tape, or small decorative details. Create a simple border, geometric arrangement, or layered collage. A personalized notebook can be used for lists, sketches, planning, journaling, or craft ideas.
11. DIY Ribbon Organizer
Turn a basic storage container into a dedicated ribbon organizer. Sort ribbons by color or texture, then decorate the outside of the container to match your craft space. Keeping materials grouped together can make it much easier to find what you need during a project.
12. Decorative Button Art
Buttons can be arranged into simple shapes, patterns, borders, or abstract designs. Mount the finished arrangement on cardstock, a small canvas, or another suitable surface. This project is a fun way to use leftover buttons that might otherwise remain tucked away in a craft box.
13. DIY Pen and Marker Holder
Repurpose a plain container into a bright holder for writing and drawing supplies. Add a decorative band, patterned paper, or colorful tape around the exterior. Grouping markers by color can also turn the finished holder into part of the room’s visual decor.
14. Creative Gift Jar
A simple jar can become a charming gift container when decorated with ribbon, twine, paper, or a handmade tag. Fill it with small non-perishable treats, craft supplies, notes, or other suitable items. The decoration can be adapted for birthdays, celebrations, or everyday thoughtful gifts.
15. DIY Craft Supply Labels
Create matching labels for containers holding buttons, ribbons, paper pieces, markers, and other materials. Use a consistent lettering style and repeat a small decorative element across the labels. This is a simple project that improves both organization and the appearance of a craft area.
16. Decorative Paper Collage
Collect small pieces of patterned paper and arrange them into a colorful collage. Layering different shapes can create an interesting handmade background for a card, notebook, box, or decorative panel. Keep a few colors consistent throughout the design for a more unified result.
17. Simple Handmade Wall Accent
Create a small wall accent by combining paper shapes, textured materials, and decorative details on a sturdy backing. The design does not need to be complicated. Repeated shapes and a balanced color palette can create a polished look with very little material.
18. Mix-and-Match DIY Craft Set
Combine several small projects using the same colors or materials. For example, create a decorated container, matching organizer, and personalized notebook as a coordinated set. This approach is especially useful when you want several handmade pieces to work together visually.
Expert Insight
A consistent color palette can make inexpensive craft supplies look surprisingly cohesive. Choose two or three main colors, then use texture and small accents to add variety without losing visual harmony.
How to Make Simple DIY Crafts Look More Polished
A professional-looking craft does not require advanced techniques. Small design choices often make the biggest difference. Before attaching anything permanently, lay your materials out and experiment with different arrangements. Step back and look at the project from a distance to see whether the colors and shapes feel balanced.
Choose a Simple Color Palette
Color is one of the fastest ways to create a cohesive handmade look. Bright colors can create a playful and energetic feel, while neutral tones combined with one or two accent colors can look more understated. If you are using several patterned materials, keep the base colors related so the finished project does not feel chaotic.
Layer Texture Carefully
Texture adds depth to DIY projects. Twine, buttons, paper, ribbon, fabric, and decorative tape can all provide visual interest. However, too many competing textures may overwhelm a small item. Pick one dominant texture and use smaller accents to support it.
Pro Tip: Before gluing or attaching embellishments, take a quick photo of your arrangement. It gives you an easy reference if pieces move while you work and lets you compare several layout options before making the final choice.
Essential Supplies for Creative DIY Ideas
You do not need a huge craft collection to get started. A small set of versatile supplies can support many different projects. Consider keeping these basics available:
- Scissors for cutting paper, ribbon, and lightweight materials.
- Craft glue or another adhesive appropriate for the project surface.
- Decorative tape for quick patterns and borders.
- Buttons and small embellishments for adding texture.
- Twine, ribbon, or cord for wrapping and finishing.
- Colored paper and cardstock for backgrounds and decorative layers.
- Markers or pens for labels, lettering, and small details.
- Plain containers, boxes, frames, and organizers that can be customized.
The best supply collection is one that encourages you to create. Keep frequently used items in an accessible location so you can easily start a small project whenever inspiration appears.
Creative DIY Tips for Beginners
If you are new to crafting, start with projects that involve simple decorating rather than complicated construction. A plain item that only needs paper, tape, buttons, or twine can provide a satisfying first project. Once you become comfortable with arranging materials, you can gradually experiment with more detailed designs.
- Choose one small project. Finishing a simple craft builds confidence.
- Gather supplies before starting. This keeps the process organized and prevents unnecessary interruptions.
- Test the arrangement first. Place materials without attaching them to see how everything looks together.
- Keep the design intentional. A few coordinated details can be more effective than covering every surface.
- Allow room for experimentation. A project does not have to look exactly like your original plan.
Make Your DIY Projects Personal
The real appeal of creative DIY is the ability to make something that feels like your own. You can select colors that complement your room, use favorite patterns, add initials, or combine materials in an unexpected way. Even when two people start with the same basic item, their finished projects can look completely different.
Personalization also makes handmade gifts more meaningful. A decorated container, customized frame, or creative organizer can be adapted to the recipient’s preferred colors and style. Because the project is handmade, even a simple design can communicate thoughtfulness.
How to Turn Crafting Into a Creative Routine
You can make DIY crafting easier by creating a small routine around it. Set aside a short amount of time to sort your supplies, collect inspiration, or work on one unfinished project. You do not need an entire afternoon to be productive. A few focused minutes can be enough to decorate one container, organize a drawer, or complete a small handmade accent.
Keeping a collection of unused containers, paper scraps, buttons, ribbons, and other reusable materials can also encourage spontaneous creativity. Instead of immediately throwing away a useful-looking piece, consider whether it could become part of a future project.
At a Glance
- Start with simple, inexpensive objects.
- Use two or three coordinated colors.
- Combine texture with practical function.
- Test layouts before attaching embellishments.
- Personalize each project with your own details.
Conclusion
These DIY ideas creative projects show how much potential can be hidden in simple, affordable supplies. A plain frame can become colorful button art, an ordinary container can become a textured decorative holder, and a basic organizer can become a cheerful addition to a workspace. The goal is not to spend more or use complicated techniques. It is to look at everyday materials with a creative perspective.
Start with one project that catches your attention, choose a few supplies, and give yourself permission to experiment. Change the colors, rearrange the details, and add personal touches until the result feels right for you. With a little imagination, budget-friendly crafting can become an enjoyable way to decorate, organize, create gifts, and discover new creative possibilities.