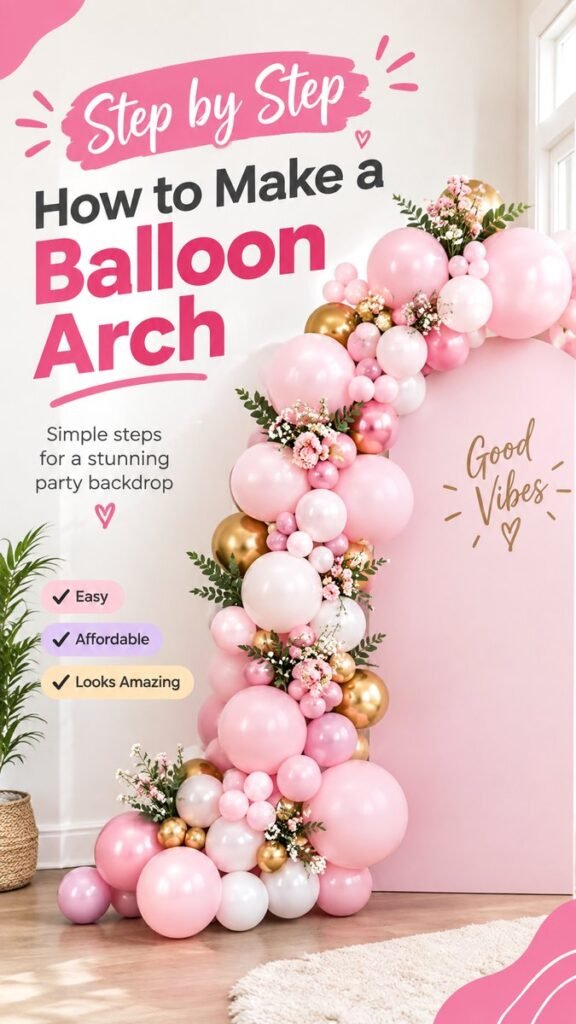
Balloon arch DIY projects are one of the easiest ways to turn an ordinary celebration space into a memorable party backdrop. A beautiful balloon arrangement can frame a dessert table, highlight a photo area, decorate an entrance, or create a statement wall without requiring a complicated decorating setup. With a thoughtful mix of balloon sizes, soft colors, metallic accents, and a few floral details, you can create a polished look that feels festive and personal.
Key Takeaways
- Combine several balloon sizes to create a fuller, organic shape.
- Use a simple color palette for a polished party backdrop.
- Add flowers or greenery to soften the balloon arrangement.
- Secure the arch carefully so it stays balanced throughout the event.
- Build the design in sections instead of trying to create everything at once.
- Adjust the arrangement as you go for a natural, effortless finish.
Why Balloon Arch DIY Ideas Are So Popular
A balloon arch instantly adds height, texture, and color to a room. Unlike a traditional decoration that may occupy only one small area, a balloon garland can stretch upward and across a backdrop, creating a strong visual focal point. That makes it especially useful when you want one decoration to have a big impact.
The organic style is particularly appealing because it does not need to look perfectly symmetrical. Larger balloons can be mixed with smaller balloons to create movement, while metallic balloons and decorative flowers can be placed throughout the arrangement for extra interest. The result feels layered rather than rigid.
Another advantage of a balloon arch DIY project is flexibility. You can change the colors and decorative details to suit almost any celebration. Soft pink and white can create an elegant look, while brighter colors can make a children’s birthday party feel playful. Neutral balloons with gold or silver accents can work beautifully for more sophisticated gatherings.
Important: The most attractive balloon arches usually have visual variety. Mixing balloon sizes and distributing accent colors instead of placing them in identical groups helps create the relaxed, organic appearance that makes a DIY garland look professionally styled.
Choosing a Color Palette for Your Balloon Arch
Color is one of the first decisions to make because it establishes the mood of the entire decoration. A limited palette is often easier to work with than a large collection of unrelated colors. Two or three main balloon colors can provide enough contrast while keeping the finished display cohesive.
Soft Pink and White
Pink and white create a gentle, romantic combination that works particularly well for birthdays, baby showers, bridal celebrations, and feminine party themes. Different shades of pink can be layered together so the arrangement has depth without becoming visually overwhelming.
Adding Metallic Accents
Gold balloons can introduce a subtle celebratory feel. Rather than using too many metallic balloons, place them between groups of matte or pastel balloons. This creates small highlights throughout the arch and allows the main colors to remain dominant.
Using White as a Balancing Color
White balloons are especially useful when a design contains several shades or decorative elements. They create breathing room between stronger colors and can help the entire arrangement feel lighter. If your backdrop is already colorful, neutral balloons can also prevent the decoration from looking too busy.
Supplies You May Need
A basic balloon arch DIY setup does not require an enormous collection of specialized supplies. The exact materials depend on the size and structure of your display, but a useful starting list includes:
- Latex balloons in several complementary colors
- Balloon inflator or electric balloon pump
- Balloon decorating strip or flexible garland support
- Balloon glue dots for filling small gaps
- Ribbon, string, or suitable attachment material
- Command-style hooks or another appropriate support method for the venue
- Small balloons for filling spaces
- Artificial flowers or greenery for decorative accents
- Optional metallic balloons for highlights
You do not need every supply listed above for every design. The goal is to choose materials that make assembly easier while allowing you to shape the garland naturally.
How to Make a Balloon Arch DIY Step by Step
The easiest way to approach a balloon arch is to think of it as a collection of small sections rather than one enormous decoration. Building sections gradually gives you more control over the shape and makes it easier to fill empty spaces.
1. Plan the Shape
Start by deciding where the balloon arch will be displayed. Consider whether you want a full arch, a half arch, or an asymmetrical organic garland that climbs from the floor toward the top of a backdrop.
For an organic look, do not worry about creating two perfectly identical sides. A slightly uneven arrangement can feel more modern and visually interesting. Before inflating everything, identify the approximate starting and ending points of the garland.
2. Inflate Balloons in Different Sizes
Variation in size is one of the biggest secrets to creating a full-looking balloon garland. Inflate some balloons generously while leaving others smaller. The smaller balloons can later be used to fill gaps between larger balloons.
Try to avoid making every balloon exactly the same size. Uniform balloons tend to produce a more traditional appearance, while varied sizes create the flowing, layered style commonly seen in modern party decor.
3. Attach the Main Balloons
Begin attaching the larger balloons to your decorating strip or chosen support. Alternate colors as you work instead of placing all balloons of one color together. Step back periodically to check how the colors are distributed.
If one section appears too heavy with a particular shade, move or add balloons before the garland is fully assembled. Making small adjustments during this stage is much easier than correcting the entire arrangement later.
4. Add Smaller Balloons
Once the main structure is established, look for visible gaps. Small balloons are perfect for filling these areas. Attach them between larger balloons so they create a dense, rounded appearance.
Instead of filling every opening immediately, work gradually. A few small balloons in strategic areas can provide more visual interest than covering every available space.
5. Add Flowers and Greenery
Floral accents can transform a simple balloon garland into an elegant party centerpiece. Small clusters of flowers can be tucked into areas where colors transition or where the balloon arrangement needs additional texture.
Greenery can provide contrast against pastel balloons, while flowers in colors that coordinate with the balloons can make the entire design feel intentional. Use a few strategically placed clusters rather than covering the entire garland.
6. Attach the Finished Garland
Secure the balloon arch to the backdrop or wall using an attachment method appropriate for the surface and venue. Make sure the support points can handle the weight of the finished garland.
If the arrangement is large or extends close to the floor, use multiple secure points rather than relying on one attachment location. This helps distribute the weight and keeps the design stable.
7. Make the Final Adjustments
Stand several steps away and look at the entire arrangement. Check for noticeable gaps, overly concentrated colors, or areas that look heavier than others. Add small balloons or decorative details where necessary.
This final adjustment stage is what gives a DIY balloon arch its finished appearance. You are not simply attaching balloons. You are balancing color, size, texture, and empty space.
Expert Insight
An organic balloon arch looks more natural when the eye can move through the arrangement. Place larger balloons as visual anchors, then use smaller balloons, metallic accents, and floral details to connect the sections rather than creating perfectly repetitive clusters.
How to Create a Fuller Organic Balloon Garland
If your goal is a lush balloon arch with a professional appearance, focus on layering. A single row of balloons can look sparse, especially when photographed from a distance. Overlapping balloons at different angles creates more dimension.
Use Three Balloon Sizes
A combination of large, medium, and small balloons provides natural variation. The largest balloons form the foundation, medium balloons build volume, and small balloons fill the spaces that remain.
Create Uneven Clusters
Instead of creating identical groups, vary the number of balloons in each section. One area might contain several small balloons around a large balloon, while another may feature two large balloons with a metallic accent between them.
Leave Some Breathing Room
Full does not mean every inch has to be covered. Small areas of negative space can make larger clusters stand out. If the entire arrangement is equally dense, the eye has fewer places to focus.
Pro Tip: Photograph the garland from the same angle your guests will see it. A cluster that looks balanced up close may appear too heavy or too sparse from across the room. A quick step back can reveal exactly where additional balloons are needed.
Ways to Customize a Balloon Arch for Different Celebrations
The beauty of a balloon arch DIY project is that the basic technique can be adapted to many occasions. Once you understand the structure, changing the mood is as simple as adjusting the palette and accents.
Birthday Party Balloon Arch
Choose the birthday person’s favorite colors and combine them with different balloon sizes. Add a personalized sign, number balloons, or a dessert table underneath the garland if the space allows.
Baby Shower Balloon Garland
Pastel shades create a soft and welcoming atmosphere. Pink, white, cream, blue, sage, or neutral combinations can all work depending on the party theme. Small floral accents can add an elegant finishing touch.
Bridal Shower or Engagement Celebration
For a more refined arrangement, use a restrained palette with metallic accents. White balloons combined with blush, champagne, or soft pink can create a sophisticated backdrop for photographs.
Home Party Backdrop
You do not need a huge venue to make an impact. A smaller asymmetrical balloon garland can frame a doorway, living room corner, dining area, or simple decorative backdrop. Scale the number of balloons to the available space.
Common Balloon Arch DIY Mistakes to Avoid
DIY decorations become easier when you know which problems to watch for. A few simple adjustments can make the assembly process smoother and the finished display more attractive.
- Using only one balloon size: This can make the garland look flat. Mix sizes for dimension.
- Adding too many colors: A crowded palette can make the display feel disconnected. Start with a few coordinated shades.
- Ignoring the backdrop: Consider the wall, floor, and surrounding decor when choosing balloon colors.
- Overfilling every gap: Some negative space can help the arrangement breathe.
- Skipping a final visual check: Always step back and inspect the whole garland before calling it finished.
- Using weak attachment points: A large balloon garland can become heavy, so secure it appropriately for the surface.
How to Make Your Balloon Backdrop Look More Elegant
Elegant party decor often comes down to restraint. You can create a luxurious-looking balloon backdrop without adding dozens of different decorative elements. Choose a consistent palette, repeat a few textures, and place accents intentionally.
Flowers are particularly effective when they appear in small clusters throughout the garland. Instead of attaching flowers at regular intervals, position them where they naturally complement the balloon groups. A little asymmetry can make the arrangement feel more thoughtfully designed.
The backdrop itself also matters. A simple neutral wall or soft-colored panel allows the balloon garland to become the main feature. Too many competing decorations can reduce the visual impact of the balloons.
Tips for Photographing Your Balloon Arch
A beautiful balloon arch is naturally photo-friendly, so think about how the finished display will appear in pictures. Keep the most detailed portion of the arrangement within the main camera view and avoid placing important decorative details where people are likely to stand.
Natural light can help pastel balloons appear soft and dimensional. If the event is indoors, position the display where the surrounding lighting does not create harsh reflections. Metallic balloons can catch light strongly, so their placement may affect photographs.
For Pinterest-worthy inspiration photos, include enough of the surrounding setup to show how the balloon arch works as part of the room. A clean backdrop, balanced composition, and visible decorative details can make the project easier for others to imagine recreating.
Simple Ways to Save Time During Assembly
Balloon preparation can take longer than expected, especially for a large garland. Organizing the process before you begin can make everything easier.
- Choose your color palette before inflating balloons.
- Inflate balloons in batches according to size.
- Keep small balloons separate so they are easy to access later.
- Prepare your backdrop and attachment points before building the garland.
- Assemble sections on a clear surface where balloons will not get caught.
- Keep a few extra balloons available for last-minute filling.
Working in stages also makes it easier to take breaks. Instead of trying to complete the entire decoration in one uninterrupted session, prepare balloons first, build the main structure second, and add decorative details last.
At a Glance
- Pick two or three main colors for a cohesive look.
- Mix balloon sizes to build depth and volume.
- Use small balloons to fill selected gaps.
- Add flowers or greenery for texture and personality.
- Step back often to balance the finished arrangement.
Conclusion
A balloon arch DIY project can completely change the feel of a party space with a relatively simple decorating technique. The key is not perfection. A successful organic balloon garland comes from combining different sizes, coordinating colors, thoughtful spacing, and a few well-placed decorative accents.
Start with a clear palette, build your main balloon structure gradually, and use smaller balloons to create fullness where it is needed. Flowers and greenery can add another layer of personality, while metallic accents can bring subtle sparkle to the finished backdrop.
Whether you are decorating for a birthday, baby shower, bridal celebration, or an intimate gathering at home, the same basic approach can be adapted to fit your space and style. Experiment with colors, shapes, and arrangements until the garland feels right for your celebration.
Ready to create your own party backdrop? Gather your balloons, choose your favorite color combination, and start building your balloon arch one section at a time. Save these ideas so you can return to them when your next celebration comes around!