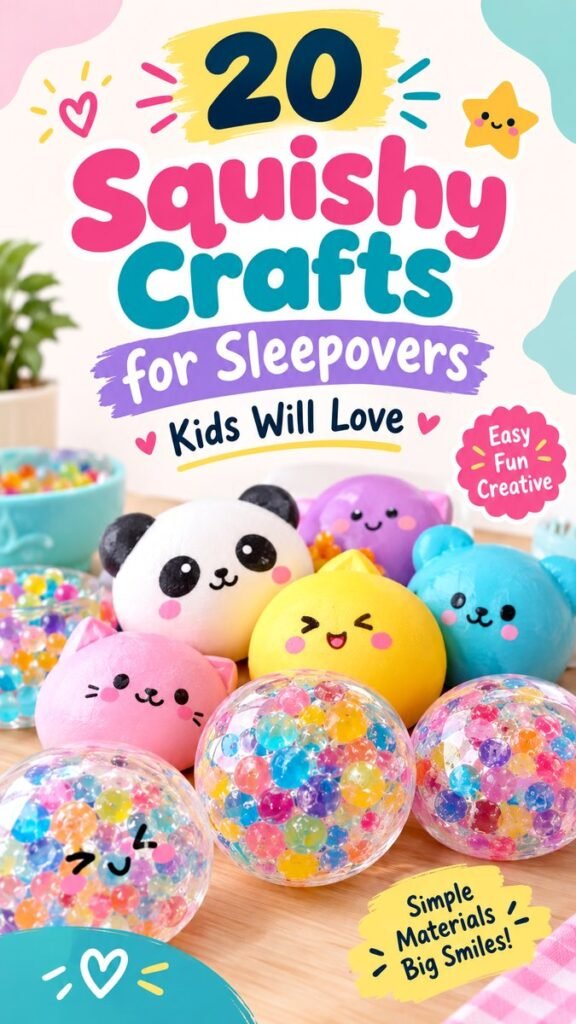
Looking for a fun craft that brings color, creativity, and plenty of smiles to a kids’ activity day? Squishies DIY projects are a fantastic choice. From soft character shapes to colorful sensory-inspired designs, homemade squishies can turn an ordinary afternoon into an exciting creative session. They are especially fun for sleepovers, rainy days, birthday activities, and relaxed weekends at home. With playful faces, bright colors, and simple shapes, these crafts give kids plenty of room to experiment with their own ideas.
Key Takeaways
- Squishies DIY projects are colorful, playful, and easy to personalize.
- Cute animal and food-inspired shapes make especially fun designs.
- Bright colors, simple faces, and expressive details add personality.
- Homemade squishies can be adapted for sleepovers and creative play sessions.
- Always choose age-appropriate craft materials and supervise younger children.
Why Squishies DIY Crafts Are So Much Fun
There is something instantly appealing about a tiny, colorful character that you can hold, squeeze, and decorate. Squishies combine crafting with playful sensory-inspired fun, making them more interactive than many traditional paper or coloring projects. Kids can choose a shape, pick their favorite colors, add a funny expression, and create a finished piece that feels completely personal.
The visual appeal is another reason squishy crafts work so well for Pinterest-inspired activity ideas. Round shapes, pastel colors, smiling faces, tiny ears, rosy cheeks, and bright details create an adorable aesthetic that photographs beautifully. A collection of handmade squishies can even become part of a colorful craft table display.
Important: The best squishies DIY projects do not need complicated designs. A simple shape paired with a cheerful color and expressive face can create a craft that looks adorable and feels exciting to personalize.
Cute Squishy Ideas to Try
A major advantage of DIY squishies is the enormous variety of characters you can create. The colorful examples commonly associated with this craft include animal-inspired figures, simple round characters, fruit-like shapes, and transparent designs filled with colorful decorative pieces. You can use these ideas as starting points and then change the colors, expressions, and details to create something new.
1. Kawaii Animal Squishies
Animal faces are an easy place to begin. Think pandas, cats, bears, bunnies, or other friendly creatures. Start with a basic rounded shape, then add ears, eyes, a tiny nose, and rosy cheeks. Even small changes to the face can completely change the personality of the finished squishy.
For a panda-inspired design, a simple white base with dark ears and facial details creates an instantly recognizable look. A cat can be made with triangular ears and whisker details. A bear can use rounded ears and a tiny muzzle. The goal is not perfection. Slightly oversized eyes and playful expressions often make handmade characters even more charming.
2. Colorful Round Characters
Round squishies are perfect for beginners because the basic shape is easy to decorate. Try cheerful shades such as yellow, pink, turquoise, purple, or soft blue. Once the base is ready, add eyes, a smile, cheeks, or tiny decorative marks.
Give each character a different expression. One might have closed happy eyes, another might have a wide smile, and another could look surprised. Creating a small group of characters makes the craft more engaging because every piece can have its own personality.
3. Fruit-Inspired Squishies
Fruit shapes are another playful option for a squishies DIY collection. Think strawberries, lemons, peaches, oranges, or watermelons. Use recognizable colors and add a cute face for a kawaii twist.
Fruit-inspired crafts are particularly useful when you want a bright summer theme. A mix of pink, yellow, green, and orange creates a lively color palette without requiring complicated decoration. You can also add tiny leaves or seeds as finishing details.
4. Clear Sensory-Inspired Designs
Transparent squishy-style crafts filled with colorful beads or decorative pieces create a completely different look. The clear outer appearance lets the bright colors become part of the design. These pieces can be especially eye-catching when displayed together because the contents create a playful mixture of shapes and colors.
For younger children, adults should select appropriate materials and handle any small loose components. Small beads and similar pieces can present a choking hazard, so craft choices should always match the child’s age and abilities.
Why This Matters
- Simple shapes make it easier for children to focus on creativity rather than complicated construction.
- Different colors and facial expressions turn the same basic design into many unique characters.
- A supervised craft station can make squishy projects a fun group activity for sleepovers.
How to Plan a Squishies DIY Craft Session
A little preparation can make a creative session much more enjoyable. Instead of putting every possible supply on the table, choose a small selection of materials and colors that work well together. This keeps the workspace organized while still giving kids plenty of creative freedom.
Choose a Fun Color Palette
Pastel shades create a soft and cute aesthetic, while bright primary and neon-inspired shades produce a more energetic look. You can also choose a theme, such as rainbow colors, ocean tones, candy colors, or a combination of favorite shades.
Using a coordinated palette can make the finished collection look more polished. At the same time, children should feel free to choose unexpected combinations. A purple bear with yellow cheeks or a turquoise cat with pink ears can become a memorable handmade character.
Create a Simple Craft Station
Set up a clear workspace with the main crafting materials in easy reach. Keep decorations grouped together so children can quickly find what they need. Small containers can help separate different colors and decorative elements.
It can also help to prepare a few simple examples before beginning. These examples are not meant to be copied exactly. Instead, they give children ideas about how shapes, faces, and colors can work together.
Encourage Personalization
The most enjoyable part of a DIY craft is making it your own. Encourage children to experiment with different expressions, patterns, accessories, and color combinations. One person may prefer a simple smiling character, while another may want a highly decorated design.
Instead of aiming for identical results, make variety part of the activity. A collection of completely different squishies can look more interesting than a group of matching ones.
Pro Tip: Give each handmade character a name and personality. This tiny addition can turn a simple squishy craft into a storytelling activity and makes the finished pieces feel even more special.
Squishies DIY Ideas for Sleepovers
Squishy crafts are a natural fit for sleepover activities because they can be turned into a relaxed creative station. Set out several shape ideas and let everyone design a character of their choice. The activity can be done individually or as a friendly group project where everyone creates a small collection.
For a themed sleepover, match the colors to the party decorations. A pastel palette works beautifully for a soft, dreamy theme, while bold rainbow shades can create a more energetic atmosphere. You can also make the craft part of a larger activity by giving everyone a few minutes to design a character before sharing the finished creations.
Make It a Creative Challenge
Turn the craft into a playful challenge without making it competitive. Give everyone the same basic shape and ask them to create completely different characters. Compare the results and talk about the choices each person made.
Another idea is to choose a theme such as animals, desserts, ocean creatures, or colorful fantasy characters. The theme provides direction while still leaving plenty of room for imagination.
Tips for Making Cute DIY Squishies
Keep the Shapes Simple
Basic circles, ovals, rounded rectangles, and simple animal silhouettes are excellent starting points. Once the main shape is complete, decorative details can do most of the visual work.
Use Facial Details Carefully
Small eyes, tiny mouths, rosy cheeks, and simple lines can create a strong kawaii appearance. Try different expressions before settling on the final look.
Think About Texture and Contrast
Combining smooth-looking surfaces with colorful decorative details can make a craft display more visually interesting. Transparent elements filled with colorful pieces can also provide contrast against solid pastel characters.
Keep Safety in Mind
Choose craft supplies according to the child’s age. Small decorative pieces should be kept away from young children who may put objects in their mouths. Adults should supervise activities involving cutting tools, adhesives, or small components.
Ways to Display Finished Squishies
Once the crafting is finished, do not hide the results away immediately. A colorful display can be part of the fun. Arrange the characters together on a clean tabletop, group them by color, or create a little scene with the different designs.
For photographs, natural-looking light and a simple background can help the colors stand out. Arrange the largest characters toward the back and smaller pieces toward the front to create a layered display. Transparent bead-filled designs can add extra color and visual texture to the arrangement.
You can also turn finished pieces into small handmade gifts, party keepsakes, or decorations for a craft corner, depending on the materials and construction method used.
At a Glance
- Pick a simple shape and build the design around it.
- Experiment with cheerful colors and cute facial expressions.
- Create animal, fruit, character, or transparent sensory-inspired styles.
- Use the activity for sleepovers, rainy days, parties, or weekend crafting.
- Supervise children and select materials appropriate for their age.
Conclusion
Squishies DIY crafts are all about turning simple shapes into colorful little characters full of personality. Whether you prefer cute animal faces, cheerful round characters, fruit-inspired designs, or transparent creations filled with colorful details, there are countless ways to make the idea your own.
The biggest appeal is the freedom to experiment. Change the colors, switch the expressions, add tiny details, or create an entire collection of characters with different personalities. These projects can become a fun addition to sleepovers, creative afternoons, birthday activities, and family craft sessions.
Start with one simple design, gather a few cheerful colors, and let creativity take over. The result does not need to be perfect to be adorable. Sometimes the funniest expressions and most unexpected color combinations become the designs everyone remembers.
Tags
Squishies DIY DIY Squishy Crafts Kids Crafts Squishy Crafts Sleepover Crafts Kawaii Crafts Sensory Crafts Easy DIY Ideas