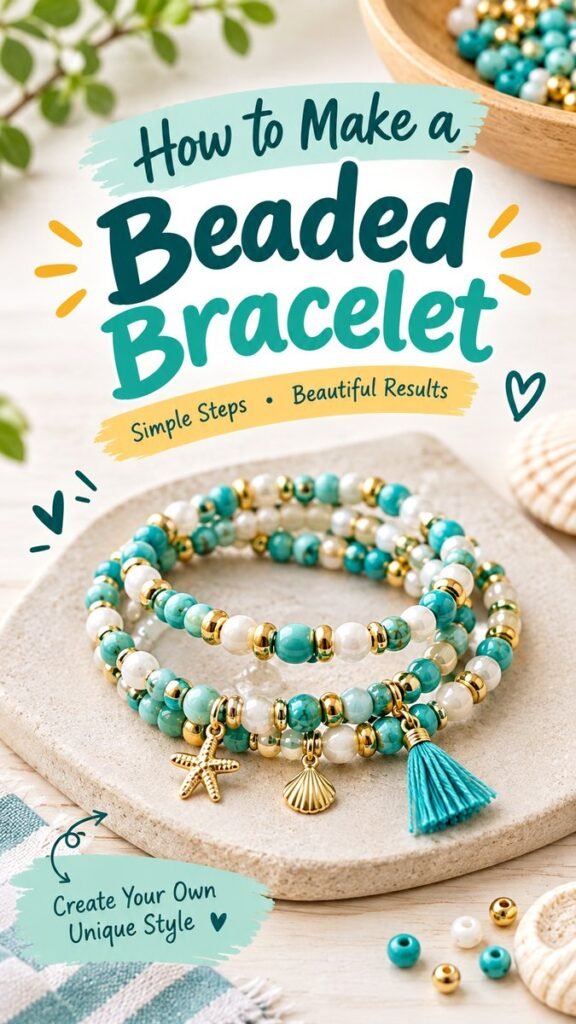
Making your own jewelry can be a simple and rewarding way to explore color, texture, and personal style. Beaded bracelets are especially beginner-friendly because you can create beautiful designs with a small collection of beads, a flexible cord, and a few basic jewelry findings. Whether you want a delicate everyday bracelet, a colorful stack, or a handmade gift, DIY bracelet tutorials give you plenty of room to experiment.
Key Takeaways
- Beaded bracelets are approachable projects for beginners and experienced crafters.
- Combining turquoise, white, and metallic beads creates a fresh, polished look.
- Simple repeating patterns can make handmade jewelry look intentional and balanced.
- Charms and tassels provide easy ways to personalize a bracelet.
- Small adjustments to color, bead size, and spacing can create completely different styles.
Why DIY Beaded Bracelets Are So Fun to Make
DIY bracelets are more than just a craft project. They are an opportunity to create something that reflects your personality. A bracelet can be minimal and elegant, playful and colorful, or filled with decorative details. Because each bead can be selected individually, even a simple design can feel completely personal.
Beaded bracelet tutorials are also ideal when you want a project that can be completed without a large workspace or complicated equipment. You can organize your beads in small dishes, choose a pattern, and work through the design one section at a time.
One of the biggest advantages of handmade bracelets is flexibility. You do not need to reproduce a particular pattern perfectly. Use the basic structure as inspiration, then change the colors, bead shapes, accents, or charms to create a design that feels like your own.
Materials for a Simple Bracelet Project
A basic beaded bracelet does not require an extensive collection of supplies. Start with a few dependable materials and add decorative elements as your confidence grows.
- Beads: Choose round beads, small accent beads, spacer beads, or a mixture of different shapes.
- Stretch cord or jewelry cord: Select a suitable cord for the bracelet style you want to make.
- Spacer beads: Metallic or neutral spacers can separate larger beads and add visual rhythm.
- Charms: Small decorative charms can give a bracelet a distinctive finishing touch.
- Tassels: A small tassel adds movement and a playful handmade detail.
- Scissors: Keep sharp scissors nearby for trimming cord.
- Small tray or bead dish: A shallow surface makes it easier to organize beads while designing.
If you are just beginning, avoid buying too many different supplies at once. A small selection of complementary beads can produce many designs. Once you understand how different sizes and colors work together, you can gradually expand your collection.
Choosing a Beautiful Bead Color Palette
Color is one of the easiest ways to make a handmade bracelet look polished. The example style uses a refreshing combination of turquoise, white, soft neutral tones, and gold-colored accents. This palette creates a bright, relaxed appearance while still giving the finished jewelry enough contrast to stand out.
When choosing colors for your own DIY bracelet, begin with one main shade. Then add a neutral and an accent color. For example, turquoise can serve as the primary color, white can provide a clean contrast, and metallic gold can act as the accent.
You can also create completely different moods with the same bracelet structure. Soft pink with cream and silver can create a delicate appearance, while black with white and metallic accents can feel more modern. Earthy greens, beige, and brown work well for a natural-inspired palette.
Use Repetition to Create Balance
A repeating sequence helps a bracelet feel organized. Try arranging several main beads, followed by a smaller spacer, then repeating the sequence. You do not need to make every section identical, but keeping some consistency can make the finished piece look intentional.
How to Plan Your Bracelet Design
Before threading the beads, place them on a flat surface and experiment with different arrangements. This small step can save time and lets you see how the colors interact before you commit to the final pattern.
- Select your main bead color. Choose the shade that you want to dominate the bracelet.
- Add a complementary neutral. White, cream, beige, or another understated tone can give the design breathing room.
- Introduce an accent. Metallic spacers or colorful feature beads can add contrast.
- Test the sequence. Lay out several repeating sections and adjust the spacing until the pattern feels balanced.
- Choose your finishing detail. Decide whether you want a charm, tassel, bead cluster, or simple ending.
Planning is particularly helpful when working with several bead sizes. Larger beads naturally attract more attention, so placing them evenly throughout the design can prevent one section from looking visually heavy.
Expert Insight
A bracelet often looks more sophisticated when the color pattern has a clear rhythm. Instead of using every bead randomly, repeat two or three colors and vary the bead size or metallic accents for subtle contrast.
Step-by-Step DIY Bracelet Tutorial
1. Prepare Your Workspace
Set up a clean, comfortable workspace before you begin. Place your beads in small groups so you can easily see the colors and sizes available. A tray or shallow dish is useful because round beads can quickly roll away from your work area.
Keep your cord, scissors, and chosen decorative elements within reach. Having everything ready makes the process smoother and reduces interruptions while you are threading the bracelet.
2. Create Your Bead Sequence
Arrange the beads in the order you want them to appear. Start with a simple pattern if you are new to bracelet making. For example, alternate a colorful bead with a white bead and insert a small metallic spacer between selected sections.
Once you are comfortable with basic sequences, experiment with clusters. Three small beads grouped together can create a different visual effect from one larger bead, even when the colors remain the same.
3. Thread the Beads
Thread each bead carefully onto the cord, following your planned sequence. Keep an eye on the developing pattern as you work. If a section does not look quite right, it is usually easier to adjust it before reaching the end.
Try not to rush this stage. Taking a little extra time to check your spacing can make the finished bracelet look cleaner and more balanced.
4. Check the Fit
Before finishing the bracelet, gently bring the ends together and check the size. It should feel comfortable without being excessively tight. Remember that the final fit depends on the type of cord, bead size, and intended wearing style.
If the bracelet feels too loose or too tight, this is the ideal moment to remove or add beads. Once the ends are secured, making changes can be more difficult.
5. Secure the Bracelet
Finish the bracelet according to the type of cord and closure you are using. If you are working with stretch cord, make a secure knot and trim the excess carefully. For designs using clasps or other findings, follow the appropriate jewelry-making method for that hardware.
Always make sure the connection feels secure before wearing the bracelet. Give it a gentle check after finishing and inspect the knot or closure periodically with regular use.
6. Add Charms or Tassels
Decorative details can transform a straightforward beaded bracelet into something much more distinctive. A small shell-shaped charm, star-inspired charm, or colorful tassel can create a focal point without requiring a complicated bead pattern.
If your bracelet already contains several colors and textures, keep the charm relatively simple. If the bracelet has a minimal bead pattern, a more noticeable charm can become the main decorative feature.
Ideas for Customizing Handmade Bracelets
The beauty of DIY jewelry is that there are almost endless ways to modify a basic design. You can make several bracelets using the same construction technique while changing only the colors and decorative details.
- Beach-inspired: Combine turquoise, white, cream, and gold accents with shell-inspired charms.
- Minimalist: Use one or two colors with small spacer beads and very little decoration.
- Colorful: Mix several bright shades and create a repeating rainbow-inspired pattern.
- Elegant: Pair neutral beads with metallic accents and one understated focal bead.
- Personalized: Add an initial, symbolic charm, or color combination that has personal meaning.
- Bracelet stack: Make several coordinating bracelets and vary the bead sizes or patterns for a layered effect.
How to Make a Bracelet Stack Look Coordinated
Wearing multiple bracelets together can make a simple handmade collection feel more complete. The key is to give the bracelets something in common. You might use the same turquoise shade across several pieces while changing the secondary colors and bead sizes.
Another approach is to repeat the same metallic accent throughout the collection. Gold-colored spacers on each bracelet can visually connect designs even when the bead patterns are different.
For a balanced bracelet stack, vary the texture rather than making every bracelet identical. One piece can feature larger beads, another can use smaller beads, and a third can include a tassel or charm. Shared colors will help the group still feel cohesive.
Common DIY Bracelet Mistakes to Avoid
Using Too Many Colors
Colorful jewelry can be beautiful, but too many unrelated shades may make the design feel busy. Start with two or three main colors and add small accents when needed.
Skipping the Test Layout
Threading beads immediately can make it harder to notice an uneven pattern. Laying everything out first gives you a chance to experiment and rearrange sections before committing to the final design.
Ignoring Bead Proportions
Large feature beads naturally draw attention. If several large beads are placed together, one area can become visually dominant. Spread feature beads throughout the bracelet or use smaller spacers to create separation.
Making the Finish Too Loose
A beautiful bead pattern will not matter much if the finished connection is unreliable. Take time to secure the ends properly and check the bracelet before wearing it.
Creative Bracelet Projects for Beginners
Once you have made your first bracelet, there are many ways to build on the same skills. Try creating a matching set with different bead arrangements. You could also make a bracelet using only two colors, then create another version with a decorative charm.
Small projects are also useful for practicing pattern design. Instead of worrying about creating a complicated piece, focus on making one clean repeating sequence. Once that feels comfortable, experiment with asymmetrical arrangements and focal sections.
Handmade bracelets can also make thoughtful gifts. A personalized color palette can be chosen around someone’s favorite shades, while a charm can add an extra personal touch. Making several coordinated bracelets can turn a single afternoon craft session into a small handmade collection.
A Simple Way to Keep Improving Your Bracelet Designs
Keep a small selection of your favorite bead combinations together so you can quickly revisit successful color palettes. Take note of combinations that work well and reuse the underlying idea in a new design.
Do not be afraid to take apart a bracelet and redesign it. Jewelry making is an experimental craft, and changing a few beads can completely transform the appearance. A pattern that looks ordinary on a tray may become much more interesting once it is arranged around the wrist.
Quick Points
- Choose a main color and build the palette around it.
- Use repetition to make the bead pattern feel intentional.
- Mix bead sizes for texture and visual interest.
- Add one simple charm or tassel as a focal detail.
- Check the fit and finishing connection before wearing your bracelet.
Conclusion: Create a Bracelet That Feels Like You
DIY bracelet tutorials make it easy to turn a handful of beads into wearable handmade jewelry. With a thoughtful color palette, a simple repeating pattern, and a few carefully chosen accents, even a beginner can create a bracelet that looks creative and polished.
The turquoise, white, and gold combination is a great starting point for anyone who loves fresh, relaxed jewelry, but there is no need to stop there. Experiment with your favorite colors, change the bead sizes, introduce charms, or create several coordinating pieces for a layered look.
Most importantly, enjoy the process. Handmade jewelry does not need to be complicated to be special. Start with a simple pattern, learn what combinations you like, and gradually develop your own style. With each bracelet, you will have another opportunity to experiment, create, and make something uniquely yours.