A dog house can be much more than a basic outdoor shelter. With a thoughtful design, a few practical materials, and a weekend of hands-on work, you can create a comfortable backyard retreat that gives your dog a cozy place to relax while adding a charming DIY feature to your outdoor space. Whether you prefer a classic wooden cabin, a simple compact shelter, or a more decorative design, these dog house DIY ideas offer plenty of inspiration for your next project.
Key Takeaways
- A DIY dog house can be customized to suit your dog’s size and your outdoor space.
- Weather-resistant materials are a smart choice for an outdoor shelter.
- A raised floor can help keep the interior cleaner and more comfortable.
- Good ventilation is important for a pleasant interior environment.
- Simple tools and careful planning can make a weekend build much easier.
- Personal touches can turn a practical shelter into an attractive backyard feature.
Why Build a DIY Dog House?
Building a dog house yourself gives you the freedom to choose the shape, materials, finish, and overall size. Instead of searching for a ready-made shelter that almost fits your needs, you can create a design around your dog’s comfort and the available space in your yard.
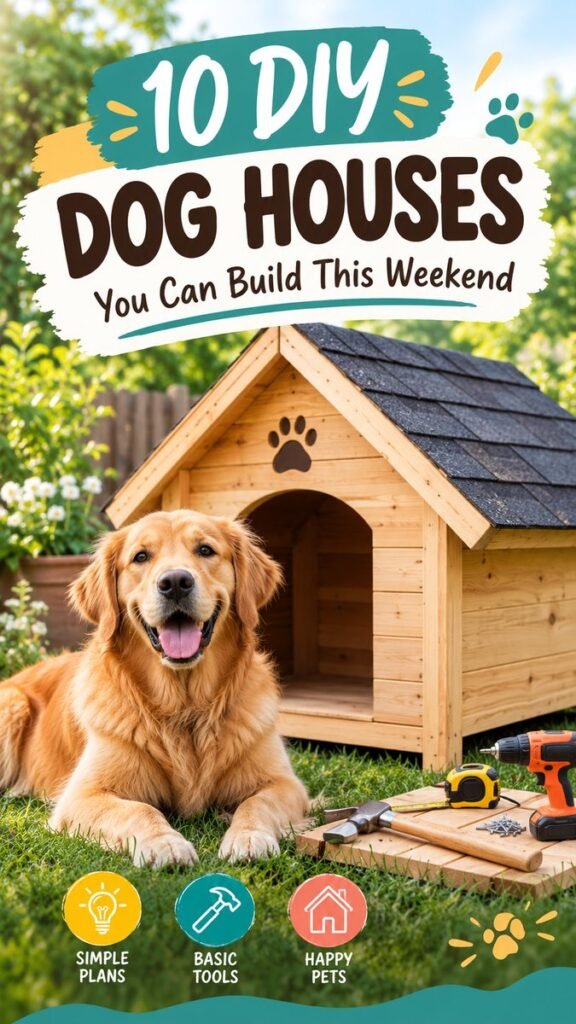
The wooden dog house shown as inspiration has a traditional pitched roof and warm natural wood appearance. This style works especially well for homeowners who want a shelter that feels like a small backyard cottage rather than a simple box. The pitched roof also creates a familiar cabin-like appearance that can complement gardens, patios, and lawns.
Important: The most successful dog house DIY projects balance appearance with practical comfort. A beautiful shelter still needs enough interior space, protection from weather, appropriate ventilation, and a safe structure for the dog using it.
Choosing the Right Dog House Design
Before picking up a saw or measuring boards, think about the type of shelter you want to build. The design should reflect your dog’s size, the climate where you live, and the location where the house will sit.
Classic Wooden Dog House
A classic wooden dog house is one of the most versatile options for a backyard. It can feature a triangular front, a pitched roof, wooden siding, and a simple open entrance. The natural appearance of wood also makes it easy to coordinate with outdoor furniture, fencing, raised garden beds, and other landscaping elements.
For a timeless appearance, keep the exterior relatively simple. Natural wood tones can create a warm rustic look, while a suitable outdoor finish can provide a different visual character. Decorative trim around the entrance or roof can also add personality without making the project unnecessarily complicated.
Compact Backyard Shelter
If your yard is small, a compact dog house can provide a comfortable retreat without taking over the available outdoor space. Focus on an efficient footprint and make the interior large enough for your dog to stand, turn around, lie down, and settle comfortably.
Decorative Cottage-Style House
For a more eye-catching project, consider cottage-inspired details. A contrasting roof, simple wooden trim, a small porch-like platform, or a decorative paw-print detail can make the shelter feel intentional and unique. Keep decorative elements secure and avoid anything that could become a hazard.
Planning Your Dog House DIY Project
Good planning can save considerable time once construction begins. Start by deciding where the dog house will be placed. Look for a relatively level area with enough room around the shelter for your dog to move comfortably.
Consider sunlight, wind, rain, drainage, and the surrounding landscape. A sheltered position may provide better protection than an exposed location. At the same time, the entrance should not be positioned where rainwater can easily flow directly inside.
Measure for Your Dog
The house should not be excessively large or unnecessarily cramped. Measure your dog while standing and consider the amount of floor space needed for resting. The entrance should allow comfortable access without requiring the dog to squeeze through a narrow opening.
If the dog is still growing, account for its expected adult size when planning the structure. A little extra planning at this stage can prevent the need to rebuild the house later.
Sketch the Layout
A basic sketch can show the front, side, roof, entrance, and floor dimensions before you begin cutting materials. Marking measurements on paper first makes it easier to identify awkward proportions and estimate how many boards or panels you may need.
Materials and Basic Tools
The exact materials depend on your chosen design, but many simple dog house projects can be built around common woodworking supplies. Wood boards or exterior-grade panels can form the walls, while suitable roofing materials can protect the structure from rain and sun.
You may also need exterior screws or other appropriate fasteners, hinges if you want an access panel, and a suitable outdoor wood finish. Always choose materials intended for the conditions where the shelter will be used.
Useful DIY Tools
- Tape measure for accurate dimensions
- Saw suitable for your selected materials
- Drill and appropriate bits
- Hammer for compatible fasteners
- Sandpaper for smoothing exposed edges
- Clamps for holding pieces securely during assembly
- Level for checking the structure
The tools pictured alongside the wooden dog house reinforce the approachable, hands-on nature of this project. You do not need an elaborate workshop to start planning a basic shelter, but accurate measurements and safe tool handling are essential.
Building the Main Structure
Once the dimensions are established, begin with the base and wall sections. A sturdy base provides the foundation for the entire shelter, while carefully aligned walls help the roof fit properly later.
Create a Raised Floor
A slightly raised floor can be useful for an outdoor dog house because it creates separation between the sleeping area and damp ground. It can also make cleaning around the shelter easier. Make sure the base is stable and does not rock or shift when the dog enters or exits.
Assemble the Walls
Build the front, back, and side panels according to your sketch. Check each section for square alignment before securing it permanently. Sand rough edges and inspect corners for exposed fasteners or splintered wood.
Add the Pitched Roof
The pitched roof is one of the defining visual features of the classic dog house. It gives the shelter a charming cabin appearance and creates a clear slope for the roof covering. Make sure the roof extends far enough to provide reasonable protection around the walls and entrance.
Expert Insight
Small details can make a major difference in an outdoor dog house. Pay particular attention to drainage, airflow, smooth edges, structural stability, and the placement of the entrance. These practical considerations matter more than decorative features.
- Keep the floor stable and reasonably elevated.
- Provide ventilation without creating an overly exposed interior.
- Inspect every edge and connection before allowing your dog inside.
Making the Dog House Comfortable
A DIY dog house should be designed around comfort rather than appearance alone. Think about how the shelter will feel during both warm and cool weather. Good airflow can help prevent the interior from becoming stuffy, while appropriate insulation may be useful in climates with significant temperature changes.
The entrance should be easy for the dog to use. Avoid sharp corners and unfinished cuts. The sleeping surface should also be dry, cleanable, and comfortable. A removable mat or suitable bedding can make routine cleaning simpler.
Pro Tip: Think about maintenance before finishing the build. A dog house with easy-to-access surfaces, a practical floor, and a simple roof design will generally be easier to keep clean and inspect over time.
Weatherproofing an Outdoor Dog House
Outdoor wood is exposed to moisture, sunlight, temperature changes, and everyday wear. Choosing suitable exterior materials and finishes can help the structure remain attractive and functional for longer.
Pay close attention to the roof because it receives direct exposure to rain and sun. Roofing should be securely installed and arranged so water can run away from the shelter rather than collecting around the walls or entrance.
The bottom of the structure deserves attention as well. Avoid placing unfinished wood directly on consistently damp ground. A stable raised base can help protect the lower structure and improve the overall setup.
Simple Ways to Personalize Your DIY Dog House
Once the structure is complete, you can give it a distinctive personality. Natural wood already creates a warm look, but there are many simple ways to customize the exterior while keeping the design practical.
- Choose a finish that complements your garden or patio.
- Add simple trim around the entrance.
- Create a small name plaque using pet-safe materials.
- Use a contrasting roof color for visual interest.
- Coordinate the shelter with nearby outdoor furniture or landscaping.
Keep decorations securely attached and avoid small loose parts that could become a choking hazard. The best personalization is attractive while still keeping the dog house easy to clean and safe to use.
Weekend Dog House DIY Checklist
If you want to complete a dog house over a weekend, preparation is the key. Gather your materials before beginning, prepare a clear workspace, and decide on your measurements ahead of time. Having the basic tools nearby can reduce interruptions once construction starts.
A simple workflow is to measure and cut the main components first, assemble the base and walls, install the roof, smooth exposed edges, and finish the exterior. Allow appropriate time for any coatings or finishes to cure before the dog uses the shelter.
Before Your Dog Moves In
- Check that the structure is stable.
- Inspect every surface for splinters or sharp edges.
- Confirm that fasteners are secure and not exposed where they could cause injury.
- Make sure the entrance is appropriately sized.
- Check that the interior stays dry and has reasonable airflow.
- Remove construction debris and clean the area thoroughly.
At a Glance
Quick Points
- Start with accurate measurements and a simple sketch.
- Choose durable materials suited to outdoor conditions.
- Prioritize stability, airflow, drainage, and comfortable space.
- Use a pitched roof for a classic cabin-inspired appearance.
- Keep the final design practical, safe, and easy to maintain.
Conclusion: Create a Cozy Backyard Retreat
A dog house DIY project can be a rewarding way to combine woodworking, creativity, and practical pet care. The classic wooden shelter style offers a particularly appealing starting point, with its pitched roof, natural wood appearance, and simple cabin-inspired shape. From there, you can adjust the dimensions, materials, finish, and details to create something that works for your dog and your outdoor space.
The most important part of the project is not making the most elaborate house. It is creating a stable, comfortable, weather-conscious shelter that your dog can enjoy. Careful planning, suitable materials, smooth finishes, and thoughtful placement will help turn a straightforward weekend project into a useful addition to the backyard.
Whether you are an experienced DIY enthusiast or simply looking for a manageable woodworking project, a homemade dog house is a great place to start. Gather your basic tools, sketch your design, prepare your materials, and give your four-legged companion a cozy space of their own.
Tags
Dog House DIY DIY Dog House Dog House Plans DIY Pet Projects Woodworking Projects Backyard Ideas Outdoor Dog Shelter Pet-Friendly DIY