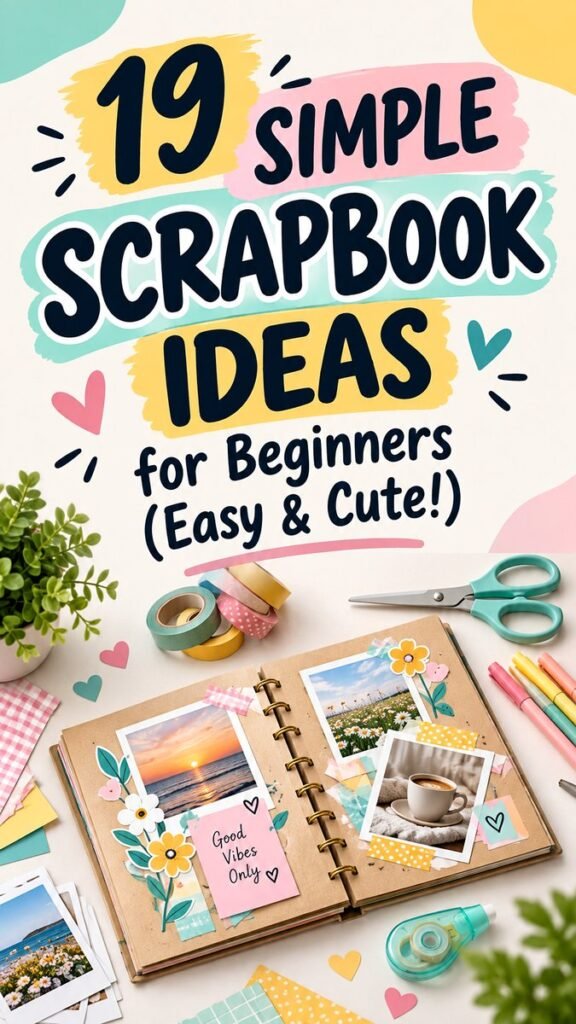
DIY scrapbooking is a wonderful way to turn everyday photos, little notes, and favorite memories into something personal and creative. You do not need advanced crafting skills to get started. With a scrapbook, a few photos, colorful paper, washi tape, scissors, markers, and simple decorative details, you can create pages that feel thoughtful without being complicated.
The scrapbook style shown here combines a warm handmade look with cheerful colors, layered paper, photographs, playful shapes, and small embellishments. It is an approachable direction for beginners because the beauty comes from combining simple elements rather than creating perfectly complicated designs. Whether you are documenting a trip, celebrating a special occasion, or simply collecting moments from everyday life, these DIY scrapbook ideas can help you create pages you will enjoy looking back on.
Key Takeaways
- Start with simple scrapbook layouts that are easy to arrange.
- Combine photographs with patterned paper, washi tape, and handwritten details.
- Use a consistent color palette to make individual pages feel connected.
- Layer small embellishments to add personality without overcrowding the page.
- Leave some open space so your photos and main message remain easy to see.
- Focus on preserving meaningful memories rather than creating perfect pages.
Why DIY Scrapbooking Is So Appealing
Scrapbooking brings together photography, paper crafts, journaling, and creative decoration in one relaxing activity. Instead of storing favorite pictures only on a phone or computer, you can give them a physical place in a handmade memory book.
One of the best things about DIY scrapbooking is its flexibility. A page can be colorful and playful, soft and minimal, or filled with layers and decorative details. There is no single correct way to design a scrapbook. Your choice of photographs, colors, words, and embellishments can reflect the personality of the memories you are preserving.
Important: A beginner scrapbook page does not need to look complicated to be beautiful. A thoughtful photo arrangement, a few coordinated paper pieces, and a short handwritten note can create a meaningful finished page.
Simple Scrapbook Supplies for Beginners
You can begin with a surprisingly small collection of craft supplies. The goal is to choose materials that make arranging and decorating easy rather than buying everything at once.
- Scrapbook album: Choose a size and format that feels comfortable to work with.
- Photos: Select favorite pictures that tell a story or capture a particular moment.
- Patterned paper: Use it for backgrounds, borders, layers, and decorative shapes.
- Washi tape: This is useful for adding color, creating borders, and attaching lightweight decorations.
- Scissors: A sharp pair makes trimming photos and paper much easier.
- Adhesive: Paper-safe glue, tape runners, or photo-safe adhesive can help keep pieces secure.
- Markers and pens: Use them for captions, dates, labels, and short journal entries.
- Decorative pieces: Stickers, paper flowers, hearts, tabs, and small cutouts can add personality.
You can also reuse attractive paper scraps from other craft projects. Small leftovers can become photo corners, tiny labels, layered shapes, or colorful borders. This makes scrapbooking a practical way to use materials that might otherwise be left in a craft drawer.
Choose a Color Palette Before You Begin
Color can make a scrapbook page look coordinated even when the individual pieces are very simple. The inspiration here uses a cheerful combination of soft neutrals, pastel tones, pinks, greens, yellows, and warm paper shades.
For your own page, choose two or three main colors and one neutral. For example, you might combine soft pink, mint green, and yellow with cream or kraft paper. Another option is to take one color from your favorite photograph and repeat it in the paper, tape, stickers, or handwritten accents.
Keeping the palette controlled does not mean every item needs to match perfectly. Slight variations can actually make a handmade scrapbook feel more interesting and natural.
19 Simple DIY Scrapbook Ideas to Try
1. Create a Simple Photo Grid
Arrange several photographs in a neat grid and leave a little space between each one. Add a small title above the photos and a short note below them. This is one of the easiest layouts for beginners because the structure keeps the page organized.
2. Try a Layered Photo Layout
Place photographs on top of slightly larger pieces of patterned or colored paper. Layering creates depth while requiring very little design experience. Try mixing different paper sizes for a relaxed handmade effect.
3. Add Washi Tape Corners
Use short strips of washi tape to decorate the corners of photographs. This simple technique adds color and gives the photos a casual, creative appearance without covering important parts of the image.
4. Make a Favorite Memories Page
Gather several small photographs that represent favorite moments from a particular period. Add short captions instead of long paragraphs. A collection of small memories can make a page feel full of personality.
5. Use a Handmade Title Card
Cut a rectangle from cardstock and write the main title by hand. You can decorate the card with tiny hearts, dots, flowers, lines, or simple stickers. Place it near the photographs to create an obvious visual starting point.
6. Add a Short Journal Note
Not every scrapbook needs a long story. Write two or three sentences about what happened, how you felt, or why the moment matters. These small details can become especially valuable when you revisit the album later.
7. Create a Travel Memory Spread
Use photographs, tickets, paper scraps, maps, handwritten notes, and simple labels to document a trip. Keep the layout relaxed and allow different pieces to overlap slightly for a collected travel-journal feel.
8. Make a Seasonal Page
Choose colors and decorations inspired by the season you are documenting. Soft pastels work beautifully for spring memories, while warm paper tones can create a cozy autumn-inspired spread.
9. Use Paper Flowers
Simple paper flowers can become attractive accents around photographs. You can make them from leftover cardstock or use ready-made craft embellishments. Keep larger decorations toward the edges so they frame rather than hide the photos.
10. Add Small Heart Shapes
Cut hearts from colorful paper and scatter a few around the page. Repeating one simple shape creates visual consistency and is especially useful when you want a cute scrapbook style without complicated embellishments.
11. Create a Photo Strip
Place several small photos vertically or horizontally in a strip. Add one narrow paper layer behind them and decorate the ends with washi tape. This layout works well when you have several pictures from the same event.
12. Try a Minimal Scrapbook Page
For a cleaner look, use one or two photographs, a simple title, and only a few decorative accents. Leaving plenty of empty space can make the main photograph feel more important.
13. Mix Handwriting With Printed Text
Combine a small printed label with handwritten captions. The contrast creates a casual, personalized look and gives the page more visual variety without requiring advanced lettering skills.
Why This Matters
The strongest scrapbook pages usually have a clear focal point. Choose one main photograph or message first, then add decorative elements around it. This simple approach keeps the page attractive and prevents embellishments from competing with the memory itself.
14. Make a Memory Timeline
Arrange photographs in chronological order to tell a small story. Add dates, short captions, or tiny labels between the photos. This can turn a collection of pictures into a visual sequence that is easy to follow.
15. Create a Scrapbook Quote Page
Choose a short phrase that captures the mood of your memories and make it the central element. Surround the words with photographs, paper shapes, and a few simple accents.
16. Use Decorative Borders
A paper or washi tape border can instantly give a page a finished appearance. Try a border around the entire layout or use small pieces only along selected edges for a more relaxed design.
17. Add a Pocket for Keepsakes
Create a small paper pocket on the page for notes, tiny cards, printed memories, or other flat keepsakes. This adds an interactive element and gives you a place to store details that do not fit naturally into the main layout.
18. Make a Color-Themed Page
Choose one favorite color and build the page around different shades of it. Add a neutral background so the photographs and decorative pieces remain easy to see.
19. Create a Personal Favorite Page
Combine favorite photos, favorite colors, short notes, and small decorative details on one spread. Because there are no strict rules, this type of page is a great way to experiment with your own scrapbook style.
How to Arrange a Beginner Scrapbook Page
Before attaching anything permanently, place all your materials on the page and experiment with different arrangements. Move the photographs around until you find a composition that feels balanced.
- Choose the photographs you want to feature.
- Select a background paper or neutral page.
- Place the largest photograph or main title first.
- Add supporting photographs around the focal point.
- Introduce patterned paper or washi tape for color.
- Add captions, dates, or short journal notes.
- Finish with small embellishments and decorative details.
- Step back and check that the page still feels easy to read.
Pro Tip: Take a quick photo of your arrangement before gluing anything down. It gives you a reference if you accidentally move pieces while working and makes it easier to compare different layout ideas.
Easy Ways to Make Scrapbook Pages Look More Creative
You do not need expensive supplies to create visual interest. Small changes in placement, scale, and texture can make a simple page look thoughtfully designed.
Layer Different Paper Sizes
Place a smaller piece of paper over a larger background layer. Slightly offsetting the edges can create a relaxed handmade effect.
Repeat Small Shapes
Use the same heart, flower, circle, or star shape in several areas of the page. Repetition helps separate decorative details while keeping the overall design cohesive.
Mix Textures Carefully
Combine smooth photographs with paper, washi tape, and lightweight embellishments. A small amount of texture can make a page feel more tactile and interesting.
Leave Breathing Room
It can be tempting to fill every empty section, but open space helps important photographs and words stand out. A balanced page often feels more polished than one packed with decorations.
Common Beginner Scrapbooking Mistakes to Avoid
Starting with a few simple design principles can make the process much easier. One common mistake is adding too many unrelated colors. Another is placing decorations before deciding where the photographs and main message will go.
- Do not overcrowd the page with too many large decorations.
- Avoid covering important parts of your photographs with embellishments.
- Do not feel pressured to use every supply you own on one spread.
- Keep important text readable by giving it enough surrounding space.
- Plan the overall arrangement before permanently attaching pieces.
The most important thing is to remember that scrapbooking is personal. A slightly uneven handwritten title or imperfectly cut paper can make the page feel more authentic. The goal is to preserve memories in a way that feels meaningful to you.
Make Your Scrapbook Personal
The most memorable scrapbook pages often include details that could not be found in a standard photo album. Add a favorite phrase, a funny memory, a short description of the day, or a note about why a photograph matters.
You can also personalize pages with your favorite color combinations and recurring decorative elements. Maybe every travel page includes a small paper label, while family pages use soft colors and handwritten captions. Creating these little visual habits can give an entire scrapbook a consistent personality.
Do not worry about following every current craft trend. Inspiration is useful, but your scrapbook should ultimately reflect your memories and your creative preferences.
At a Glance
- Choose a few favorite photographs.
- Build around a simple color palette.
- Layer paper and washi tape for easy decoration.
- Add short handwritten memories.
- Keep the focal point clear and the layout balanced.
Conclusion
DIY scrapbooking is an easy and enjoyable way to turn photographs and everyday memories into something tangible. With simple supplies and a little planning, beginners can create colorful pages filled with personality without needing complicated techniques.
Start with one favorite photograph, choose a small color palette, and add a few simple layers. From washi tape and patterned paper to handwritten captions and tiny decorative shapes, even basic materials can create a beautiful result when they are arranged thoughtfully.
Most importantly, let your scrapbook tell your story. Perfect symmetry is not required, and there is no single right layout. Experiment with different DIY scrapbook ideas, save the designs that inspire you, and gradually develop a style that feels like your own. Your finished pages will become more than craft projects because they will preserve the little moments that make your memories special.
Tags
DIY Scrapbook Scrapbook Ideas Scrapbooking for Beginners Paper Crafts Memory Book Ideas DIY Crafts Photo Album Ideas span style=”display:inline-block;background:#fff4f4;border:1px solid #f0d2d2;border-radius:20px;padding:7px 12px;margin:4px;font-size:14px;”>Creative Journaling