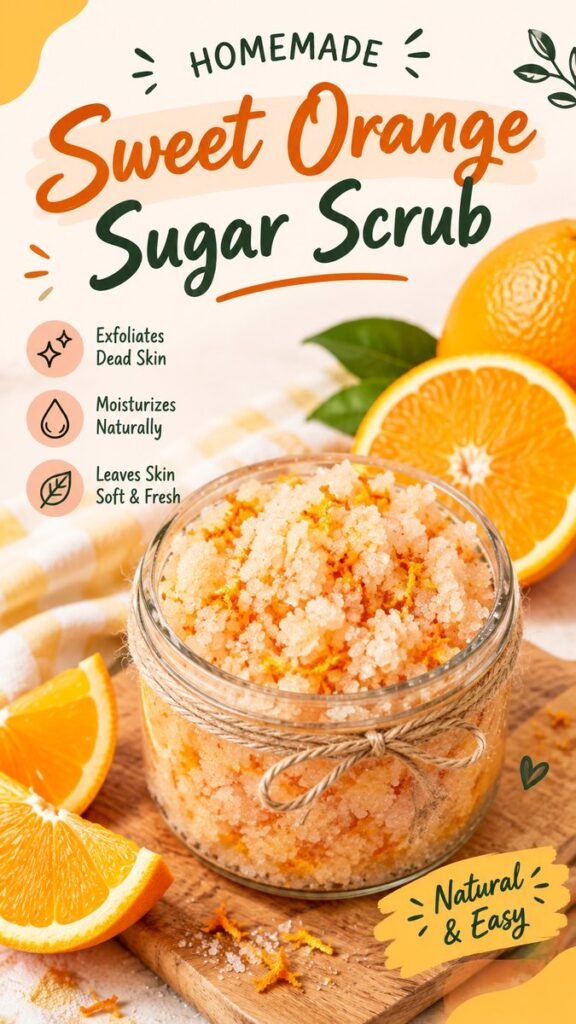
A homemade sugar scrub is a simple way to turn a few everyday ingredients into a refreshing self-care treat. This sweet orange sugar scrub combines a grainy sugar texture with the bright, fresh character of orange zest, creating a beautiful DIY body scrub that feels cheerful, fragrant, and easy to make. Whether you are preparing a small jar for your own routine or looking for a thoughtful handmade gift idea, this citrus-inspired recipe is a lovely place to start.
The warm orange tones, visible citrus zest, and crystal-like sugar texture make this DIY beauty project especially appealing. It is also easy to customize with your favorite carrier oil, adjust the texture to your preference, and package in a small glass jar for a polished homemade presentation.
Key Takeaways
- A sugar scrub DIY is an approachable project for homemade body care.
- Orange zest adds a naturally bright citrus character and attractive color.
- Fine or medium sugar can be selected according to your preferred scrub texture.
- A simple jar, ribbon, or label can turn the scrub into a charming handmade gift.
- Small batches are practical because homemade scrubs are best kept clean, dry, and fresh.
- A gentle application and patch test can help make your DIY routine more comfortable.
Why Make a Sweet Orange Sugar Scrub?
There is something satisfying about making your own sugar scrub. You control the texture, choose the ingredients, and create a product that looks as good as it feels in a neatly decorated jar. A sweet orange sugar scrub also brings a bright seasonal touch to a simple self-care routine.
Sugar provides the characteristic grainy texture associated with body scrubs, while orange zest gives the mixture a fresh citrus appearance. The result is a colorful homemade scrub that works beautifully as part of a relaxing bath or shower routine.
Important: A DIY sugar scrub is intended for gentle external exfoliation. Avoid using it on broken, irritated, sunburned, or freshly shaved skin, and stop using it if irritation occurs. Citrus ingredients can also be irritating for some people, so a small patch test is a sensible precaution.
Simple Ingredients for a Homemade Sugar Scrub
One of the best things about a sugar scrub DIY project is that the basic concept is uncomplicated. You need a granular exfoliating ingredient, a moisturizing oil, and the citrus element that gives this particular version its personality.
Sugar
Regular granulated sugar is a convenient starting point. Its crystals create the physical exfoliating texture that makes a sugar scrub different from a cream or lotion. If you prefer a softer feel, choose a finer sugar. Larger crystals create a more textured scrub, but they should be used gently rather than rubbed aggressively against the skin.
Orange Zest
Fresh orange zest gives the scrub its distinctive citrus appearance. The tiny flecks of orange peel also make the finished mixture look especially attractive in a clear container. When preparing zest, use only the colorful outer portion of the peel and avoid adding large pieces that could make the scrub unpleasant to use.
A Skin-Friendly Carrier Oil
A suitable cosmetic carrier oil helps bring the ingredients together and gives the scrub a smoother, more spreadable consistency. Popular DIY choices include simple plant-based oils commonly used in body care. The amount can be adjusted depending on whether you want a loose, oily scrub or a thicker mixture that holds its shape in the jar.
Optional Additions
You can keep the recipe minimal or personalize the presentation with a small amount of an ingredient chosen specifically for cosmetic use. If adding fragrance or essential oils, use products intended for topical use and follow the supplier’s recommended dilution guidelines rather than adding them freely.
How to Make Sweet Orange Sugar Scrub
The process is quick, making this a useful DIY project for beginners. The key is to create a texture that is moist enough to hold together but still has plenty of visible sugar crystals.
1. Prepare the Orange
Wash and dry the orange thoroughly before zesting. Finely grate the outer peel so you have small pieces rather than large strips. Fine zest distributes more evenly throughout the sugar mixture and creates the attractive speckled appearance seen in a citrus sugar scrub.
2. Combine the Sugar and Zest
Place the sugar in a clean mixing bowl and add the orange zest. Stir slowly until the zest is evenly dispersed. Taking a moment to break up any clumps at this stage makes the finished scrub more consistent.
3. Add the Oil Gradually
Add your chosen carrier oil a little at a time while mixing. This makes it easier to control the final consistency. The ideal texture should be scoopable and cohesive without becoming excessively runny.
4. Adjust the Texture
If the mixture feels too dry, add a small amount of oil and stir again. If it becomes too loose, add a little more sugar. The goal is a texture that spreads comfortably while retaining enough grain to provide gentle exfoliation.
5. Transfer to a Clean Jar
Spoon the finished scrub into a clean, completely dry container. A clear glass jar works particularly well because it allows the orange zest and pale sugar crystals to become part of the visual presentation.
How to Use a Sugar Scrub
For a simple body-care routine, scoop out a small amount of scrub with clean, dry hands or a clean spoon. Apply it to damp skin and massage gently using light circular motions. There is no need for vigorous rubbing. Rinse thoroughly and follow with your preferred body moisturizer if desired.
Because sugar scrubs provide physical exfoliation, they do not need to be used aggressively or excessively. A gentle approach is more comfortable and helps prevent the skin from feeling unnecessarily rubbed or irritated.
Where to Use It
This type of scrub is generally suited to areas of the body where gentle exfoliation is desired. Hands, arms, legs, and feet are common areas for body scrubs. Avoid sensitive areas and never apply the mixture to damaged or irritated skin.
Why This Matters
The texture of a body scrub matters just as much as its ingredients. A well-balanced mixture should feel comfortable when gently massaged over damp skin. Start with a small amount, use light pressure, and adjust the sugar-to-oil ratio when making your next batch to suit your preference.
Tips for Making the Best Sugar Scrub DIY
Choose the Right Sugar Texture
Not every sugar crystal feels the same. Fine sugar creates a smoother scrub, while coarser sugar gives a more noticeable texture. For a first batch, a moderate grain is an easy option because it provides a recognizable scrub texture without requiring complicated preparation.
Keep Water Out of the Jar
Water can change the consistency of a homemade scrub and can also create a less hygienic environment for a product that does not contain a preservative system. Store the jar away from splashing water and use clean, dry hands or a small spoon to remove each portion.
Pro Tip: Making smaller batches is often more practical than preparing a large container. You can enjoy a fresh batch, experiment with the texture, and avoid keeping homemade skincare products around longer than necessary.
Do Not Overload the Mixture With Zest
Orange zest is visually beautiful, but more is not always better. Too much peel can make the texture uneven and may feel scratchy. Finely grated zest distributed throughout the sugar is enough to create the citrus look and character of the recipe.
Test Before Full Use
Everyone’s skin responds differently to cosmetic ingredients. Before applying a new homemade mixture over a larger area, test a small amount on a limited area of skin and observe how it feels. If redness, burning, itching, or other irritation develops, rinse the area and discontinue use.
How to Make Your Orange Sugar Scrub Look Beautiful
Presentation can make a homemade sugar scrub feel much more special. A clear jar is ideal because the pale sugar, orange flecks, and soft peach tones naturally create an appealing layered appearance. A simple wooden surface, fresh orange slices, or a small amount of greenery can complement the citrus theme when photographing your finished project.
Simple Gift Packaging
For gifting, place the scrub in a small lidded jar and add a simple label with the name of the scrub and the date it was prepared. A piece of natural twine or a minimal ribbon can add a handmade touch without making the packaging complicated.
- Use a clean glass jar with a secure lid.
- Add a simple handwritten or printed label.
- Decorate with twine, ribbon, or a small paper tag.
- Include basic storage and usage instructions.
Ways to Customize Your Homemade Body Scrub
Once you understand the basic sugar scrub formula, you can experiment with different textures and visual themes. Try changing the type of sugar, adjusting the amount of oil, or choosing another cosmetic ingredient that complements the overall concept.
Try a Different Citrus Theme
Orange is a natural choice for a bright scrub, but other citrus-inspired variations can create different visual styles. Lemon or lime zest can give a lighter, fresher appearance. If experimenting with citrus ingredients, remember that topical citrus products can be irritating for some people, so keep the formula simple and test cautiously.
Create a Creamier Texture
For a softer-feeling scrub, use a finer sugar and a little more carrier oil. For a drier, more scoopable mixture, reduce the oil slightly. Making a small test batch allows you to find the consistency that works best for your routine.
Storage and Freshness Tips
Homemade body scrubs without a preservative system should be treated differently from commercially manufactured skincare products. Keep the container tightly closed, store it in a cool and dry location, and avoid introducing water into the jar.
Pay attention to changes in appearance, smell, or texture. If the scrub develops an unusual odor, visible mold, unexpected discoloration, or another noticeable change, discard it rather than trying to rescue the batch.
A Simple Self-Care Project to Try at Home
A sugar scrub DIY project does not need to be complicated to be enjoyable. The combination of sugar, oil, and finely grated orange zest creates an attractive homemade body scrub with a cheerful citrus theme. It is the kind of project that can be prepared in a short amount of time and customized around the ingredients and texture you enjoy.
The finished scrub also has plenty of visual appeal. The orange flecks stand out against the light sugar, while a clear jar lets the natural colors become part of the presentation. Add a simple label and you have an easy handmade self-care item that looks thoughtful without requiring elaborate crafting skills.
Quick Points
- Use finely grated orange zest for an even texture.
- Adjust the oil gradually until the scrub reaches your preferred consistency.
- Massage gently over damp body skin rather than scrubbing forcefully.
- Keep homemade scrub dry, clean, and stored in a closed container.
- Make a small batch and test it before regular use.
Conclusion
This sweet orange sugar scrub is a bright and approachable idea for anyone who enjoys homemade beauty projects. With its simple ingredients, attractive citrus appearance, and customizable texture, it is easy to turn an ordinary DIY recipe into a relaxing part of your self-care routine.
Keep the formula simple, choose a comfortable sugar texture, add the orange zest gradually, and take care with storage and application. Most importantly, treat homemade skincare as a small creative project rather than something that needs to be complicated. A beautifully packaged jar of citrus sugar scrub can bring a little freshness to your routine while giving you a satisfying handmade result.
Tags
Sugar Scrub DIY Orange Sugar Scrub DIY Body Scrub Homemade Skincare Natural Body Care DIY Beauty Citrus Self Care At Home Spa