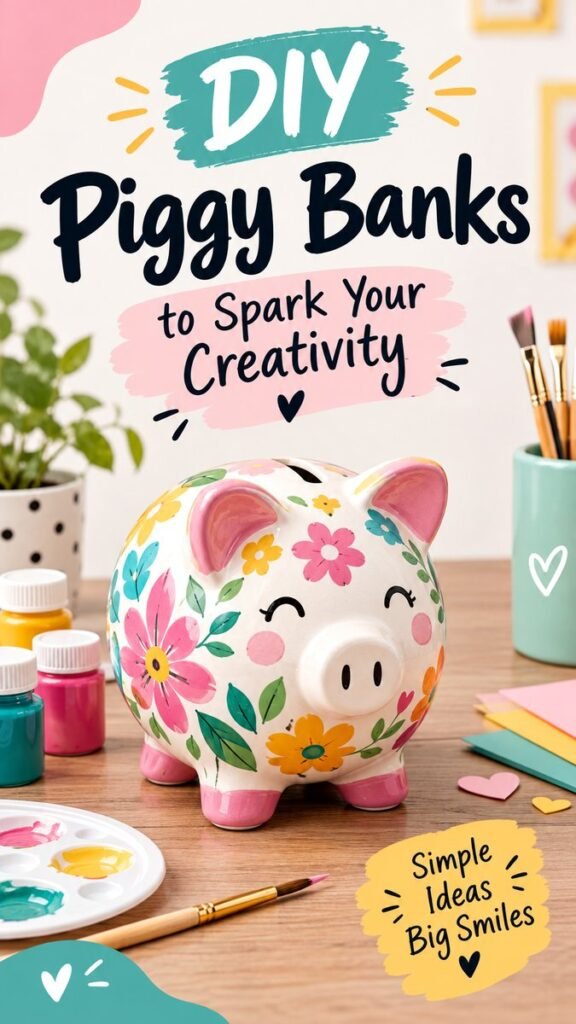
Making a piggy bank at home is a simple way to turn an everyday money-saving habit into a fun creative project. A DIY piggy bank can be colorful, playful, personalized, and surprisingly easy to customize with basic craft supplies. Whether you are creating one for a child, decorating a handmade savings jar, or simply looking for an enjoyable weekend craft, a decorated piggy bank offers plenty of room for creativity.
Key Takeaways
- Personalize a piggy bank with paint, flowers, patterns, and playful details.
- Choose a simple design that matches the maker’s personality and favorite colors.
- Use craft supplies you already have to keep the project affordable.
- Painting and decorating can make saving money feel more exciting and rewarding.
- A finished DIY piggy bank can become a cheerful addition to a bedroom, craft space, or desk.
Why Make a DIY Piggy Bank?
A piggy bank is more than a place to collect loose change. When you decorate one yourself, it becomes a small piece of handmade art with a practical purpose. The creative process also gives you an opportunity to make something that feels personal instead of relying on a standard store-bought design.
For children, a decorated piggy bank can make the idea of saving feel more tangible. For adults, it can be a charming craft project, a thoughtful handmade gift, or a decorative reminder to set money aside for a future goal. The best part is that there is no single right way to create one.
Important: The most successful piggy bank DIY projects focus on personality. You do not need complicated techniques or expensive materials. A few carefully chosen colors, simple illustrations, and decorative details can completely transform an ordinary piggy bank.
Creative Piggy Bank DIY Ideas
There are countless ways to decorate a piggy bank, but floral designs are especially cheerful and versatile. The example of a colorful decorated piggy bank shows how simple flowers, leaves, and bright colors can turn a basic shape into something full of character.
1. Floral Piggy Bank
Flowers are an easy starting point because they can be painted in many different styles. Try combining small daisies with larger blooms, leafy stems, and tiny accent flowers. You can keep the arrangement symmetrical or let the decorations flow naturally across the surface.
For a playful appearance, combine several bright shades instead of using only one flower color. Pink, yellow, turquoise, green, orange, and soft white can create a lively craft aesthetic. If you prefer a calmer look, choose two or three coordinating shades and repeat them throughout the design.
2. Colorful Patterned Piggy Bank
Not every DIY piggy bank needs to feature flowers. Geometric shapes, dots, stripes, hearts, stars, rainbows, or abstract brushstrokes can work beautifully too. A patterned design is particularly useful if you want something modern and easy to customize.
Start by selecting a base color, then add a small collection of repeated shapes. Repetition helps the finished piece look intentional even when the decorations are hand-painted.
3. Personalized Piggy Bank
Adding personal details can make the project even more meaningful. Consider painting initials, a favorite word, simple icons, or a design connected to a savings goal. Instead of covering the entire piggy bank, you can leave some areas clean and use decorative elements around the most important feature.
A personalized piggy bank also makes a fun handmade gift. Choose colors and decorations based on the recipient’s favorite style, then finish it with a thoughtful savings message.
4. Cute Character Piggy Bank
Turn the piggy bank into a character by adding friendly facial details. Simple eyes, rosy cheeks, eyelashes, or a tiny smile can give the piece a playful personality. This approach works especially well for children’s crafts because the design can be bright, expressive, and easy to recognize.
Supplies for a Simple Piggy Bank Craft
You do not need a large collection of specialized supplies to create a beautiful DIY piggy bank. The exact materials depend on the surface and decoration style, but a basic craft setup can include:
- A ceramic, wooden, papier-mache, or suitable craft piggy bank
- Craft or acrylic paints
- Small and medium paintbrushes
- A palette or disposable surface for mixing colors
- Pencil for lightly sketching a design
- Water container for cleaning brushes
- Paper towels or a protective table covering
- Optional paint markers for small details
- Optional clear protective finish suitable for the material
The colorful craft setup shown with a piggy bank demonstrates how approachable the project can be. Paint containers, brushes, and a few decorative materials are enough to create an inviting creative workspace.
How to Decorate a Piggy Bank Step by Step
Step 1: Choose Your Design
Before picking up a brush, decide on the overall look. A quick sketch can help you determine where flowers, patterns, or other details will go. You do not need to draw every detail. A simple outline is enough to establish the composition.
Think about the size and shape of the piggy bank as you plan. Large designs work well on broad areas, while smaller flowers and leaves can fill narrow spaces without making the surface look crowded.
Step 2: Prepare the Surface
Make sure the surface is clean and dry before painting. Dust or residue can make paint harder to apply evenly. If the material requires special preparation, follow the instructions appropriate for that surface and paint.
Cover your work area before starting. A sheet of paper, cardboard, or another protective layer can make cleanup much easier.
Step 3: Add the Base Color
Apply a smooth base coat if your design calls for one. Light colors can create a fresh background for colorful flowers, while darker bases can make bright decorative details stand out.
Allow each coat to dry according to the paint manufacturer’s directions before adding another layer. Thin, even coats often produce a cleaner result than applying a large amount of paint at once.
Step 4: Paint the Main Decorations
Once the base is ready, add the largest decorative elements first. For a floral piggy bank, this might mean painting the larger flowers and leaves before filling the remaining spaces with smaller details.
Varying flower sizes can make the design feel more natural. You can also rotate the direction of leaves and stems to create movement across the piggy bank.
Step 5: Add Small Details
This is where the personality really comes through. Add flower centers, tiny dots, outlines, leaves, hearts, or other accents. Small details can make a simple design look much more finished without requiring advanced painting skills.
Pro Tip: Keep a limited palette and repeat the same colors throughout the design. This creates visual harmony even when the piggy bank contains many different shapes and patterns.
Step 6: Let Everything Dry
Give the finished design enough time to dry completely. Avoid handling or moving the piggy bank unnecessarily while the paint is still wet. If you plan to add a protective finish, make sure the paint is fully cured and choose a finish compatible with your materials.
Tips for Better DIY Piggy Bank Designs
A little planning can make a noticeable difference. You want the decorations to enhance the shape of the piggy bank rather than hide it completely.
- Start with a simple palette. Three to five main colors are usually enough for a cohesive design.
- Mix large and small details. Different sizes create a more interesting visual rhythm.
- Leave breathing room. Empty areas can make colorful decorations stand out.
- Use light pencil marks. A gentle sketch can help with placement before painting.
- Build layers gradually. Add the largest shapes first, then work toward smaller accents.
- Practice tiny details separately. Test flowers, dots, or lines on scrap paper before applying them to the piggy bank.
Why This Matters
A creative piggy bank can connect a practical habit with a hands-on activity. Decorating the container gives the savings goal a visible presence, while the finished craft becomes something you can enjoy long after the painting is complete.
Make Saving Feel More Creative
One of the nicest things about a DIY piggy bank is that it can become part of a broader creative routine. Instead of treating saving as something ordinary, the decorated bank can serve as a visual reminder of a goal. You might use it for loose change, a future activity, a small personal purchase, or simply the satisfaction of building a savings habit.
For families, decorating piggy banks can also become a shared craft session. Everyone can choose a color scheme or create a different pattern. Older children can sketch their own designs, while younger children can participate by choosing colors and adding simple shapes with appropriate supervision.
The project does not have to be perfect. Hand-painted details often look more charming when they have a little character. Uneven petals or slightly different leaves can make the finished piggy bank feel genuinely handmade.
Fun Ways to Customize Your Piggy Bank
If you want to move beyond a basic painted design, experiment with different themes. A garden-inspired piggy bank could feature flowers, leaves, butterflies, and small dots. A cheerful rainbow theme could use curved lines and colorful shapes. A minimalist version could rely on one base color with a few carefully placed accents.
You can also change the mood through your color choices. Pastel shades create a soft and playful appearance, while vivid colors feel energetic and youthful. Neutral tones with a few bright accents can create a more modern craft aesthetic.
Another simple idea is to decorate the piggy bank around a particular savings goal. A travel-inspired theme might use tiny suitcase or map-inspired motifs. A book-lover could add simple book shapes. The goal is to make the decoration meaningful without making the design too complicated.
A Simple Craft With Big Creative Potential
DIY piggy bank projects are a wonderful example of how a practical object can become a creative outlet. With a few paints, brushes, and thoughtful design choices, an ordinary piggy bank can be transformed into a cheerful handmade piece.
Floral patterns are an especially approachable option because they can be adapted to almost any skill level. Start with basic petals and leaves, then add layers of color and small accents as your confidence grows. There is no need to reproduce a particular design exactly. Let your own color combinations and decorative ideas guide the final result.
Creative takeaway: The best DIY projects are the ones that feel personal. Choose colors you love, experiment with patterns, and let the piggy bank reflect your own creativity while giving it a useful purpose.
At a Glance
- Choose a piggy bank with a surface suitable for decorating.
- Plan your colors and main design before painting.
- Build the artwork from large shapes to small details.
- Allow paint to dry thoroughly between layers.
- Make the finished design personal, colorful, and fun.
Conclusion
A DIY piggy bank is a small project with plenty of creative possibilities. From cheerful floral patterns to colorful shapes and personalized artwork, you can transform a simple savings container into something that feels completely your own. The process is accessible, adaptable, and easy to make as simple or detailed as you like.
Whether you are planning a kids’ craft, searching for a relaxing weekend project, or looking for a handmade way to make saving more enjoyable, decorating a piggy bank is a great place to start. Gather your paints, choose a few favorite colors, sketch a simple idea, and let your creativity take over. The finished piece can be both a useful savings reminder and a bright little work of art worth displaying.