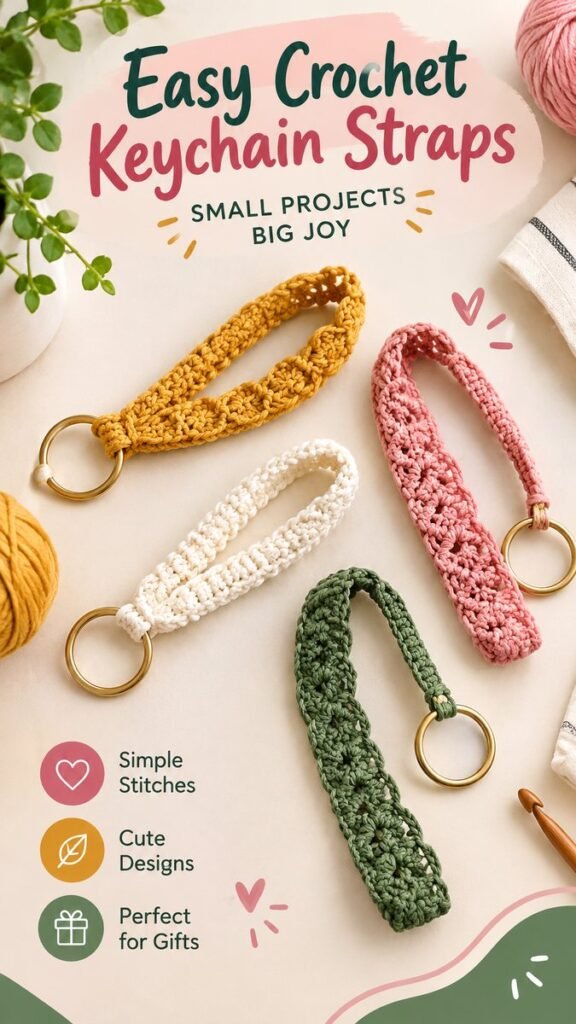
A handmade headband can be one of those small crochet projects that feels both practical and satisfying. With a few simple stitches and a favorite yarn color, you can create a comfortable accessory that adds a personal touch to everyday outfits. The collection shown here features delicate openwork crochet headbands in soft white, dusty pink, warm mustard, and deep green, offering plenty of inspiration for anyone who enjoys making useful accessories by hand.
Key Takeaways
- DIY crochet headbands are small, approachable projects with plenty of room for creativity.
- Openwork stitches can give a simple headband a delicate, decorative appearance.
- Soft yarn and comfortable sizing are important when making a wearable headband.
- Changing colors can create completely different moods and styles from the same basic idea.
- Handmade headbands make thoughtful accessories and easy crochet gift projects.
Why DIY Headbands Make Great Crochet Projects
If you are looking for a crochet project that does not require a large amount of yarn or a long list of complicated techniques, a DIY headband is a wonderful place to start. Unlike larger projects such as blankets, sweaters, or bags, a headband can be relatively compact while still giving you the opportunity to practice stitch patterns, tension, shaping, and color selection.
The headbands in this collection show how much personality can come from a narrow strip of crochet. Instead of relying on bulky decoration, the designs use repeated stitch details and open spaces to create visual interest. The result is an accessory that feels handmade without looking overly complicated.
Another appealing feature is versatility. A crochet headband can be made in neutral shades for an understated look or brighter colors for a more playful accessory. You can also adjust the width and overall length to suit the person who will wear it.
Important: Comfort should be considered just as carefully as appearance. A beautiful DIY headband is much more useful when it has a comfortable fit, soft texture, and enough flexibility to stay in place without feeling too tight.
Choosing the Right Yarn for a Crochet Headband
Yarn choice can completely change the feel of a handmade headband. Since this is a wearable accessory, texture matters. A yarn that feels pleasant against the skin is generally more appealing than one that feels rough or overly stiff.
Cotton yarn is a popular choice for lightweight crochet accessories because it can provide a clean stitch definition and a relatively breathable feel. Soft blends can also work nicely when you want a little more flexibility or a different texture. The important thing is to consider how the finished fabric feels rather than choosing yarn based on color alone.
The pictured designs demonstrate how different colors can transform the same general accessory concept. White gives the headband a fresh and minimal appearance, pink creates a softer and more playful mood, mustard adds warmth, and green gives the accessory a natural, earthy character.
Color Ideas for DIY Headbands
You do not need an elaborate color scheme to make a crochet headband stand out. One carefully chosen shade can be enough. If you want something easy to coordinate, consider cream, white, beige, gray, muted green, or another neutral tone. These colors can complement many outfits without becoming the main focus.
For a more noticeable accessory, try soft pink, mustard, coral, blue, or another favorite accent color. You could also make several headbands in different shades while keeping the stitch pattern consistent. This creates a small handmade collection without requiring you to learn a completely new design each time.
Exploring the Openwork Look
One of the most noticeable details in these DIY headband ideas is the openwork effect. Small openings within the crochet fabric create a lighter appearance and allow the stitch pattern itself to become part of the decoration. This is a simple way to make a narrow accessory look more detailed.
Openwork crochet can also help break up a solid strip of stitches. Instead of seeing one continuous block of yarn, the eye follows the repeated spaces and stitch shapes along the length of the band. That rhythm gives a handmade headband a decorative quality while keeping the overall design clean.
When creating your own version, pay attention to consistency. Repeated motifs tend to look most polished when your stitch tension remains relatively even throughout the project. If you are still practicing, do not worry if your first attempt is not perfectly uniform. Small accessories are excellent projects for building confidence.
Expert Insight
A simple stitch pattern can look surprisingly sophisticated when the tension is consistent and the finished piece is shaped neatly. Before changing the stitch pattern, focus on getting an even fabric and a comfortable fit. Those two details often make the biggest difference in the finished accessory.
How to Plan Your DIY Headband
Before picking up your crochet hook, decide what kind of headband you want to make. Think about width, length, color, texture, and the overall style. Planning these elements first can make the actual crocheting process much easier.
1. Decide on the Width
A narrow headband can have a delicate, minimalist appearance, while a wider band can provide more coverage and create a stronger statement. The openwork designs shown here have a decorative, lightweight character, making the stitch pattern an important part of the visual result.
If you are making a headband for yourself, consider how you normally wear your hair and where you want the accessory to sit. If it is a gift, a slightly flexible design can make fitting easier.
2. Choose a Comfortable Length
The length needs to allow the headband to sit securely without creating uncomfortable pressure. A practical approach is to think about the circumference of the intended wearer’s head and allow the crochet fabric enough flexibility to fit comfortably.
Because crochet fabric can stretch differently depending on the yarn and stitch pattern, a small test swatch can be helpful. It gives you a chance to see how the fabric behaves before committing to the complete headband.
3. Pick a Stitch Pattern
For a DIY headband inspired by these designs, look for a stitch pattern that creates an attractive repeated texture. Simple combinations of basic crochet stitches can produce decorative openings without making the project unnecessarily complicated.
If you are new to crochet, start with a pattern that uses stitches you already know. Once you are comfortable with the structure, you can experiment with more decorative motifs. The goal is to choose a pattern that you enjoy making as well as one that looks good when worn.
Simple Ways to Personalize a Handmade Headband
The best part of making a DIY headband is the freedom to adapt it. Even when you begin with a basic pattern, a few small changes can make the finished accessory feel completely different.
- Change the yarn color to match a favorite outfit or season.
- Adjust the width for a slimmer or fuller appearance.
- Experiment with different openwork stitch combinations.
- Make a coordinated set using several complementary colors.
- Keep the design simple for an everyday accessory.
Pro Tip: If the stitch pattern is already decorative, let it be the star. A beautiful yarn color and neat finishing can often create a more polished result than adding lots of extra embellishments.
Making DIY Headbands as Handmade Gifts
Crochet headbands can also be a lovely option when you want to make something small for someone special. They are practical, easy to personalize, and can be created in colors that reflect the recipient’s style. A handmade accessory does not need to be large to feel thoughtful.
Consider making a small matching set with two or three colors. You could choose one neutral shade, one soft pastel, and one deeper accent color. Presented together, the pieces can feel like a coordinated handmade collection.
For gift projects, neat finishing is especially important. Take a little extra time to secure loose ends and check the edges. A cleanly finished headband will look more refined and should be more enjoyable for the recipient to use.
Helpful Tips for a Polished Finish
Small crochet projects can reveal uneven tension more easily than you might expect, so take your time as you work. Try to keep your stitches consistent, especially when creating a repeated openwork design. If your fabric starts becoming noticeably tighter or looser, pause and check your tension before continuing.
Once the crocheting is finished, inspect the entire headband. Look for loose ends, uneven edges, or sections that may need gentle adjustment. Finishing is not just a final step. It is part of turning a handmade crochet piece into a wearable accessory.
If the yarn allows it, gentle blocking can help a decorative stitch pattern settle into a cleaner shape. Always consider the yarn’s care instructions before using moisture or heat, and handle delicate openwork carefully.
Keep the Care Simple
A crochet headband can stay looking fresh when it is handled according to the yarn’s care requirements. Avoid unnecessary stretching, store it where it will not become tangled, and clean it gently when needed. Proper care can help preserve the shape and texture of handmade accessories.
At a Glance
- Choose a soft, comfortable yarn.
- Keep stitch tension as even as possible.
- Use openwork details for a light decorative look.
- Customize colors and width to suit your style.
- Finish edges and secure yarn ends carefully.
Conclusion
DIY headbands are a wonderful way to turn a small amount of yarn into something useful, stylish, and personal. The colorful crochet designs shown here demonstrate how simple shapes and repeating stitch details can create accessories with plenty of character. Whether you prefer soft neutrals, cheerful pinks, warm mustard, or earthy green, changing the yarn color can give the same basic idea an entirely new personality.
Start with a comfortable size, choose a stitch pattern you enjoy, and focus on even tension and neat finishing. As your confidence grows, experiment with different colors, widths, and decorative textures. A handmade crochet headband is small enough to be a relaxing weekend project while still offering plenty of creative possibilities.
Whether you are making one for yourself, building a collection of crochet accessories, or preparing a thoughtful handmade gift, this type of project is a great reminder that useful crafts can also be beautiful. Keep your favorite yarn nearby, try a new stitch, and create a DIY headband that feels uniquely yours.
Tags
DIY Headband Crochet Headband Easy Crochet Crochet Accessories Handmade Accessories Crochet Projects Beginner Crochet DIY Fashion