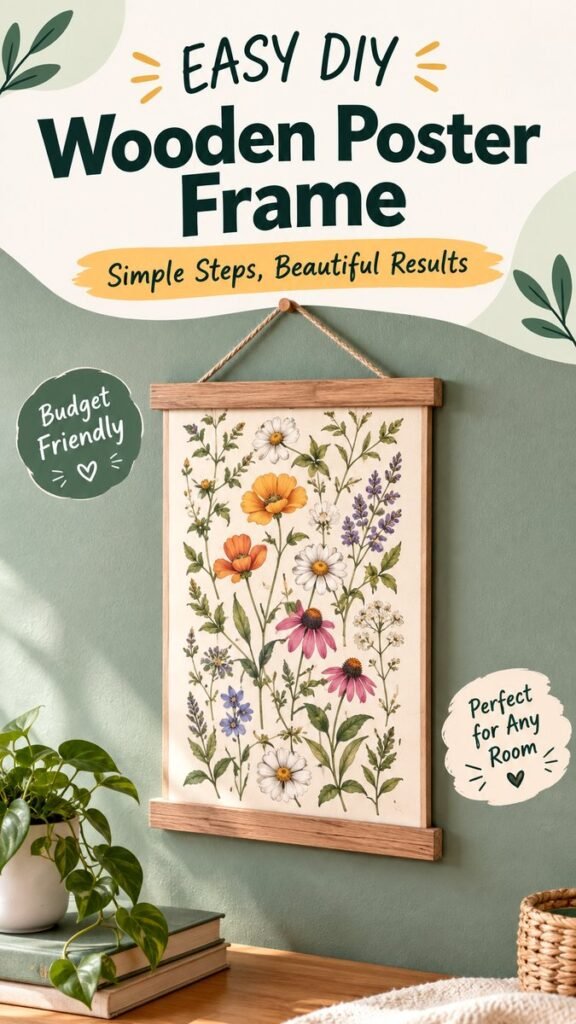
A simple poster can completely change the feel of a room, especially when it is displayed in a warm, handmade wooden frame. This DIY poster frame idea combines natural wood, vintage-inspired botanical artwork, and relaxed home decor to create a piece that feels thoughtful without being complicated. It is an approachable project for anyone who wants to turn a favorite print into attractive wall art while adding texture and personality to a space.
Key Takeaways
- A wooden poster frame is a simple way to give artwork a polished, finished appearance.
- Natural wood works especially well with botanical prints, vintage illustrations, and neutral decor.
- A lightweight frame design can be adapted to different poster sizes and decorating styles.
- Simple materials and basic tools make this a practical weekend DIY project.
- Changing the print or finish lets you refresh the look whenever your room needs something new.
Why a DIY Poster Frame Is Worth Making
Posters are an easy and affordable way to introduce color, pattern, artwork, or personality to a room. The challenge is that an unframed poster can sometimes look temporary or unfinished. A simple wooden frame solves that problem while adding a natural decorative element of its own.
The design shown here has a particularly relaxed character. The warm wood contrasts beautifully with a muted green wall, while the botanical artwork introduces soft colors and organic shapes. Together, these details create a calm, collected appearance that works well with cozy interiors.
Important: The beauty of this project comes from its simplicity. You do not need an elaborate frame profile or complicated joinery to make artwork look intentional. A clean wooden design can provide enough structure to turn an ordinary poster into a charming piece of wall decor.
Choosing the Right Poster for Your Frame
The artwork you choose will influence the entire finished look. Botanical prints are a natural match for this type of wooden poster frame because their organic shapes complement the warmth and texture of natural wood. Floral illustrations, pressed-flower artwork, garden-inspired drawings, and vintage-style plant prints can all create a similar atmosphere.
You can also use a minimalist art print, typography poster, abstract illustration, landscape artwork, or family-friendly decorative print. The important thing is to choose artwork that suits the room where the frame will be displayed.
Think About Color First
Before building the frame, look at the main colors in your poster. Natural wood pairs especially well with cream, beige, olive, sage, muted blue, terracotta, soft yellow, and other earthy shades. If your artwork is colorful, a simple wood finish can help keep the overall composition balanced.
For a more modern appearance, choose a cleaner print with plenty of negative space. For a vintage or cottage-inspired room, an illustrated botanical poster can provide extra character.
Measure Before Cutting
Accurate measurements are one of the most important parts of any DIY poster frame project. Measure the visible area of the poster first, then decide how much of the artwork you want the wooden strips to overlap.
Because the frame in this style holds the poster between wooden pieces at the top and bottom, you can keep the design intentionally minimal. This also makes it easier to change the artwork later without rebuilding the entire frame.
Materials for a Simple Wooden Poster Frame
You can adapt the materials to whatever is available in your workshop or local hardware store. The goal is to create two neat wooden bars that hold the upper and lower edges of the poster securely.
- A poster or art print
- Two straight wooden strips sized to the poster width
- Sandpaper or a sanding block
- Wood glue or another suitable adhesive
- A measuring tape or ruler
- A pencil for marking measurements
- A saw suitable for making clean wood cuts
- Wood stain, paint, or clear finish if desired
- Cord, twine, or another hanging material
The exact dimensions depend on the size of your poster. Select wood that is substantial enough to look attractive but not so heavy that the finished piece becomes difficult to hang safely.
How to Make a DIY Wooden Poster Frame
This project can be adjusted to suit your preferred tools, materials, and level of woodworking experience. Take your time with measuring and sanding, because those small details have a major effect on the final appearance.
1. Measure the Poster
Lay the poster flat on a clean surface and measure its width. Check the height as well, particularly if you plan to position the frame so the full artwork remains visible.
Write down your measurements before cutting the wood. It is better to measure twice and cut once than to discover that the frame pieces are slightly too short after the project is underway.
2. Cut the Wooden Strips
Cut two pieces of wood to the desired width. Depending on the style you want, the wood can be exactly the same width as the poster or slightly wider to create a small visual border.
Make the cuts as straight as possible. Clean edges help the finished frame look intentional and professional, even when the project is made with basic DIY tools.
3. Sand the Edges
Sand the cut edges and exposed surfaces until they feel smooth. Pay particular attention to corners and areas that will be handled when you attach or replace the poster.
If you enjoy a rustic look, you do not have to make the wood perfectly uniform. A little natural variation can add character. For a contemporary appearance, spend more time smoothing the surfaces and creating crisp, even edges.
4. Choose the Wood Finish
The natural wood appearance shown in this style of decor is a great starting point. You can leave the wood unfinished if you like its natural tone, or apply a clear protective finish to enhance the grain.
For a different look, consider a light oak, walnut, honey, or muted brown stain. Painting the wood is another option if you want the frame to coordinate with a particular wall or color palette.
Pro Tip: Test your stain or paint on a scrap piece of the same wood before finishing the frame. The final color can look different depending on the wood species, grain, and number of coats.
5. Position the Poster
Place the poster between the wooden strips and check that it sits straight. This is the stage where you can make small adjustments before securing anything permanently.
If the artwork is printed on delicate paper, handle it carefully and avoid excessive pressure. A flat working surface makes it easier to align the poster accurately.
6. Secure the Frame Pieces
Attach the poster to the wooden pieces using a method appropriate for your materials. The goal is to hold the paper firmly while avoiding unnecessary damage to the artwork.
If you want to change posters regularly, consider a removable approach rather than permanently attaching the print. This makes the frame more versatile and lets you update your wall decor seasonally.
7. Add a Hanging Cord
A simple cord or piece of twine can complete the look. Center the hanging material carefully so the finished poster hangs level on the wall.
Choose hanging hardware that is appropriate for the weight of your completed frame and the type of wall where it will be installed. Always make sure the attachment points are secure before hanging the artwork.
Decorating With a Wooden Poster Frame
One of the best things about this DIY poster idea is its versatility. The finished frame can work in many areas of the home, from a bedroom wall to a reading corner, hallway, home office, entryway, or living room.
In a space with neutral furniture, a colorful botanical print can become a gentle focal point. In a room that already has plenty of patterns, choose simpler artwork and let the wooden frame provide warmth without competing for attention.
Create a Cozy Botanical Corner
The combination of botanical artwork, natural wood, and houseplants creates an especially cohesive decorating theme. You can place the framed poster near a real plant, a small stack of books, a woven basket, or other natural textures.
These elements do not need to match perfectly. A relaxed arrangement often feels more inviting when different textures and shades work together naturally.
Use It as Seasonal Wall Decor
A removable poster frame can become a flexible part of your decorating routine. Switch botanical artwork for seasonal illustrations, abstract prints, inspirational typography, or other artwork whenever you want a quick refresh.
This approach can also help keep your decor feeling fresh without requiring a large collection of frames in different sizes.
Why This Matters
A well-designed frame does more than hold artwork. It creates a visual connection between the print and the surrounding room. Natural wood adds warmth, while the simplicity of the frame allows the poster itself to remain the main attraction.
Ways to Personalize Your DIY Poster Frame
Once you understand the basic construction, there are plenty of ways to make the project your own. Small changes can completely alter the personality of the finished piece.
Try Different Wood Tones
Light wood creates an airy Scandinavian-inspired feel, while deeper brown tones can make the frame look more traditional and cozy. A slightly weathered finish can complement rustic interiors, while smooth untreated wood works well in modern spaces.
Experiment With Frame Width
Wider wooden strips create a stronger visual statement. Narrower strips make the artwork feel lighter and more understated. Consider the size of the poster and the wall itself when choosing the proportions.
Add a Decorative Hanging Detail
Twine gives the project a casual handmade character, while a simple cord can create a cleaner appearance. You can also choose a hanging material that echoes colors or textures already present in the room.
Common DIY Poster Frame Mistakes to Avoid
Even simple projects can benefit from a little planning. Avoiding a few common mistakes will make the process easier and improve the final result.
- Skipping measurements: Incorrect dimensions can leave the poster poorly supported or make the frame look uneven.
- Using rough wood: Splintered edges can make handling difficult and reduce the polished appearance of the finished frame.
- Ignoring alignment: A slightly crooked poster can be surprisingly noticeable once it is displayed on a wall.
- Choosing an overly heavy design: Keep the frame practical for the size of the poster and the intended hanging location.
- Overcomplicating the finish: The artwork and natural wood are often enough. Too many decorative details can distract from the clean design.
Simple Styling Ideas for Every Room
A DIY wooden poster frame can be adapted to almost any decorating style. In a bedroom, use soft botanical artwork and warm wood for a peaceful atmosphere. In a home office, choose an illustration or typography print that adds visual interest without making the space feel busy.
For a living room, consider creating a small gallery arrangement with several framed prints. Keep the wood finishes consistent for a cohesive appearance, or mix complementary tones for a more collected look.
In an entryway, a single vertically oriented poster can fill an empty wall without overwhelming the area. Pair it with a small shelf, plant, basket, or other simple accent to create a welcoming vignette.
At a Glance
- Choose artwork that complements your room.
- Measure carefully before cutting the wood.
- Sand all edges for a smooth finish.
- Use natural wood for a warm, timeless appearance.
- Secure the finished frame safely before displaying it.
Final Thoughts on This DIY Poster Idea
A DIY wooden poster frame is a small project with a big decorating payoff. It transforms a simple print into a finished piece of wall art while bringing natural texture and handmade character into the room. The clean construction keeps the focus on the artwork, making it particularly appealing for botanical prints and other illustrations with a timeless quality.
What makes this project especially useful is how easy it is to personalize. Change the wood tone, choose a different poster, adjust the frame proportions, or swap the hanging cord to create a version that fits your own style. You can keep the design rustic and relaxed or make it sleek and contemporary with carefully finished wood.
Whether you are decorating a blank wall, refreshing a cozy corner, or looking for a simple weekend woodworking project, this DIY poster frame offers a practical way to add personality without making the room feel cluttered. Choose a print you love, keep the construction simple, and let the natural beauty of the wood complete the look.