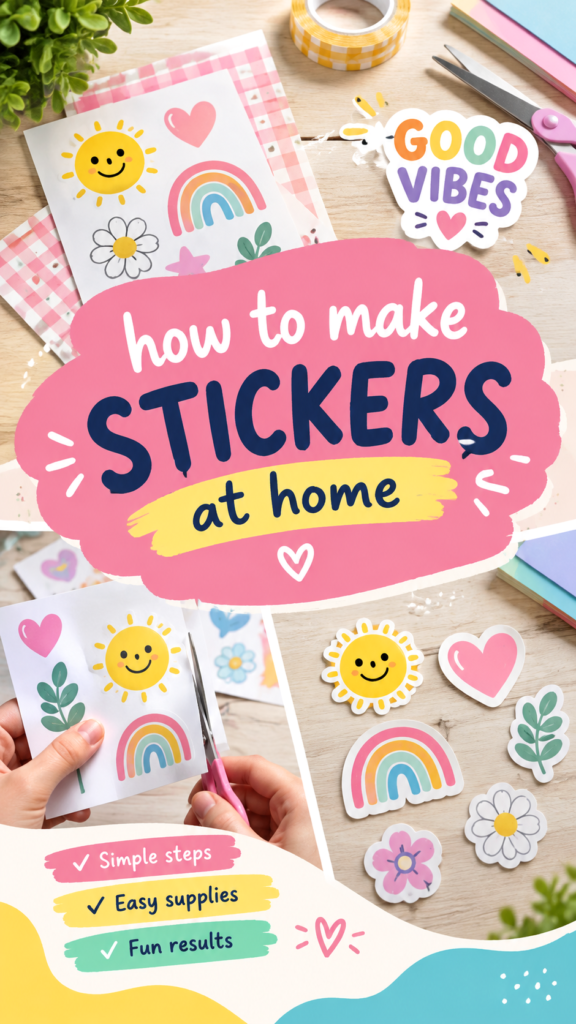
DIY stickers are one of the easiest ways to turn simple craft materials into colorful, personalized designs. Whether you love cheerful flowers, smiling faces, rainbows, hearts, fruit, positive words, or playful doodles, homemade stickers give you the freedom to create designs that match your style. They are fun to make, easy to customize, and useful for decorating journals, planners, notebooks, cards, gift wrapping, and more.
What makes DIY stickers especially appealing is the creative process itself. You can start with a simple drawing, a printable design, or a sheet of colorful artwork, then transform it into individual stickers with basic cutting and adhesive techniques. The result can be as simple or detailed as you want. A few bold shapes can create a charming handmade look, while carefully designed illustrations can give your sticker collection a polished finish.
For beginners, making stickers at home is a great low-pressure craft project. You do not need a large workspace or complicated equipment to get started. With paper, scissors, markers, tape, sticker paper, or adhesive sheets, you can create a collection of custom designs and experiment with different colors, shapes, and styles.
Key Takeaways
- DIY stickers are easy to personalize with drawings, text, doodles, and colorful illustrations.
- Simple craft supplies can be enough for beginners to create fun homemade designs.
- Clear outlines and bold colors help handmade stickers stand out.
- Cutting around each design creates the classic individual sticker look.
- Homemade stickers are versatile for journals, planners, cards, gifts, and everyday decoration.
Why DIY Stickers Are Such a Fun and Popular Craft
Stickers bring together several things people already enjoy: drawing, crafting, decorating, collecting, and personalizing everyday items. A single sticker can add color to a plain notebook, make a journal page feel more expressive, or turn a simple package into something more thoughtful.
The appeal of DIY stickers also comes from their flexibility. You can create one design or make an entire themed collection. A sheet of cheerful illustrations might include flowers, hearts, rainbows, fruit, stars, smiley faces, leaves, and short positive phrases. The designs do not have to match perfectly. In fact, mixing playful illustrations often creates a more energetic and handmade result.
Homemade stickers are also a useful craft for people who want to explore creativity without committing to a large project. You can make them in a few minutes, work on a small batch, or spend an afternoon creating a complete sticker sheet. The process can be relaxed and experimental, making it suitable for beginners and experienced crafters alike.
The Creative Freedom of Custom Sticker Designs
One of the biggest advantages of making your own stickers is that you are not limited to a particular style. You can create bright and colorful designs, soft pastel illustrations, bold graphic shapes, retro-inspired artwork, cute doodles, or minimal black-and-white stickers.
A cheerful sticker collection often works best when it includes a variety of shapes and sizes. Larger stickers can become focal points, while smaller icons can fill empty spaces on a journal page or notebook cover. This mix also makes a finished collection feel more interesting and useful.
Important: The best DIY sticker designs are usually simple enough to be recognized quickly. Bold outlines, clear shapes, and strong color contrast can make even a basic drawing feel polished and visually appealing.
How to Make DIY Stickers at Home
There are several ways to make stickers, depending on the supplies you have available. Some methods are quick and simple, while others create a more durable or professional-looking result. The basic process is similar: create the artwork, prepare the design, cut it out, and add an adhesive backing.
1. Create Your Sticker Artwork
Start by choosing a theme. A happy, colorful collection might include flowers, hearts, smiley faces, strawberries, cherries, rainbows, leaves, and encouraging words. You can draw the artwork by hand using markers or colored pencils, or create digital designs and print them.
When creating your artwork, keep the final size in mind. Small designs should have simple details because tiny lines may become difficult to see after cutting. Bold outlines can make each sticker easier to separate from the background.
- Use thick outlines around simple shapes.
- Choose colors that stand out from one another.
- Mix small icons with a few larger statement designs.
- Keep text short and easy to read.
- Leave enough space around each design for cutting.
2. Prepare the Sticker Sheet
Once your artwork is ready, arrange the designs on a sheet. This can be a printed page, a handmade sheet, or a collection of individual illustrations. Try to leave small gaps between designs so that each one can be cut out comfortably.
A balanced sticker sheet often combines different visual elements. For example, you might place a large rainbow near a group of smaller flowers and add a few hearts or smiley faces around the empty areas. This creates a lively layout without making the sheet feel crowded.
Tip: Use a Consistent Visual Theme
Even when your sticker shapes are different, using a consistent color palette or outline style can help the entire collection feel connected. For a bright and cheerful look, combine warm yellow, pink, orange, green, blue, and soft pastel tones.
3. Add an Adhesive Backing
The adhesive method you choose depends on your materials and how you plan to use the stickers. Sticker paper is a convenient option for printed designs, while double-sided adhesive sheets can work well for handmade artwork. Clear tape can also be useful for simple craft projects when combined with paper and a suitable backing technique.
For a more polished appearance, make sure the adhesive layer is smooth and securely attached. Wrinkles and bubbles can affect the final look, especially on larger stickers.
Expert Insight
If you are making a large collection of DIY stickers, focus on repeatable shapes and simple cutting methods. A consistent process helps you create more stickers without sacrificing the clean, handmade look that makes custom designs so appealing.
4. Cut Around Each Design
Careful cutting is one of the most important steps in making attractive homemade stickers. Scissors work well for simple shapes and rounded edges. Take your time around curves, corners, and narrow details.
Leaving a small white border around the artwork can create a classic die-cut sticker effect. This border helps the design stand out and gives the finished sticker a cleaner appearance. The border does not have to be perfectly even. Slight variations can add to the handmade character of the project.
- Cut around the outer shape first.
- Move slowly around curves and detailed edges.
- Leave a small border if you want a die-cut appearance.
- Trim any uneven sections after the first cut.
- Store finished stickers on a clean, flat surface until use.
Cute DIY Sticker Ideas to Try
Choosing a theme can make the creative process easier. Instead of wondering what to draw, start with a category and create several related designs. A themed collection also looks especially good when displayed together on a sticker sheet.
Happy and Colorful Characters
Smiley faces, cheerful flowers, friendly fruit, and playful cartoon shapes are perfect for beginner-friendly DIY stickers. These designs rely on simple circles, curves, and bold outlines, making them easy to draw and cut.
Nature-Inspired Sticker Designs
Leaves, flowers, strawberries, cherries, suns, and rainbows are popular choices for colorful craft projects. You can create them in realistic colors or experiment with imaginative palettes.
Positive Words and Short Phrases
Short phrases can turn a simple sticker into something expressive. Try words such as “happy,” “yay,” “hello,” or “good vibes.” Keep lettering large and bold so that it remains readable when the sticker is small.
Handwritten text can give your designs a warm, personal feeling. If you prefer a more polished appearance, use a consistent lettering style across the entire sticker collection.
Pro Tip: Create several versions of the same basic shape using different colors. A flower, heart, or smiley face can become part of a cohesive sticker set simply by changing the color combinations and small decorative details.
Ways to Use Your Homemade Stickers
Making the stickers is only the beginning. Once you have a collection of finished designs, there are plenty of creative ways to use them around your home, school supplies, craft projects, and personal stationery.
Decorate Journals and Planners
DIY stickers can make blank pages feel more colorful and personal. Use them to mark important dates, decorate monthly layouts, frame notes, or fill empty spaces between writing.
Personalize Notebooks and Stationery
A few custom stickers can completely change the look of a plain notebook or folder. Choose a theme for each item, or mix different designs for a playful collage effect.
Add a Handmade Touch to Gifts
Homemade stickers can be used to decorate gift bags, wrapping paper, cards, and small packages. They can also become part of a handmade gift when arranged as a themed sticker sheet.
Tips for Making Your DIY Stickers Look Better
A few small adjustments can make a big difference in the final result. You do not need advanced tools to improve the appearance of your homemade stickers.
Choose Strong Color Contrast
Dark outlines around bright colors can make illustrations easier to see. This is especially useful for small stickers, where fine details may otherwise disappear.
Keep the Designs Easy to Cut
Very complicated edges can be difficult to cut neatly by hand. Rounded shapes and simple silhouettes are often more practical and just as attractive.
Make More Than One Sticker at a Time
Working in batches can save time. Draw several designs, prepare the adhesive backing, and then cut the full collection in one creative session.
Test Before Making a Large Collection
Try one or two stickers first to see how your chosen materials behave. This can help you adjust the size, cutting method, and adhesive technique before creating an entire sheet.
DIY Stickers as a Creative Everyday Craft
One reason DIY stickers remain such a satisfying craft is that they combine creativity with practical results. You are not just making artwork to store away. You are creating small designs that can be used, shared, collected, and displayed.
The project can also grow with your skills. A beginner might start with simple hand-drawn smiley faces and hearts, while a more experienced crafter can experiment with digital illustration, layered materials, custom lettering, and themed collections.
There is also something especially enjoyable about creating a set of tiny objects that all belong together. A colorful collection of flowers, fruit, rainbows, and positive words can feel like a small visual world built from your own ideas.
Why This Matters
- DIY stickers encourage creativity without requiring a large project.
- Simple designs can be just as effective as detailed artwork.
- Finished stickers can be used in many other crafts and everyday items.
At a Glance: DIY Sticker Essentials
- Start simple: Choose easy shapes with clear outlines.
- Use bright colors: Make each design visually distinct.
- Leave cutting space: Avoid placing designs too close together.
- Create a theme: Related designs make a collection feel cohesive.
- Have fun experimenting: Small imperfections are part of the handmade charm.
Conclusion: Turn Simple Ideas Into Your Own Sticker Collection
DIY stickers are a colorful, creative, and accessible craft that can be adapted to almost any style. From smiling faces and flowers to rainbows, fruit, hearts, and positive phrases, there is no limit to the types of designs you can create.
The key is to start with simple artwork, use materials that work well for your preferred method, and enjoy the process of turning small illustrations into something you can use every day. You do not need perfect drawings or expensive equipment to create stickers that feel fun and personal.
Whether you are decorating a journal, customizing stationery, making handmade gifts, or simply looking for an enjoyable craft project, homemade stickers offer a simple way to add more color and personality to your everyday world. Gather a few supplies, sketch your favorite ideas, and start building a sticker collection that is completely your own.
Tags
DIY Stickers Homemade Stickers Sticker Ideas Easy Crafts Paper Crafts Cute Crafts Journaling Ideas Creative DIY