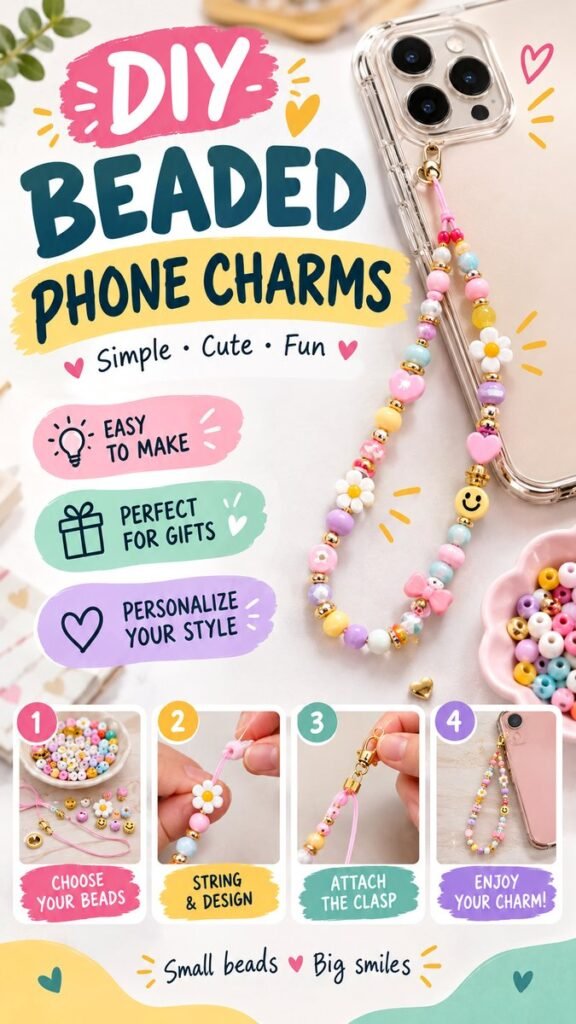
DIY phone charms are one of the easiest ways to turn an everyday phone accessory into something colorful, playful, and completely personal. With a few beads, some cord, a clasp, and a handful of cute charms, you can create a beaded phone strap that reflects your favorite colors, moods, letters, and little details. The cheerful designs shown here combine pastel beads, flowers, hearts, smiley faces, gold accents, and colorful patterns for a fun handmade look that feels both trendy and unique.
Whether you are new to crafting or already enjoy making jewelry, this phone charms DIY project is a simple creative activity to try. You can keep the design soft and pastel, make it bright and rainbow-inspired, spell out a name or word with letter beads, or mix several styles together. The best part is that there are no strict rules. Your phone charm can be as simple or as detailed as you want.
Key Takeaways
- Choose beads that reflect your favorite colors and personal style.
- Combine round beads, letter beads, shaped beads, and decorative charms.
- Use a strong cord and secure the clasp carefully for a dependable phone strap.
- Try simple patterns first if you are a beginner.
- DIY phone charms make thoughtful handmade gifts for friends and family.
- Experiment with different color combinations to create a design that feels original.
Why DIY Beaded Phone Charms Are So Fun
A phone charm is more than a small decoration. It is an opportunity to bring a little creativity into an item you use every day. Instead of settling for a standard case or plain strap, you can create something with colors, beads, letters, and charms that feel personal.
Beaded phone charms are also approachable because the project does not require a large collection of craft supplies. A small selection of colorful beads can create dozens of different combinations. Add a few gold-toned findings or a favorite charm, and even a simple arrangement can look polished.
Important: The most appealing phone charm designs usually have a clear color story. Choose two or three main colors, then add small accents rather than trying to use every bead at once.
Supplies You Can Use for a Phone Charm DIY
The beauty of this project is that you can adjust the materials according to the design you have in mind. The colorful examples feature a mixture of beads, decorative details, cord, and hardware.
- Colorful beads: Pastel, rainbow, neutral, or bright beads can form the main pattern.
- Letter beads: Use alphabet beads to spell names, initials, short words, or fun messages.
- Decorative beads: Flowers, hearts, smiley faces, bows, and other playful shapes add personality.
- Spacer beads: Small metallic or neutral beads help separate larger pieces and give the design structure.
- Strong cord: Select a flexible cord suitable for threading your beads and creating a phone strap.
- Clasp or attachment hardware: A small clasp makes it easier to connect the finished charm to a compatible phone case attachment point.
- Scissors: Keep a sharp pair nearby for trimming the cord cleanly.
You do not need every possible type of bead. Start with a small collection and build from there. A simple combination of pastel round beads, a few gold spacers, and one statement charm can already create a beautiful result.
How to Choose the Right Beads
Choosing beads is one of the most enjoyable parts of making DIY phone charms. The reference design uses a playful mix of pastel pink, lavender, yellow, blue, white, and colorful accent beads. The combination creates a soft, cheerful aesthetic without looking overly complicated.
Start With a Color Palette
Before stringing anything, place your beads on a flat surface and arrange them by color. Look for a combination that feels balanced. Pastel pink and white create a soft feminine look, while lavender and blue can add a dreamy feel. Rainbow beads are ideal when you want a playful and energetic accessory.
Gold-colored spacer beads can be especially useful between colorful beads because they create visual breaks. A few metallic accents can make a handmade phone strap feel more finished without overpowering the main colors.
Mix Shapes and Sizes
Using beads with slightly different shapes and sizes adds texture. Round beads create a smooth base, while flower beads, heart beads, smiley faces, and bows become visual focal points.
Try not to place all of your largest or most decorative beads together. Spread them throughout the design so the eye naturally moves along the entire phone charm.
Step 1: Plan Your Phone Charm Design
Lay out the beads before you begin threading. This simple step can save time and make it easier to spot colors or shapes that do not work well together.
- Choose your main color palette.
- Select a few accent beads or charms.
- Decide whether you want a repeating pattern or a more random arrangement.
- Choose where any letter beads should appear.
- Arrange the beads in the approximate order you want to string them.
If you are creating a word with alphabet beads, check the spelling before threading. It is much easier to rearrange loose beads than to undo a finished section.
Step 2: String the Beads
Once you are happy with the layout, begin threading the beads onto your cord. Work slowly and keep the arrangement nearby so you can follow your planned pattern.
One of the designs shown uses individual letter beads to create a personalized word, while another uses a bright mixture of colorful beads and a heart detail. These contrasting approaches show how flexible the same basic phone charm DIY technique can be.
Keep the Pattern Balanced
If you are making a symmetrical design, add beads in a consistent order on both sides. For a more relaxed handmade look, alternate colors and shapes in an intentionally irregular pattern.
Leave enough room near the ends of the cord for attaching your hardware. Avoid filling the entire length so tightly that there is no working space for the finishing step.
Expert Insight
A strong design does not need dozens of different beads. Repeating a few colors and shapes creates rhythm, while one or two statement charms give the phone strap a focal point.
Step 3: Add the Clasp and Finishing Details
After the beads are arranged, finish the phone charm by connecting the cord to suitable attachment hardware. The clasp gives the strap a practical connection point and makes the finished piece easier to use with a compatible phone case attachment.
Pay close attention to the final knot or connection. The beads may be lightweight, but the charm will experience regular movement whenever the phone is carried, picked up, or placed down.
Pro Tip: Before using your finished charm, gently test the attachment and connection points. A secure finish is just as important as a cute bead arrangement.
Step 4: Personalize Your Phone Charm
This is where your DIY phone charm can become truly individual. Consider using alphabet beads to add initials, a nickname, or a short word. You can also choose charms based on your favorite colors, hobbies, flowers, animals, or playful symbols.
Ideas for Personal Themes
- Pastel theme: Combine pink, lavender, baby blue, yellow, and white.
- Rainbow theme: Arrange colorful beads in a bright repeating sequence.
- Initial charm: Feature one or two alphabet beads as the centerpiece.
- Flower theme: Pair pastel beads with daisy or floral-shaped beads.
- Sweet and playful: Add hearts, smiley faces, bows, or other cute charms.
- Minimal design: Use a small selection of neutral beads with one standout charm.
Easy Phone Charm DIY Variations
Once you understand the basic technique, it is easy to create several variations. You can make a collection of phone straps for different seasons, outfits, occasions, or moods.
Cute Friendship Phone Charms
Create matching or coordinating beaded phone charms for friends. Each person can have a slightly different color combination while sharing one common bead or charm. This makes the project a fun handmade gift idea.
Personalized Letter Charms
Alphabet beads make it easy to add initials or short messages. Keep the word centered between colorful beads so the letters become a clear focal point.
Colorful Rainbow Straps
For a bright look, arrange beads through a rainbow-inspired sequence. Repeating the color order can create a neat pattern, while mixing shades gives the charm a more spontaneous handmade feel.
Tips for a More Polished Handmade Look
A successful phone charm is not only about the individual beads. The spacing, repetition, and overall composition make a big difference.
- Repeat colors throughout the design instead of placing each color in one isolated section.
- Use metallic spacers to create breathing room between larger beads.
- Place statement charms where they will be easy to notice.
- Keep letter beads facing the same direction for easier reading.
- Test the arrangement before making the final connection.
- Choose a cord color that complements the beads rather than distracting from them.
Another helpful approach is to photograph or simply view your arrangement from a little distance before finishing it. A pattern that looks balanced close up may look different when the entire charm is viewed as one piece.
Why These Make Great Handmade Gifts
DIY beaded phone charms are small, affordable-feeling craft projects with plenty of room for personalization. That makes them especially appealing as handmade gifts. Instead of giving someone a generic accessory, you can choose colors and charms that suit their style.
A personalized phone charm can also be paired with a handwritten note or another small handmade item. Make one for a birthday, friendship gift, celebration, craft exchange, or simply as a thoughtful surprise.
The design possibilities are nearly endless. One person might prefer soft pastel beads and floral details, while another might love bright rainbow colors and playful smiley faces. The same basic materials can create completely different results.
A Simple Craft to Keep Coming Back To
One of the best things about phone charms DIY projects is that they encourage experimentation. Your first design can be simple, and each new charm can help you explore a different color palette or bead arrangement.
Try making a short charm first if you want a quick project. Once you are comfortable with threading and finishing the cord, experiment with longer straps, layered colors, personalized letters, or multiple decorative charms.
You can also keep a small container of leftover beads and revisit it whenever inspiration strikes. Mixing beads from previous projects can lead to combinations you would not have planned intentionally.
At a Glance
- Choose a simple color palette before you start.
- Mix basic beads with one or two statement charms.
- Plan letter beads carefully before stringing.
- Leave enough cord for a secure finishing connection.
- Test the finished attachment before regular use.
Conclusion: Make a Phone Charm That Feels Like You
DIY beaded phone charms are a fun way to combine creativity, color, and personalization in one small project. From soft pastel flower designs to rainbow straps filled with cheerful beads, there are countless ways to make a phone accessory your own.
Start with a few favorite beads, plan a simple pattern, and let the design develop naturally. Add letter beads for a personalized touch, decorative charms for extra character, and metallic spacers for a polished finish. Most importantly, enjoy the process rather than worrying about making everything perfect.
A handmade phone charm is a tiny accessory with plenty of personality. Save your favorite ideas, gather your beads, and create a colorful strap that makes your everyday phone feel a little more special.
Tags
Phone Charms DIY Beaded Phone Charms DIY Phone Accessories Beaded Crafts Phone Strap DIY Cute DIY Crafts Personalized Accessories Handmade Gift Ideas