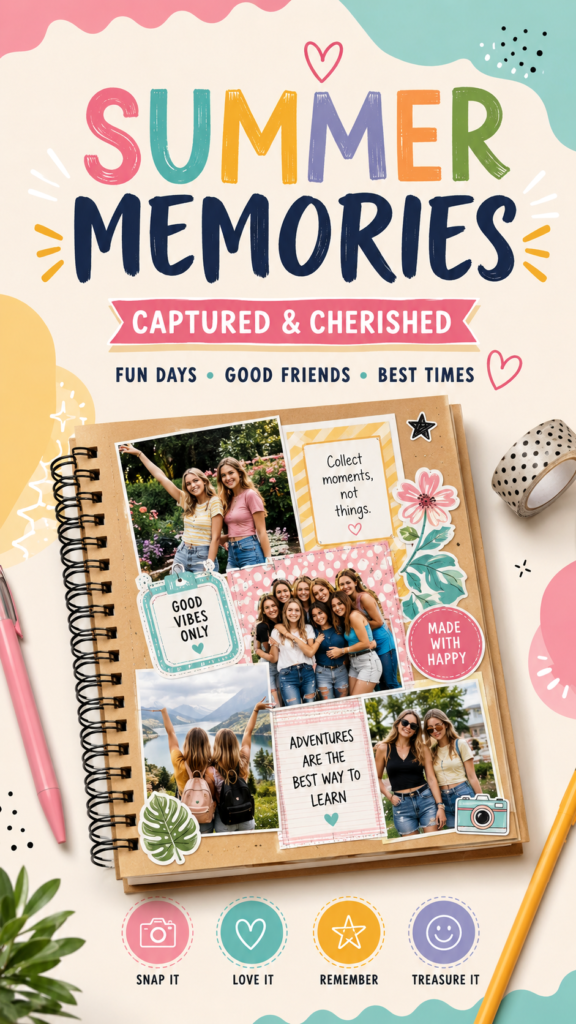
A DIY photo book is more than a collection of printed pictures. It is a creative way to turn favorite moments into a personal keepsake filled with color, personality, and stories. Whether you are preserving summer adventures, celebrating friendships, documenting a special trip, or simply gathering everyday memories, a handmade photo book gives you the freedom to design every page your own way. With photos, captions, decorative paper, stickers, doodles, and meaningful details, even simple snapshots can become part of a beautiful memory album.
The best part of creating a DIY photo book is that there are no strict rules. A page can be bright and playful, soft and minimal, carefully arranged, or full of layered scrapbook details. The goal is to capture the feeling behind the memories. A colorful photo album with handwritten notes and creative embellishments can tell a story in a way that digital galleries often cannot.
Key Takeaways
- Choose a theme to give your DIY photo book a connected, intentional look.
- Mix photo sizes to create movement and visual interest on each page.
- Add captions and notes so the memories behind the pictures are not forgotten.
- Use scrapbook supplies thoughtfully to add personality without hiding your photos.
- Leave some empty space to keep busy pages balanced and easy to enjoy.
- Focus on meaningful moments rather than trying to include every single picture.
Why a DIY Photo Book Makes Memories Feel More Personal
Photos capture a moment, but a DIY photo book can preserve the atmosphere around it. A handwritten sentence can remind you of an inside joke. A small sticker can reflect the season. A patterned background can bring back the mood of a trip, a camp, a party, or a fun afternoon with friends. These details turn a photo collection into a story.
Handmade memory books also encourage you to slow down. Instead of endlessly scrolling through hundreds of images on a phone, you select the moments that matter most. That process can be surprisingly meaningful. You begin to notice the little things that made an experience special, from funny expressions and spontaneous group photos to quiet scenes that might otherwise be overlooked.
Important insight: The strongest DIY photo books do not depend on perfect photography or expensive supplies. Personality is what makes them memorable. A simple snapshot paired with a genuine note, a date, or a small creative detail can be more meaningful than a perfectly polished page with no personal story behind it.
Start With a Theme for Your Photo Book
Before printing photos or reaching for stickers, decide what your book is about. A clear theme makes the creative process easier and helps the finished album feel connected. Your theme does not need to be complicated. It can be based on a group of people, a season, a place, or simply a collection of favorite memories.
Friendship Memory Book
A friendship photo book is perfect for documenting shared adventures, group photos, funny moments, and milestones. Use cheerful colors, playful captions, heart details, and candid pictures. Add small notes about favorite memories or funny things that happened on a particular day. Group photos work especially well when combined with close-up shots and casual snapshots.
Summer or Camp Memories
Warm colors, flowers, sunshine-inspired details, travel snapshots, and outdoor photos can give a summer memory book a lively look. This type of scrapbook is ideal for photos taken during vacations, camps, beach days, road trips, and afternoons spent outdoors. You can use captions that highlight the feeling of the season, such as favorite moments, best days, or memories worth keeping.
Everyday Life Photo Journal
Not every DIY photo album needs a major event as its subject. Everyday moments can be just as meaningful. Collect photos of favorite meals, walks, school days, hobbies, family time, pets, or ordinary afternoons with friends. An everyday photo journal can become a wonderful record of a particular season of life.
Choose the Right Photos for a Balanced Layout
One of the biggest challenges in creating a photo book is deciding which images to include. It is tempting to print everything, but a thoughtful selection usually creates a stronger result. Look for photos that show different parts of the story.
- Start with standout images. Choose a few photos that immediately represent the memory or theme.
- Add candid moments. Natural laughter, movement, and unexpected expressions bring energy to the book.
- Include detail shots. Small images of scenery, food, decorations, or objects can help set the scene.
- Mix group and individual photos. This creates variety and gives more people and moments space to shine.
- Think about the story. Arrange photos in chronological order if it helps the reader follow an experience.
You do not need every image to be the same size. In fact, mixing large focal photos with smaller snapshots is one of the easiest ways to create a scrapbook-style layout. A large image can become the center of attention, while smaller pictures can support the page around it.
Try a Photo Collage Page
A photo collage page is ideal when several images belong to the same memory. Arrange one larger photo as the focal point and layer smaller pictures nearby. Leave room for a title, short caption, or decorative accent. Slightly overlapping photo edges can create a relaxed handmade look, while a clean grid can make the page feel more modern.
Keep the Focal Point Clear
Even a colorful scrapbook page needs visual hierarchy. Decide where the eye should go first. Usually, this will be your largest photo, your page title, or a particularly meaningful image. Build the smaller elements around that focal point rather than giving every detail equal importance.
Why This Matters
A well-organized photo book is easier to look through and easier to remember. Variety creates interest, but visual hierarchy keeps the page from feeling chaotic. When in doubt, remove one or two decorations and let your favorite photos have more room to breathe.
Add Captions That Bring the Photos to Life
Captions are one of the most personal parts of a DIY photo book. You do not need to write long paragraphs on every page. A few words can be enough to capture the mood of a moment. Try dates, locations, short memories, favorite quotes from the day, or simple phrases that reflect how the experience felt.
For example, a page about a fun day with friends might include a short caption such as “Good vibes only,” while a travel page could use a note about the view, the weather, or an unexpected moment. You can also write a small reflection at the end of a section to explain why those memories matter.
Pro Tip: Write captions as if you are speaking to your future self. Include little details that may seem obvious now but could be easy to forget later, such as a nickname, a funny incident, the reason everyone was laughing, or what made that day different.
Use Scrapbook Elements to Create a Creative Look
Decorative elements help transform a basic photo album into a personalized DIY project. Stickers, paper cutouts, floral details, doodles, icons, frames, labels, and small shapes can all add character. The key is to use them as supporting elements rather than allowing them to compete with the photos.
Colorful Backgrounds
Patterned paper is a simple way to make pages feel lively. Choose colors that complement your photos. Soft pinks and warm neutrals can create a sweet scrapbook look, while brighter shades can give the book a playful, energetic personality. You can also repeat a few colors throughout the album for consistency.
Stickers and Small Icons
Camera icons, hearts, stars, flowers, travel-inspired details, and smiley accents can help reinforce the theme of your pages. Small embellishments work well near captions, in empty corners, or around the edges of photo clusters. Keep them spaced out so the layout remains readable.
Handwritten Notes and Doodles
Handwriting instantly adds personality to a memory book. You can write directly on the page, use small paper notes, or add labels with short messages. Simple doodles can also fill small empty spaces without making the page feel crowded. These imperfect handmade details are often what give a DIY scrapbook its charm.
Create a Consistent but Flexible Design
A cohesive DIY photo book does not mean every page should look identical. Instead, choose a few elements that appear throughout the album. This might include a repeated color palette, similar photo borders, one or two favorite fonts, or a consistent style of caption.
Then allow individual pages to have their own personality. One page might feature a bold collage, while another could contain a single large photograph and a handwritten note. This balance between consistency and variety keeps the book interesting from beginning to end.
Repeat Small Details for a Polished Feel
Repeating a simple design element can make even an eclectic scrapbook feel intentional. For example, use the same color for section titles, repeat a particular photo frame, or place a small decorative icon on each page. These subtle connections create visual flow without limiting creativity.
Easy DIY Photo Book Ideas for Different Occasions
A handmade photo book can be adapted for almost any collection of memories. If you are looking for inspiration, start with an occasion and choose decorations that support the story.
- Best friend scrapbook: Add group photos, funny captions, hearts, and favorite shared memories.
- Travel photo album: Include scenic images, tickets, maps, location notes, and photos of memorable details.
- Summer memory book: Use bright colors, flowers, sunshine-inspired shapes, and outdoor snapshots.
- School year scrapbook: Organize pages around important events, friends, activities, and favorite moments.
- Family memory album: Mix portraits, candid photos, celebrations, and notes about meaningful traditions.
- Couple photo book: Create a timeline of favorite dates, trips, celebrations, and everyday memories.
- Personal photo journal: Document hobbies, goals, places, and small moments that represent a chapter of life.
The most successful idea is the one you will genuinely enjoy creating. You do not need to follow a complicated template. Start with the memories you want to keep, then let the design develop around them.
How to Avoid an Overcrowded Scrapbook Page
Creative supplies are exciting, but it is easy to add too much. When every inch of a page is filled with photos, stickers, text, and patterns, the eye does not know where to look. A little empty space can actually make your photos and decorations stand out more.
Try placing your photos first. Next, add captions or important text. Finally, use decorative details to fill only the spaces that still feel empty. Step back from the page before adding more. If the main photos are still easy to notice and the story feels clear, you probably have enough.
Another useful approach is to create small clusters. Group a photo, a caption, and one or two embellishments together instead of scattering decorations randomly across the page. This makes the layout feel organized while preserving the fun layered look of a scrapbook.
Make Your DIY Photo Book a Keepsake You Will Actually Revisit
A memory book becomes more valuable when it is designed to be enjoyed years later. That means choosing durable materials, attaching photos carefully, and including context that helps the memories stay meaningful over time. Dates, names, places, and short stories can become especially valuable when you return to the album in the future.
Do not wait for a major milestone to begin. A DIY photo book can start with a single season, a collection of favorite photos, or one unforgettable weekend. You can build it slowly, adding pages whenever you have new memories to preserve. This approach removes the pressure to finish everything at once and makes the project more enjoyable.
Quick Points
- Choose photos that tell a story, not just the ones that look perfect.
- Use a theme and a small color palette to create visual harmony.
- Add captions, dates, and personal notes to preserve the details behind each memory.
- Mix photos with simple scrapbook embellishments for a layered handmade look.
- Leave room for empty space so every page remains easy to enjoy.
Conclusion: Turn Favorite Moments Into a DIY Photo Book You Will Treasure
Creating a DIY photo book is a chance to combine photography, storytelling, and creativity in one meaningful project. From colorful collage pages and group snapshots to handwritten notes and simple decorative accents, every choice helps shape the personality of the finished album.
You do not need professional design skills or a large collection of supplies to create something special. Start with your favorite photos, choose a simple theme, and build each page around the memories you want to remember. Add details that make you smile, experiment with layouts, and allow a little imperfection to become part of the handmade charm.
Whether you are making a friendship scrapbook, a summer memory album, a travel photo journal, or a personal collection of everyday moments, the best DIY photo book is one that feels true to your story. Print the photos, gather your favorite creative supplies, and start turning those digital memories into pages you can hold, share, and revisit for years to come.
Tags
DIY Photo Book Scrapbook Ideas Memory Album Photo Collage Friendship Memories Creative Journaling Handmade Photo Album Scrapbook Inspiration