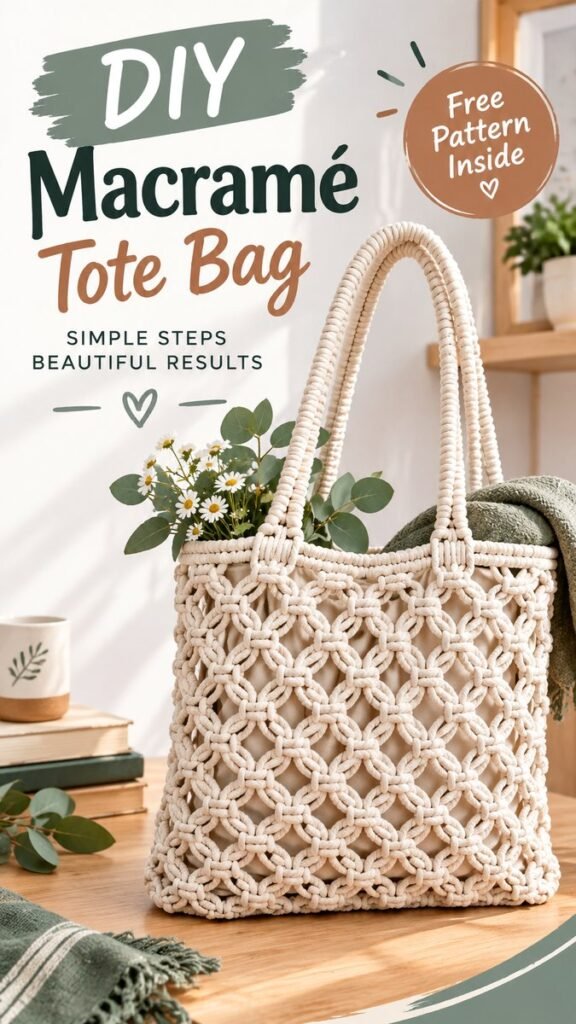
There is something especially satisfying about carrying a bag you made with your own hands. A DIY tote bag combines practical function with creativity, and a macramé design adds beautiful texture without requiring complicated materials or an elaborate setup. This handmade style is a wonderful project for anyone who loves simple crafts, boho-inspired accessories, and useful pieces that can become part of an everyday wardrobe.
The macramé tote shown here has a soft neutral appearance, a repeating knotted pattern, and sturdy-looking looped handles. Its openwork texture gives the bag a light, relaxed feel while the structured shape keeps it practical for everyday use. Whether you are new to macramé or already enjoy working with cords and knots, this tote bag DIY is an inspiring project to add to your handmade collection.
Key Takeaways
- A macramé tote bag can turn simple cord into a stylish everyday accessory.
- Repeating knot patterns create texture and visual interest without complicated decoration.
- Neutral cord works beautifully with casual, natural, and minimalist styles.
- Handle placement and consistent tension are important for a balanced finished bag.
- You can personalize the project with different colors, patterns, sizes, and finishing details.
Why a DIY Tote Bag Makes a Great Craft Project
A tote bag is one of those handmade projects that feels rewarding because it is both decorative and useful. Instead of creating something that simply sits on a shelf, you can make an accessory that has a place in your everyday routine. A handmade tote can accompany you while shopping, visiting a market, carrying craft supplies, organizing personal items, or enjoying a relaxed day outdoors.
Macramé makes the project even more interesting because the material itself becomes part of the design. Rather than relying on printed fabric or elaborate embellishments, the pattern comes from the arrangement of knots. The result is tactile, dimensional, and distinctly handmade.
The design inspiration here also demonstrates how effective a restrained color palette can be. Cream or natural-colored cord creates a timeless appearance that pairs easily with denim, linen, neutral clothing, and other earthy tones. A simple bag can therefore become surprisingly versatile.
The appeal of handmade texture
One of the defining features of a macramé tote is its texture. Rows of carefully arranged knots form a repeating open pattern across the body of the bag. This gives the finished piece visual depth while allowing the underlying structure or lining to remain part of the overall design.
Texture is particularly useful when working with neutral colors. A plain cream bag could look understated, but an intricate knot pattern gives the same color much more personality. Light catches the raised cords from different angles, making the pattern stand out naturally.
Materials for a Macramé Tote Bag DIY
You do not need a huge collection of supplies to begin a simple macramé tote bag. The exact materials depend on the size, construction method, and pattern you choose, but the project can generally be approached with a small set of basic craft supplies.
- Macramé cord: Choose a cord that feels comfortable to knot and is suitable for the strength you want in the finished bag.
- Scissors: Sharp scissors help create clean, even cord ends.
- Measuring tape: Useful for keeping the sides, handles, and knot spacing consistent.
- Bag base or lining: Depending on the construction, a fabric insert or structured base can provide additional support.
- Optional sewing supplies: These can be useful if you decide to add a fabric lining or reinforce particular sections.
Natural and neutral shades are an easy starting point because they highlight the knotwork and create a relaxed handmade aesthetic. However, there is no need to limit yourself to cream. Sage green, warm beige, muted terracotta, soft gray, dusty blue, and other understated colors can create beautiful variations.
Important: The most attractive macramé patterns depend on consistency. Try to maintain similar knot sizes and cord tension throughout the project. Even small differences can change the appearance of a repeating pattern, so working slowly is often more effective than rushing through the rows.
Understanding the Knot Pattern
The visual character of this DIY tote bag comes primarily from its repeating geometric knotwork. Instead of covering the surface with random knots, the cords are arranged into a structured pattern that creates connected shapes across the front and sides.
Repeating designs are especially beginner-friendly because you only need to learn the individual knot movements before practicing the sequence. Once the pattern becomes familiar, your attention can shift toward keeping the rows aligned and maintaining even spacing.
Start with a small practice section
If you are new to macramé, avoid beginning with the entire tote immediately. Create a small practice sample first. This gives you an opportunity to understand how tightly the cords should be pulled and how much space should remain between neighboring knots.
A sample also helps you decide whether you like the visual density of the pattern. Tighter knotting creates a fuller appearance, while more open spacing produces a lighter, airier design.
Keep the rows consistent
Consistency is one of the biggest differences between a neat finished macramé bag and one that looks uneven. After completing each section, take a moment to check the overall shape. The sides should remain reasonably balanced, and the repeating motifs should gradually line up rather than drifting to one side.
Using a measuring tape periodically can be helpful. You do not need to measure every knot, but checking the width and height at key stages can prevent small variations from becoming major problems later.
Expert Insight
A beautiful macramé tote is less about complicated knots and more about controlled repetition. Once you understand the basic pattern, focus on even tension, clean transitions, and balanced spacing. Those small details make a handmade project look polished.
How to Approach Your Tote Bag DIY Project
Before cutting a large amount of cord, think about the finished bag you want. Consider how wide it should be, how deep it needs to feel, and whether you want an open macramé exterior or a lined interior. Planning these details first can save materials and make the project easier to manage.
- Choose your overall size. Decide whether you want a compact everyday tote or a larger carryall-style bag.
- Select your cord. Pick a comfortable material and color that complements the style you want.
- Practice the knot sequence. Make a small sample until the pattern feels familiar.
- Build the main body. Work gradually while checking the width, spacing, and overall shape.
- Create and attach the handles. Make sure both sides are positioned evenly.
- Secure the finishing knots. Inspect loose ends and reinforce areas that receive regular tension.
- Add optional lining or structure. This can make the tote more practical for certain uses.
Pay attention to the handles
The handles are more than a decorative feature. They influence how comfortable and balanced the finished tote feels. When attaching them, carefully check that both sides sit at similar heights and that the handles are centered over the body of the bag.
For a relaxed look, rounded cord handles work beautifully with an open knot pattern. If you prefer a more structured appearance, you can experiment with thicker cord or incorporate a supportive element inside the handle construction.
Ways to Customize Your Handmade Tote
One of the best parts of making your own tote bag is the freedom to change the design. Once you understand the basic structure, you can treat the project as a starting point rather than a strict formula.
Experiment with color
A natural cream macramé tote has a timeless quality, but a little color can completely change its personality. Try combining two complementary shades, adding a colored handle, or using a subtle accent row near the top or bottom.
Earthy combinations work particularly well with macramé. Think warm beige with terracotta, cream with sage, or soft gray with muted blue. For a more playful accessory, brighter colors can create a completely different mood.
Change the pattern density
The spacing between knots can dramatically influence the finished appearance. A tightly worked pattern feels more substantial, while larger openings create a delicate, lightweight effect.
You can also experiment with alternating knot motifs. A simple central pattern surrounded by smaller repeating details can create a focal point without adding unnecessary decoration.
Add a fabric lining
A lining is an excellent option if you want the tote to hold smaller objects more securely. It can prevent items from slipping through open sections of the macramé and can also add another opportunity for customization.
Choose a lightweight fabric for a relaxed bag or a slightly more structured material if you want the tote to maintain its shape. A simple neutral lining keeps attention on the macramé, while a patterned fabric can become a fun surprise inside the bag.
Styling a Macramé Tote for Everyday Use
A handmade macramé tote naturally fits relaxed, casual styling. Pair it with denim and a simple top for an everyday outfit, or combine it with linen and neutral colors for a soft, natural look. The woven texture adds interest even when the rest of the outfit is understated.
The bag can also work as a practical craft accessory. Use it for yarn, fabric, notebooks, lightweight supplies, or other items you like to carry together. Its handmade appearance makes it feel more personal than a standard store-bought tote.
Pro Tip: Keep the rest of your styling relatively simple when the tote has an intricate knot pattern. Letting the texture remain the visual focus creates a more balanced and intentional look.
Common Mistakes to Avoid
Macramé projects can be forgiving, but a few common issues can affect the finished tote. Recognizing them early makes the process much easier.
- Uneven tension: Pulling some knots much tighter than others can distort the pattern.
- Inconsistent spacing: Irregular gaps can cause repeating motifs to lose their alignment.
- Uneven handles: Small differences in handle placement can make the bag appear tilted.
- Cutting cord too early: Plan your material needs before making large cuts whenever possible.
- Rushing the finishing stage: Loose ends should be checked carefully so the completed design looks clean.
If something looks uneven halfway through the project, it is usually easier to correct it immediately than to continue and hope the difference disappears. Take regular breaks, step back from the work, and look at the bag from a short distance. The overall pattern is sometimes easier to evaluate that way.
Making the Project Beginner-Friendly
You do not need to master every macramé technique before attempting a tote bag. Start by learning the small collection of knots required for your chosen pattern. Practice them with inexpensive cord, then move on to the actual bag when your movements feel comfortable.
It is also helpful to work in manageable sections. Rather than thinking about the entire tote at once, concentrate on completing one row or motif at a time. This makes the project feel less overwhelming and lets you monitor the pattern as it develops.
Most importantly, allow your first project to be a learning experience. Handmade work does not have to look machine-perfect to be beautiful. Slight variations can give a piece character while you build confidence and improve your technique.
Why Macramé Totes Continue to Inspire DIY Crafters
Macramé combines creativity with a satisfying hands-on process. The repetitive nature of knotting can make the craft feel calming, while watching a recognizable pattern emerge provides a strong sense of progress.
A tote bag is especially appealing because the finished project has a clear purpose. Instead of practicing knots on a small decorative item, you can transform those techniques into something functional. That combination of creativity and usefulness is part of what makes tote bag DIY projects so popular among craft enthusiasts.
The neutral, natural aesthetic also works well with current handmade and minimalist decorating trends. A macramé tote feels organic, textured, and personal, making it easy to photograph and share as part of a creative lifestyle collection.
At a Glance
- Choose comfortable, durable macramé cord.
- Practice the repeating knot pattern before starting the full bag.
- Maintain even tension and spacing for a polished appearance.
- Check handle placement carefully for balance and comfort.
- Personalize the finished tote with color, lining, size, or pattern variations.
Conclusion: Create a Tote That Feels Like Your Own
A DIY tote bag is a wonderful way to turn a simple collection of cords and knots into something useful, stylish, and personal. The macramé design brings natural texture to the accessory, while the repeating pattern provides plenty of opportunity to practice and refine your technique.
Whether you recreate a neutral version inspired by this relaxed aesthetic or develop your own combination of colors and patterns, the project can be adapted to suit your creativity. Start with a manageable design, focus on consistent knots, and give yourself time to enjoy the process.
The real charm of handmade accessories is that every finished piece carries a little of the maker’s personality. With patience and a few basic macramé techniques, your next tote bag can become more than a practical accessory. It can be a handmade piece you are genuinely excited to use, style, and share. Gather your cord, practice your knots, and make a tote that is uniquely yours.