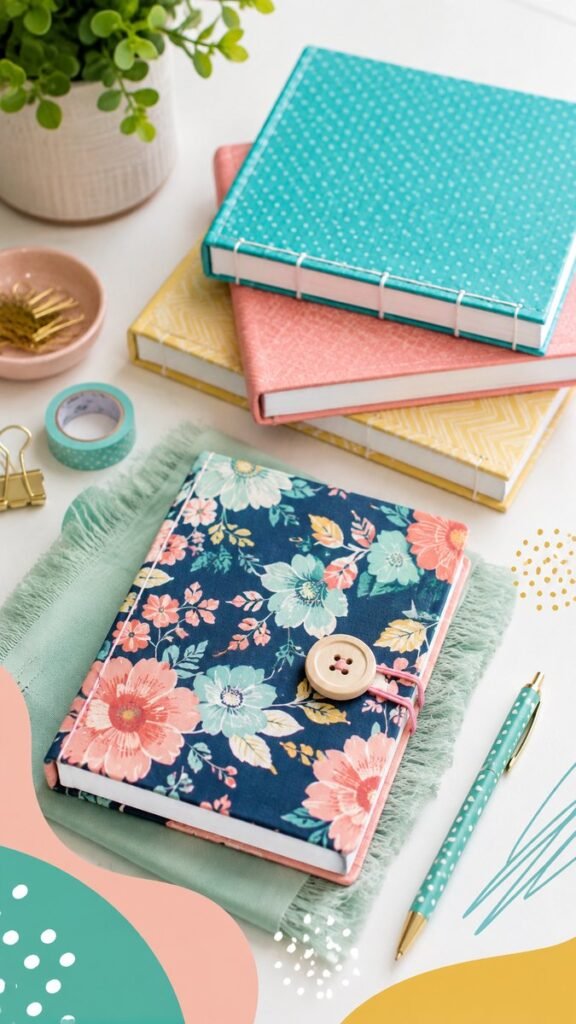
There is something especially satisfying about opening a journal that feels completely your own. A handmade cover, a favorite color, a playful pattern, or a simple decorative detail can transform an ordinary notebook into a creative space you actually want to use. DIY journal projects are a wonderful way to combine crafting, organization, memory keeping, and self-expression in one practical activity.
The beauty of a DIY journal is that there is no single correct design. You can create a bright and colorful notebook, a fabric-covered journal, a patterned sketchbook, or a simple handmade diary with subtle personal details. By experimenting with paper, covers, textures, closures, and decorations, you can make a journal that reflects your style and encourages you to fill its pages.
Whether you want to start a new creative hobby, make a personalized gift, or simply give an ordinary notebook a fresh look, these DIY journal ideas can help you create something beautiful and useful.
Key Takeaways
- DIY journals can be customized with colors, patterns, fabrics, and creative details.
- You can start with a plain notebook or build a journal using simple craft materials.
- Layering textures creates a more personal and handmade appearance.
- Functional details such as elastic bands, buttons, and tabs can add both style and usefulness.
- A personalized journal can be used for writing, sketching, planning, memory keeping, and creative projects.
Why DIY Journals Are So Popular
Journaling has become much more than writing down thoughts. For many people, a journal is also a creative workspace. It can hold lists, sketches, ideas, memories, goals, notes, collage elements, and everyday inspiration. Creating the journal yourself adds another layer of creativity before you even begin filling the pages.
A handmade journal also gives you control over the design. Instead of searching for a notebook with exactly the right combination of colors and patterns, you can create one that matches your personal taste. Bright turquoise, soft coral, sunny yellow, floral prints, geometric patterns, or simple neutral textures can all work together in different ways.
Important: The most successful DIY journal projects balance creativity with usability. A beautiful cover is exciting, but the journal should also feel comfortable to open, write in, carry, and use regularly.
Start With a Simple Journal Base
You do not need complicated bookbinding skills to begin making a DIY journal. A basic notebook provides an easy foundation for customization. Choose a size that suits the way you plan to use it.
A smaller notebook can be convenient for everyday notes and travel. A larger journal gives you more room for sketches, photos, lists, and creative layouts. The thickness of the notebook also matters. If you enjoy adding collage materials or decorative paper, a sturdier journal can provide more support.
Choose the Right Type of Journal
Think about the purpose of your project before decorating it. Different styles work better for different creative goals.
- Blank journals are ideal for drawing, sketching, and free-form creativity.
- Lined notebooks work well for daily writing, reflections, and lists.
- Grid or dotted journals are useful for planning, tracking, and structured layouts.
- Mixed-media journals can support collage, decorative paper, and layered creative projects.
Once you know how you want to use the journal, it becomes easier to choose colors and decorations that support its purpose.
Use Color to Create a Distinctive DIY Journal
Color is one of the easiest ways to give a handmade journal personality. A collection of colorful notebooks can feel coordinated without looking identical. Try choosing a small palette of complementary shades and repeating those colors in different patterns and materials.
For example, a fresh combination of turquoise, coral, soft pink, yellow, and deep navy can create an energetic but balanced appearance. A patterned cover can become the main focal point, while solid-colored notebooks provide visual contrast.
Mix Solid Colors and Patterns
Combining a bold floral print with simpler colors is an easy way to create visual interest. If every surface has a busy pattern, the design can feel overwhelming. A better approach is to let one or two elements become the stars of the project.
You might choose a patterned fabric cover and pair it with a simple elastic closure. Or use a colorful notebook with a small decorative label. Geometric patterns, tiny dots, botanical prints, and subtle line designs can all bring variety without making the journal difficult to use.
A Simple Design Rule
Choose one main pattern, one or two supporting colors, and one small accent detail. This creates a finished look while keeping the design clean and visually organized.
Add Texture for a Handmade Look
Texture can make a DIY journal feel much more special. Smooth paper, woven fabric, soft cloth, decorative tape, and layered materials each create a different experience. Even a simple notebook can look more custom when you add one textured element to the cover.
Fabric is especially useful for handmade journal covers because it introduces color and pattern at the same time. A floral fabric can create a cheerful, creative mood, while a simple textured material can give the journal a more understated appearance.
You can also experiment with decorative paper, lightweight cardstock, ribbon, twine, or carefully selected embellishments. The key is to make sure the added materials are securely attached and do not interfere with opening and closing the journal.
Expert Insight
Texture works best when it has a purpose. A fabric cover, an elastic closure, or a reinforced edge can add visual interest while also making the journal feel more durable and enjoyable to handle.
Creative Closure Ideas for Handmade Journals
A closure can become one of the most memorable details of a DIY journal. It also helps protect loose pages, notes, and small inserts when the notebook is not being used.
Elastic bands are a popular option because they are simple and practical. You can coordinate the elastic with the cover color or choose a contrasting shade for a playful accent. Buttons can also create a charming handmade touch when combined with a loop or elastic cord.
Ideas to Try
- Elastic wrap: Add a band that stretches around the journal to keep it closed.
- Button closure: Attach a large decorative button and create a simple loop closure.
- Ribbon tie: Use soft ribbon for a flexible and decorative finish.
- Tabbed closure: Create a paper or fabric flap for a more structured design.
Pro Tip: Test the closure before permanently attaching it. The journal should close securely without bending the cover or making the notebook difficult to open.
Decorate With Everyday Craft Supplies
One of the best things about DIY journal ideas is that you can often work with materials you already have. Decorative tape, paper scraps, old fabric, buttons, clips, and colored pens can all become part of the design.
Washi tape is useful for adding borders, color blocks, page markers, or small decorative accents. Binder clips can help organize loose pages or temporarily hold materials together while you work. A patterned pen or matching stationery can also make the finished journal feel like part of a complete creative set.
Before buying a large collection of supplies, start with a few materials that work well together. A limited palette often makes the project look more intentional.
DIY Journal Ideas for Different Creative Purposes
Once the outside of your journal is finished, you can customize the inside around a specific purpose. The same basic notebook can become many different things depending on how you organize its pages.
Personal Writing Journal
Keep the pages simple and create space for daily thoughts, observations, reflections, and ideas. You may want to add a decorative title page or a few tabs to separate sections.
Creative Sketchbook
Use a journal with blank pages for quick drawings, design ideas, lettering practice, and visual inspiration. A colorful handmade cover can make the sketchbook feel more inviting every time you sit down to create.
Memory and Keepsake Journal
Add photos, ticket stubs, notes, printed images, and small paper souvenirs. This type of DIY journal can gradually become a personal collection of meaningful moments.
Idea and Inspiration Notebook
Use sections for project ideas, color combinations, creative goals, craft inspiration, and future plans. Tabs, sticky notes, and color-coded pages can help keep everything organized.
How to Make Your Journal Feel Cohesive
A DIY project does not need to be perfectly matched to look polished. In fact, combining different patterns and textures often creates more personality. The secret is finding a few elements that connect the design.
Repeat one color in several places. Use a similar type of line pattern. Choose materials with related tones. Small connections like these can make a collection of different notebooks and accessories feel intentionally styled.
If you are making more than one journal, consider giving each notebook its own pattern while keeping one shared color. This is a simple way to create a coordinated collection for different purposes.
Keep the Process Fun and Flexible
The best DIY journal is one that inspires you to use it. Do not feel pressured to make every detail perfect. A handmade project can include small imperfections, unexpected combinations, and design choices that change as you work.
Try placing materials on the cover before attaching them. Move colors around. Compare different patterns. Sometimes the most creative results come from experimenting instead of following a strict plan.
Important: Personalization is the real advantage of a DIY journal. Choose colors, materials, and decorative details that make you excited to pick it up and use it again.
Easy DIY Journal Project: A Simple Step-by-Step Approach
If you are new to handmade notebooks, start with a simple cover makeover. This gives you plenty of creative freedom without requiring complicated tools.
- Choose a notebook that fits your preferred writing or creative style.
- Select a small color palette with two to four coordinating shades.
- Choose one main material for the cover, such as decorative paper or fabric.
- Plan where any closure, label, or accent will be placed.
- Attach the main covering carefully and smooth out any wrinkles.
- Add decorative details gradually rather than covering every empty space.
- Allow adhesives to dry completely before using the journal.
- Personalize the inside with sections, tabs, prompts, or decorative pages.
This approach can be adapted again and again. Once you understand the basic process, you can experiment with more detailed covers, different textures, and new organization ideas.
Making a DIY Journal Part of Your Creative Routine
Creating the journal is only the beginning. A beautiful handmade notebook can become part of a regular creative routine. Keep it somewhere visible, along with a favorite pen and a few simple supplies. When your tools are easy to reach, it becomes easier to capture ideas whenever inspiration appears.
You do not need to fill pages every day. Some people use a journal regularly, while others return to it only when they have something meaningful to record. The important thing is that the journal serves you rather than becoming another task to complete.
A personalized notebook can also make a thoughtful handmade gift. You can choose colors and patterns based on a general creative theme, then leave the pages open for the recipient to make the journal their own.
At a Glance
- Start with a notebook that matches your intended use.
- Combine solid colors with one standout pattern.
- Add texture with fabric, paper, or simple craft materials.
- Use practical details such as elastic bands or buttons.
- Keep the design personal, useful, and enjoyable to revisit.
Final Thoughts on Creating Your Own DIY Journal
A DIY journal is a simple project with endless creative possibilities. You can transform a basic notebook into a colorful handmade accessory, build a collection of journals for different purposes, or create one special book that holds your ideas and memories.
From bright covers and playful patterns to textured fabrics and practical closures, every design choice gives the journal a little more personality. Start with materials you enjoy, keep the layout functional, and do not be afraid to experiment with unexpected combinations.
The finished journal does not need to look like anyone else’s. In fact, that is exactly what makes a handmade notebook so rewarding. Create something that feels personal, useful, and inspiring, then fill it with the ideas that matter to you.
Tags
DIY Journal Journal Ideas Handmade Journal Creative Journaling Notebook Ideas DIY Crafts Paper Crafts Personalized Notebook