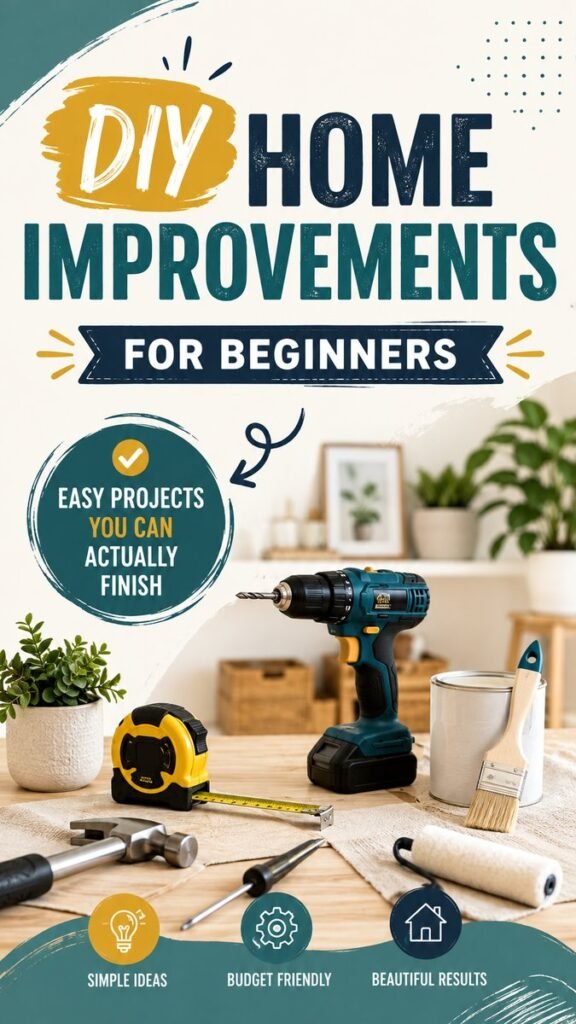
DIY home improvement does not have to mean taking on a massive renovation or spending a fortune on new materials. The right beginner projects can make a room look fresher, feel more organized, and work better while giving you the satisfaction of creating something with your own hands. With a few basic tools, simple supplies, and a willingness to learn, you can tackle practical upgrades that deliver noticeable results without overwhelming yourself.
Key Takeaways
- Start with small DIY home improvement projects that match your skill level.
- Basic tools can handle many useful repairs, decorating tasks, and upgrades.
- Measure carefully before cutting, drilling, mounting, or installing anything.
- Choose budget-friendly materials that create a visible difference.
- Focus on one project at a time so each improvement can be completed properly.
- Keep your workspace organized and prioritize safe tool use throughout the project.
Why DIY Home Improvement Is Great for Beginners
Home improvement can seem intimidating when you imagine complicated renovations, specialized equipment, and long project timelines. In reality, many of the most rewarding updates are surprisingly approachable. A fresh coat of paint, a new shelf, updated hardware, a decorative wall treatment, or a small organization upgrade can completely change how a space looks and functions.
Beginner DIY projects are especially useful because they allow you to develop practical skills gradually. Instead of learning everything at once, you can become comfortable with measuring, drilling, sanding, painting, assembling, and installing through manageable projects.
Important: The best beginner project is not necessarily the most impressive one. Choose a task that is simple enough to finish confidently, because completing smaller projects helps you build the skills and motivation needed for larger home improvements.
Essential Tools for Simple Home Projects
You do not need a workshop filled with professional equipment to get started. A compact collection of reliable basic tools can be surprisingly versatile. The image highlights several useful DIY essentials, including a cordless drill, measuring tape, hammer, screwdriver, paint roller, and paintbrush. These are the kinds of tools that can support a wide range of beginner-friendly projects.
Measuring Tape
A measuring tape is one of the most important tools for home improvement. Accurate measurements help prevent wasted materials and ensure that shelves, frames, hardware, and other additions fit where you want them.
Before starting a project, measure the available space more than once. Write the dimensions down rather than relying on memory. When a project involves multiple pieces, remember to account for spacing, clearance, and the thickness of materials.
Cordless Drill
A cordless drill can make many DIY tasks faster and easier. It is useful for assembling furniture, installing hardware, mounting shelves, creating pilot holes, and completing a variety of small home upgrades.
Beginners should take time to understand the drill’s basic controls before using it on a visible surface. Practice on a scrap piece of material if you are unfamiliar with drilling. Start slowly and use the appropriate bit for the material and fastener.
Hammer and Screwdrivers
A hammer and a few screwdrivers are simple but extremely useful. They can help with assembling furniture, installing small hardware, making minor adjustments, and handling everyday household tasks.
Paint Roller and Brushes
Painting is one of the easiest ways to create a noticeable visual change. A roller works well for larger surfaces, while brushes are useful around edges, corners, trim, and smaller details. Keeping both available makes a basic painting project much easier to manage.
Easy DIY Home Improvement Projects to Try
The goal of a beginner project should be simple: make a meaningful improvement without creating unnecessary complexity. Start with areas where a small change can have a big visual or practical impact.
1. Refresh a Wall With Paint
Painting is a classic DIY home improvement project for good reason. Color can change the atmosphere of a room, make a small area feel brighter, or give an outdated space a fresh appearance.
Begin with a manageable wall rather than an entire house. Clear the area, protect nearby surfaces, clean the wall, and prepare it before applying paint. Use painter’s tape where needed, work in manageable sections, and allow each coat to dry according to the paint manufacturer’s instructions.
A neutral shade can create a clean backdrop for furniture and decor, while a stronger accent color can add personality. The key is to choose a color you can comfortably live with and prepare the surface properly before painting.
2. Install Simple Decorative Shelves
Floating or bracketed shelves can add both storage and personality. They are useful for displaying books, plants, framed artwork, baskets, and small decorative objects.
Before drilling, determine where the shelf should sit and mark the position carefully. Use an appropriate mounting method for the wall and the expected load. A level can help ensure that the finished shelf looks intentional rather than slightly tilted.
Keep the styling simple. A few carefully selected objects usually look more polished than a shelf packed from edge to edge. Combining books, greenery, and decorative pieces can create an inviting display without requiring a major renovation.
3. Update Small Hardware
Small details can have an outsized effect on the appearance of a room. Replacing dated cabinet pulls, drawer handles, hooks, or other basic hardware can give furniture and storage areas a refreshed look.
When replacing hardware, measure the existing holes before purchasing replacements. Keeping the same hole spacing can make the project much simpler because you may not need to create new holes.
4. Create a Peel-and-Stick Accent
Peel-and-stick materials can be an approachable option for adding pattern or texture without committing to a complicated installation. The image features patterned peel-and-stick tiles, which can inspire updates to suitable areas around the home.
These materials are especially appealing for beginners because they can provide a decorative transformation with relatively simple application. The most important step is preparing the surface and planning the layout before removing the backing.
Measure the area, determine where the pattern should begin, and think about how pieces will meet at corners and edges. A thoughtful layout can make an inexpensive material look much more polished.
5. Add Functional Wall Hooks
Wall hooks can turn unused wall space into convenient storage. They work well near entryways, utility areas, bedrooms, bathrooms, or other places where everyday items need an easy-to-reach home.
Think about what will hang from the hooks before choosing their position. Heavy items may require stronger mounting solutions, while lightweight decorative objects may need less support. Keep the arrangement visually balanced and leave enough room between items for comfortable use.
How to Choose the Right Beginner DIY Project
Not every project is equally suitable for a first attempt. The smartest approach is to consider the time, tools, materials, and skill required before you begin.
- Choose a manageable scope. A single wall, shelf, drawer, or small decorative area is easier to control than an entire room.
- Check your tools. Make sure you have the basic equipment needed before starting.
- Estimate the time. Give yourself enough time to prepare, work carefully, clean up, and handle unexpected delays.
- Consider the surface. Different walls and materials may require different fasteners, preparation methods, or tools.
- Plan the finished look. Think about colors, spacing, patterns, and how the update will work with the rest of the room.
Pro Tip: Take a quick photo of the area before you begin and use it to visualize the change. This simple step can help you decide whether a new color, shelf, hardware arrangement, or decorative feature will actually improve the space.
Budget-Friendly Ways to Improve Your Home
DIY home improvement does not have to involve expensive materials. In many cases, the biggest difference comes from thoughtful planning rather than a large budget.
Start by identifying what bothers you most about a space. Is the wall looking tired? Is the storage inefficient? Does the furniture feel dated? Is an empty wall going unused? Answering these questions can point you toward a project that solves a real problem instead of simply adding more things to the room.
Reuse and refresh whenever practical. Existing furniture can sometimes benefit from new hardware, paint, organization, or improved placement. Decorative changes can also make a room feel substantially different without replacing every item.
Focus on High-Impact Details
Some improvements are small but highly visible. A freshly painted wall, coordinated hardware, organized shelving, attractive hooks, or a carefully selected accent surface can create a stronger sense of cohesion.
Instead of trying to change everything at once, choose one feature that deserves attention. Once that improvement is complete, evaluate the room again. You may discover that fewer changes are needed than you originally thought.
Why This Matters
A successful DIY project should improve both appearance and everyday function. When an update solves a practical problem while making the room look better, the result feels more valuable than a purely decorative change.
Beginner DIY Mistakes to Avoid
Even simple projects can become frustrating when preparation is skipped. Fortunately, most common beginner mistakes are easy to avoid with a little planning.
Skipping Measurements
Guessing dimensions is one of the easiest ways to waste materials or end up with an awkward result. Measure the space and the materials carefully before making cuts, drilling holes, or purchasing supplies.
Rushing Preparation
Preparation often feels slower than the actual project, but it has a major effect on the final result. Clean surfaces before painting or applying adhesive materials. Protect nearby furniture and flooring. Gather your tools before beginning so you are not constantly stopping halfway through the job.
Choosing the Wrong Mounting Method
Anything attached to a wall should be mounted with the surface and intended load in mind. Lightweight decorative items and heavier storage items have different requirements. When you are unsure, check the instructions for the hardware or material you are using and choose an appropriate mounting method.
Trying to Finish Everything at Once
It is tempting to create a long weekend project list after discovering how satisfying DIY can be. However, taking on too many projects simultaneously can leave your home cluttered with unfinished tasks.
Choose one improvement, complete it, clean your workspace, and enjoy the result before moving to the next project. This approach keeps DIY manageable and makes it easier to learn from each experience.
Make Your DIY Projects Look More Polished
A professional-looking result often comes down to details. Straight lines, consistent spacing, clean edges, coordinated colors, and careful finishing can make a simple project appear much more sophisticated.
When arranging shelves or wall decor, create visual balance rather than placing every item at the same height. Combine different shapes and sizes while leaving enough open space to keep the arrangement from feeling crowded.
For painting projects, take your time around corners and edges. For hardware installations, double-check measurements before drilling. For peel-and-stick materials, carefully align the first piece because the starting position influences the entire pattern.
Most importantly, do not be afraid to slow down. DIY is not a race. Careful work usually produces a better result than rushing simply to finish quickly.
Safety Tips for Home Improvement Beginners
Simple projects still require sensible safety habits. Wear appropriate protective equipment when a project calls for it, keep tools in good condition, and follow the instructions provided with tools, paints, adhesives, hardware, and other materials.
- Keep your work area clean and free from unnecessary obstacles.
- Use the correct tool and accessory for the task.
- Secure materials before cutting, drilling, or fastening.
- Protect floors and nearby furniture during painting or installation.
- Read product instructions before using unfamiliar materials.
- Stop if a task is beyond your experience and seek appropriate professional guidance when necessary.
Build Your DIY Skills One Project at a Time
The beauty of beginner DIY home improvement is that every completed project can teach you something useful. Your first shelf installation may teach you about measurements. A painting project can teach you about surface preparation. A hardware update can help you become more comfortable with screwdrivers and drills.
As your confidence grows, you can gradually move toward projects that require more planning and a wider range of tools. The goal is not to become an expert overnight. It is to develop practical skills through repeated, achievable experiences.
Important: A home does not need a complete renovation to feel improved. A handful of thoughtful, well-finished updates can make everyday spaces more comfortable, organized, and personal.
Quick Points
- Start small and choose projects you can realistically complete.
- Keep basic tools such as a drill, tape measure, hammer, and screwdrivers ready.
- Painting, shelving, hardware, hooks, and suitable peel-and-stick updates are approachable options.
- Measure twice and plan the finished arrangement before making permanent changes.
- Prioritize preparation, clean finishing, and safe tool handling.
Conclusion
DIY home improvement is a practical way to make your surroundings more useful, attractive, and personal without turning every update into a major renovation. The most approachable projects often rely on simple tools, affordable materials, and careful preparation rather than advanced skills.
Whether you start with a freshly painted wall, a useful shelf, updated hardware, new hooks, or a decorative surface, each finished project can give you more confidence for the next one. Keep your plans realistic, measure carefully, work safely, and focus on quality rather than speed.
With a little creativity and a willingness to learn, even small changes can make a noticeable difference. Pick one corner, one wall, or one practical problem in your home and start there. The best DIY projects are the ones you can finish, enjoy, and use as inspiration for what comes next.