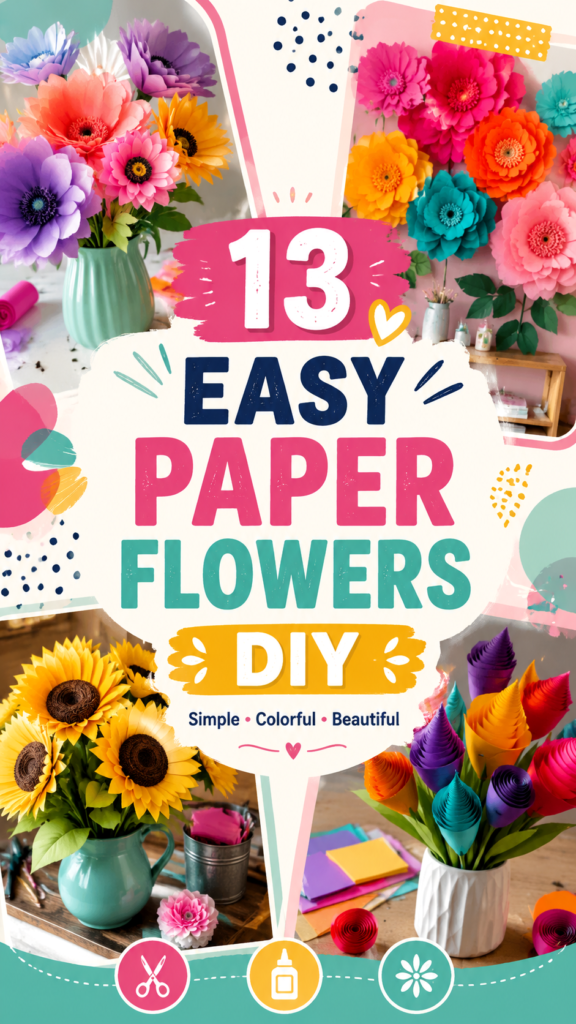
Bright, cheerful, and surprisingly easy to make, paper flowers are a wonderful way to bring handmade color into your home. This collection of easy paper flowers DIY ideas shows how simple sheets of colorful paper can become eye-catching blooms, playful bouquets, and decorative arrangements. From large statement flowers to tightly rolled paper blooms and sunny sunflower-inspired designs, there are plenty of creative directions to explore.
Paper flower crafts are especially appealing because they offer the beauty of a colorful floral display without requiring a garden, fresh flowers, or complicated crafting equipment. With a few basic supplies and a little patience, you can create arrangements that work beautifully for room decor, parties, gifts, seasonal displays, and everyday creative projects.
Key Takeaways
- Use bright paper colors to create cheerful DIY flower arrangements.
- Combine different flower shapes and sizes for a fuller display.
- Rolled, folded, layered, and curled techniques can create very different looks.
- Paper flowers are useful for home decor, crafts, gifts, and party decorations.
- Simple materials such as paper, scissors, glue, and floral stems are enough for many projects.
Why Easy Paper Flowers DIY Projects Are So Popular
There is something wonderfully satisfying about turning an ordinary piece of paper into a decorative flower. Unlike many craft projects that require a long list of specialized supplies, paper flowers can often be made with materials you already have at home. Colorful construction paper, cardstock, craft paper, scissors, glue, and a few simple tools can provide everything you need to get started.
Another advantage is creative freedom. Real flowers naturally come in specific colors and shapes, but handmade flowers do not have the same limitations. You can make a bright turquoise bloom, a deep purple flower, a hot pink centerpiece, or a multicolored bouquet simply by choosing different sheets of paper.
The visual inspiration here leans into that playful approach. Several colorful flower arrangements can be combined into one creative display, creating an energetic look that feels perfect for a craft room, bedroom, office, party table, or cheerful corner of the home.
Important: The most appealing paper flower arrangements usually have variety. Mixing large blooms with smaller flowers, changing the colors, and varying the heights of the stems can make a handmade bouquet look much more dimensional.
13 Easy Paper Flowers DIY Ideas to Try
You do not need to follow one exact technique to create a beautiful paper flower. The best approach is to experiment with different shapes and construction methods. Here are 13 approachable ideas inspired by the colorful floral styles shown in the collection.
1. Layered Paper Flowers
Layered flowers are a great starting point for beginners. Cut several flower shapes in different sizes, stack them from largest to smallest, and secure the centers with glue. Slightly curl the petals upward before assembling them to create more depth.
Try using two or three coordinating colors rather than making every layer identical. A pink outer layer with a lighter center, for example, can create a soft dimensional effect.
2. Rolled Paper Blooms
Rolled paper flowers are instantly recognizable and especially fun when made in bright colors. Start with a long strip or spiral-cut piece of paper, then roll it tightly from one end toward the other. As you work, allow the outer edge to loosen slightly so the flower develops a natural spiral shape.
These flowers are particularly effective when grouped together in several shades. Try combining purple, turquoise, pink, orange, and yellow for a vibrant craft arrangement.
3. Giant Paper Flowers
Large paper flowers can become statement pieces for walls, backdrops, shelves, and celebrations. Oversized petals create a dramatic appearance while still relying on relatively simple shapes.
For a balanced arrangement, create several large flowers in different sizes. Place the biggest bloom slightly off-center and surround it with smaller flowers to keep the display visually interesting.
4. Paper Sunflower-Inspired Blooms
Sunny yellow petals paired with a dark center can create a cheerful sunflower-inspired paper flower. The design works particularly well for rustic decor because the warm yellow color contrasts beautifully with natural baskets, wooden surfaces, and green leaves.
Use several shades of yellow if you want more depth. You can also experiment with different petal lengths to create flowers that look less uniform and more handmade.
5. Curled Petal Flowers
For a softer floral appearance, gently curl each petal around a pencil, dowel, or similar rounded object before attaching it to the center. This simple step can transform a flat paper shape into a flower with noticeable dimension.
Curled petals are ideal when you want your DIY flowers to have a more open, natural-looking silhouette. Avoid making every curl exactly the same for a relaxed handmade finish.
6. Colorful Daisy-Style Flowers
Daisy-inspired flowers are among the easiest paper flowers to customize. Cut a simple series of rounded or pointed petals, attach them around a contrasting center, and add a stem if you want to use the flower in a bouquet.
Although white petals with a yellow center are classic, there is no reason to stay traditional. Bright pink, blue, purple, and orange petals can give the same basic design a modern craft-room feel.
7. Multi-Color Paper Bouquets
Instead of creating one type of flower, make a collection of different blooms and arrange them together. This approach is ideal for using leftover craft paper because every flower can have its own color and shape.
When arranging the bouquet, place the tallest stems toward the back and shorter blooms toward the front. Add paper leaves between flowers to fill empty spaces and connect the different colors.
Expert Insight
Color is one of the easiest ways to make a paper flower project look intentional. Choose a simple palette before you begin, then repeat those colors throughout the bouquet.
- Use two or three main colors for a coordinated look.
- Add one contrasting shade to create a focal point.
- Repeat colors in different flower sizes to tie the arrangement together.
8. Tissue Paper Flowers
Tissue paper is lightweight and creates delicate flowers with soft, slightly ruffled petals. Stack several sheets, fold them accordion-style, secure the middle, and gently separate the layers to form a fluffy bloom.
These flowers are excellent for party decorations, photo backdrops, gift wrapping, and colorful wall displays. Because tissue paper is so light, even a large group of flowers can create a dramatic effect without feeling visually heavy.
9. Layered Center Flowers
A decorative center can completely change the appearance of a simple paper flower. Add a small circle, tightly rolled strip, fringe, or contrasting paper shape to the middle of the bloom.
For example, a large orange flower can be given a textured pink center, while a turquoise flower can feature a dark contrasting center. Small details like these make individual blooms feel more finished.
10. Paper Flowers in Glass-Style Jars
The floral arrangements shown alongside colorful containers demonstrate another easy decorating idea: use handmade flowers as tabletop displays. A clear or decorative jar can serve as a simple vase, allowing the stems and colors to become part of the overall look.
Arrange flowers loosely rather than packing them tightly. A few leaves and flowers at different heights can create an airy arrangement that works beautifully on a desk, shelf, side table, or craft station.
11. Paper Flower Wall Decor
Not every paper flower needs a stem. Flat-backed flowers can be attached to a wall, canvas, board, or decorative panel. Create a cluster of different sizes and arrange them as a colorful focal point.
This idea works particularly well in creative spaces. A collection of pink, orange, yellow, purple, and blue blooms can add personality to an otherwise plain wall without requiring permanent changes.
12. Spiral Paper Flowers
Spiral flowers are another beginner-friendly project that can produce an impressive result. Cut a circle into a spiral, then roll the strip inward from the outside edge. Adjust the tightness as you go to control how open the flower becomes.
Use thicker paper for flowers that need more structure and lighter paper for a softer appearance. Making several flowers in different sizes can turn this simple technique into a colorful bouquet.
13. Mixed Paper Flower Arrangements
For the ultimate creative project, combine several techniques in one bouquet. Pair layered flowers with spiral blooms, curled petals, sunflower-inspired designs, and smaller accent flowers.
The result does not need to be perfectly symmetrical. In fact, varying the flower sizes, colors, stem lengths, and angles often makes the arrangement feel more lively and handmade.
Basic Supplies for DIY Paper Flowers
One of the best things about paper flower crafts is that the supply list can remain simple. Before beginning, gather the materials that match the technique you want to try.
- Colored paper or cardstock
- Tissue paper for soft, fluffy flowers
- Scissors
- Craft glue or a glue stick
- Pencil for shaping petals
- Ruler for measuring strips
- Green paper for leaves
- Craft wire or floral stems for bouquets
- Decorative containers, jars, or vases
You do not need to purchase everything at once. Start with paper, scissors, and glue, then add tools as you discover which flower-making techniques you enjoy most.
How to Make Paper Flowers Look More Realistic
Even colorful fantasy-style paper flowers can benefit from a few simple shaping techniques. The key is to avoid leaving every petal completely flat. A little movement gives the flower dimension.
Shape the Petals
Gently bend or curl the edges of petals before assembling the flower. Try curling some petals inward and others outward so the finished bloom has layers of movement.
Build the Center Gradually
A flower center does not need to be a single flat circle. Layer small pieces of paper, use a spiral, or add a contrasting center to create visual depth.
Vary the Petal Sizes
Using identical petals can make a flower look rigid. Try making inner petals slightly smaller and outer petals larger. This simple change creates a more dimensional silhouette.
Pro Tip: Do not worry about making every flower identical. A handmade bouquet often looks more interesting when each bloom has subtle differences in shape, size, color, and petal arrangement.
Creative Ways to Display Paper Flowers
Once your flowers are finished, the next step is deciding how to display them. A colorful bouquet in a vase is an obvious choice, but there are plenty of other possibilities.
- Tabletop bouquets: Arrange several flowers in a jar, vase, pitcher, or decorative container.
- Wall clusters: Attach flat flowers to a wall to create a playful floral installation.
- Party backdrops: Combine large flowers and smaller blooms for a colorful photo area.
- Gift decoration: Use small paper flowers as handmade embellishments on wrapped gifts.
- Craft room decor: Display finished flowers near your supplies for a cheerful creative workspace.
- Seasonal arrangements: Change the paper colors throughout the year to create different moods.
Tips for Choosing Colors for Paper Flowers
The bold color combinations in these flower arrangements are a reminder that paper crafts do not have to be subtle. Bright colors can make a bouquet feel energetic, playful, and modern.
For a cheerful arrangement, combine warm shades such as yellow, orange, and pink. For a cooler palette, try turquoise, blue, purple, and soft pink. If you prefer a more balanced design, choose one dominant color and use two complementary shades as accents.
Green leaves are useful for almost any palette because they visually separate the flowers and prevent a colorful arrangement from feeling too crowded.
Make Your Paper Flower Project Your Own
There is no single correct way to make flowers DIY. The most enjoyable projects leave room for experimentation. Change the petal shape, enlarge the bloom, combine unexpected colors, or create an entire bouquet from one simple technique.
You can also adapt the project to whatever paper you already have. Patterned paper can create playful blooms, recycled paper can give flowers a more rustic character, and cardstock can provide stronger petals for structured designs.
Start with one flower and use it as a test. Once you understand how the paper behaves, make several variations. This approach makes the project less intimidating and gives you plenty of opportunities to discover your favorite style.
Quick Points
- Choose colorful paper that fits your desired decor style.
- Shape petals before assembling for extra dimension.
- Mix flower sizes to create a fuller bouquet.
- Add leaves and contrasting centers for visual balance.
- Display finished blooms in vases, jars, walls, or creative arrangements.
Conclusion: Bring Color Home With Easy Paper Flowers DIY
Easy paper flowers DIY projects are a simple way to turn basic craft materials into bright, expressive decor. Whether you prefer layered blooms, rolled paper flowers, giant statement pieces, sunflower-inspired designs, or colorful mixed bouquets, there are countless ways to make the project your own.
The most important thing is to have fun with the process. Experiment with colors, vary the shapes, curl the petals, and combine different techniques until your arrangement feels right. A handmade bouquet does not need to look perfectly uniform to be beautiful. Its charm comes from the creativity behind every flower.
With just a few basic supplies and a little imagination, you can create cheerful paper flower crafts that brighten a room, decorate a celebration, or make a thoughtful handmade gift. Pick your favorite colors, gather your paper, and start creating your own colorful bouquet today.