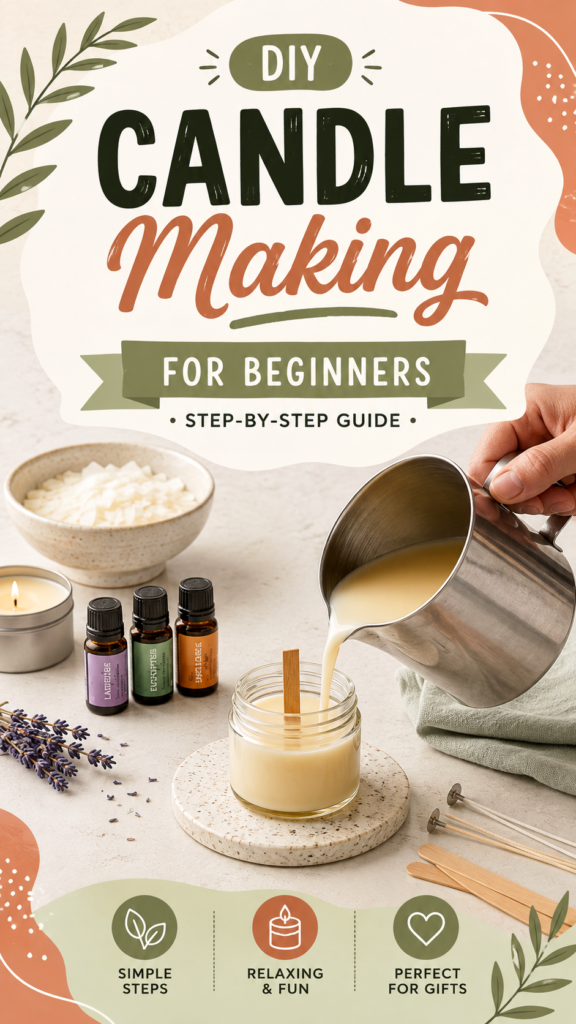
Making your own candles is one of those creative projects that feels both practical and wonderfully relaxing. With a few basic materials, you can turn simple wax, fragrance, a wick, and a container into a beautiful handmade candle for your home or as a thoughtful gift. DIY candles are also easy to personalize, making them a fun project for beginners who want to explore candle making without complicated equipment.
Key Takeaways
- Choose a suitable candle wax and heat-safe container.
- Keep the wick centered for a cleaner, more even burn.
- Measure fragrance carefully rather than adding it randomly.
- Allow the candle to cool and set completely before using it.
- Simple jars, natural colors, and subtle scents create an elegant handmade look.
Why DIY Candles Are Great for Beginners
DIY candle making is approachable because the basic process is straightforward. You prepare the container and wick, melt the wax, add fragrance if desired, pour the mixture into the container, and let it cool. Once you understand what each stage does, you can begin experimenting with different scents, containers, colors, and decorative details.
The visual appeal is another reason homemade candles have become such a popular craft. A simple glass jar filled with creamy wax can look beautiful on a coffee table, bedside table, bathroom shelf, or kitchen counter. Adding a natural scent can make the finished candle feel even more personal.
Important: Candle making is simple, but heat and melted wax require care. Work on a stable, uncluttered surface, use appropriate equipment, and never leave heating wax unattended.
What You Need to Make DIY Candles
You do not need a large collection of craft supplies to begin. A small beginner setup can contain only the essentials. The exact materials may vary depending on the type of candle you want to create, but the following supplies are a useful starting point.
Candle Wax
Wax is the foundation of your candle. Beginner projects commonly use container-friendly wax that melts and pours easily. Soy wax is especially popular for homemade candles because it has a soft, creamy appearance that suits the minimalist aesthetic shown in many modern candle designs. Other candle waxes can also work, so always follow the manufacturer’s instructions for the specific wax you choose.
A Suitable Candle Container
A glass jar can give a homemade candle a polished appearance while allowing the color and texture of the wax to remain visible. Choose a container designed to withstand the heat associated with candle burning. Avoid using random household containers unless you know they are appropriate for candles.
Wicks and Wick Accessories
The wick is an important part of the candle because it carries the melted wax toward the flame. Wick size should match the diameter and type of candle you are making. A wick that is too small may struggle to create an adequate melt pool, while an unsuitable wick can produce an inconsistent burn.
Fragrance or Essential Oils
Fragrance can transform a plain candle into a personalized home accessory. The image features small bottles beside the candle-making setup, suggesting the creative possibilities of experimenting with different scents. When adding fragrance, use an ingredient specifically intended for candle making and follow its recommended usage instructions.
Basic Candle-Making Tools
A heat-safe pouring pitcher makes transferring melted wax much easier. You may also want a thermometer, a stirring utensil, wick holders, a scale, and protective equipment suitable for working with hot materials. Keeping everything prepared before you begin makes the process smoother and helps you stay focused.
How to Make DIY Candles Step by Step
The easiest way to approach candle making is to divide the project into simple stages. Preparing your workspace first will make every step more comfortable and organized.
Step 1: Prepare Your Workspace
Cover your work surface and gather every supply before heating the wax. Keep the area free from clutter and make sure you have enough room to place the pouring container and finished candle safely. Because melted wax becomes hot, organization is more than a convenience. It is an important part of a careful workflow.
Step 2: Secure the Wick
Position the wick in the center of your candle container. A wick adhesive or appropriate wick tab can help keep it in place. Use a wick holder or another suitable centering tool across the top of the container so the wick remains upright while you pour the wax.
A centered wick gives the candle a much more balanced appearance. It also helps the finished candle burn more evenly, which is why this small preparation step deserves plenty of attention.
Step 3: Measure and Melt the Wax
Measure the amount of wax you need according to the size of your container and the instructions supplied with your wax. Place the wax into an appropriate melting vessel and heat it using a suitable method. Stir gently when necessary and monitor the temperature rather than relying only on appearance.
Pro Tip: A thermometer can make candle making much more consistent. Different waxes have different recommended heating, fragrance-addition, and pouring temperatures, so always use the instructions provided for your particular wax.
Step 4: Add Your Fragrance
Once the wax reaches the appropriate stage for fragrance addition, add your chosen candle-safe fragrance according to the manufacturer’s recommended percentage. Stir slowly and thoroughly so the fragrance distributes through the wax.
This is where DIY candles become especially creative. You might choose a calming floral scent, a fresh botanical blend, a warm seasonal fragrance, or a simple single-note aroma. Keeping your first project uncomplicated makes it easier to understand how the fragrance behaves in the finished candle.
Step 5: Pour the Wax
Carefully pour the melted wax into the prepared container. Pour slowly to reduce splashing and help create a smooth surface. Leave the wick centered as the wax begins to settle.
The pouring stage is one of the most satisfying parts of candle making. The liquid wax gradually fills the jar and begins transforming into the finished candle. The neutral, creamy appearance of the candle in the design works particularly well with natural wood, glass, greenery, and soft textiles.
Step 6: Let the Candle Cool
Place the candle somewhere stable and allow it to cool naturally. Avoid moving it unnecessarily while the wax is setting. Cooling too quickly or disturbing the candle can affect the final surface.
Depending on the wax and container, the candle may need additional time before it is ready for use. Follow the guidance provided with your chosen wax and fragrance. Patience at this stage can make a noticeable difference in the final result.
Step 7: Trim the Wick
After the candle has fully set, trim the wick to the recommended length before lighting it. Keeping the wick neat helps prepare the candle for a more controlled flame. Avoid trimming it excessively short, and always follow the wick manufacturer’s guidance.
Expert Insight
The best beginner candle is usually a simple one. Start with one container, one wax, one wick style, and one fragrance. Once you understand how those ingredients work together, change one element at a time. This makes it easier to learn what produces the results you like.
How to Choose a Candle Scent
Choosing a scent is one of the most enjoyable parts of making DIY candles. Think about the atmosphere you want the candle to create. Floral fragrances can feel soft and fresh, while citrus notes often have a bright character. Warm scents can create a cozy feeling, and herbal or botanical aromas can suit a clean, natural home aesthetic.
Instead of combining many fragrances at once, begin with a single scent or a simple two-note combination. Keep notes about the amounts you use so you can recreate a blend you love later.
Creative Ways to Personalize Homemade Candles
One of the biggest advantages of DIY candles is how easily they can be customized. The candle itself can remain simple while small design decisions make it feel unique.
- Choose different containers: Glass jars create a clean, timeless look, while other suitable candle vessels can add personality.
- Experiment with scent: Create seasonal or mood-inspired fragrance combinations.
- Use subtle color: Soft neutral tones can create an elegant appearance without overwhelming the space.
- Add simple labels: A small handmade label can make a finished candle feel polished and gift-ready.
- Create themed sets: Make several candles with complementary scents for birthdays, holidays, housewarming gifts, or self-care moments.
Important: Decorative ingredients should never be added simply because they look attractive. Anything placed inside or near a burning candle can affect how it burns. Use only materials that are specifically appropriate for candle making and follow their safety instructions.
Common DIY Candle Mistakes to Avoid
Beginners often discover that candle making is easy to start but takes a little practice to perfect. A few common mistakes can be avoided with careful preparation.
Choosing the Wrong Wick
Wick selection matters because candle diameter, wax type, fragrance load, and container design can all influence performance. If you are testing a new candle recipe, consider making small test candles rather than producing a large batch immediately.
Adding Too Much Fragrance
More fragrance does not automatically mean a better candle. Every wax and fragrance has limitations. Follow the recommended usage rate and measure ingredients accurately for repeatable results.
Pouring at the Wrong Temperature
Wax temperature can affect the candle’s appearance and performance. Instead of guessing, use the temperature guidance supplied by your wax manufacturer. Consistency is especially important when you want to make several candles that look and perform similarly.
Moving the Candle While It Sets
It can be tempting to pick up a freshly poured candle to inspect it, but leaving it undisturbed gives the wax a better opportunity to cool evenly. Give the candle enough time to solidify before handling it.
DIY Candles as Thoughtful Handmade Gifts
Homemade candles make appealing gifts because they combine creativity and practicality. A simple candle can be tailored to someone’s favorite scent, preferred color palette, or home style. You can also make several coordinated candles and package them as a small handmade collection.
For a polished presentation, keep the design simple. A clean glass jar, creamy wax, a neat wick, and a small label can look elegant without requiring complicated decoration. Natural textures such as wood, linen, dried botanicals, or a simple gift box can complement the handmade character of the candle.
How to Make Candle Making More Enjoyable
Part of the appeal of DIY candle making is the process itself. Set up your supplies before starting, keep your workspace comfortable, and avoid rushing through the heating and pouring stages. You can make the experience even more enjoyable by preparing several scent ideas in advance or creating a small list of candles you want to try.
Take photographs of successful batches and write down your wax, wick, fragrance, container, and temperature details. These notes become valuable when you want to recreate a favorite candle. They also turn each project into an opportunity to learn something new.
At a Glance
- Prepare your workspace before heating wax.
- Center and secure the wick carefully.
- Follow the recommended temperatures for your wax.
- Measure fragrance instead of estimating.
- Let the finished candle cool completely before use.
Conclusion
DIY candles are a rewarding beginner craft because the basic process is simple while the creative possibilities are almost endless. Starting with a suitable wax, a compatible wick, a heat-safe container, and a candle-safe fragrance gives you everything you need to explore the hobby.
As you gain confidence, you can experiment with new scents, container styles, colors, and gift ideas. The most important lesson is to work carefully, measure consistently, follow product instructions, and give each candle enough time to cool and settle.
Whether you want to make a cozy candle for your own home, create handmade gifts, or simply try a relaxing new craft, candle making is a wonderful place to begin. Start with one simple project, enjoy the process, and build your skills one candle at a time.
Tags
DIY Candles Candle Making Candle Making for Beginners Homemade Candles Soy Candles DIY Home Decor Handmade Gifts Candle Crafts