Small household problems can quickly become frustrating when you do not know where to start. A loose connection, a damaged pipe, a minor leak, or a worn section of household equipment may look like a job that requires professional help, but many basic maintenance tasks can be approached with practical DIY home repair techniques. The key is knowing which fixes are appropriate for a simple home project and which problems should be left to a qualified professional.
Key Takeaways
- Start with simple household repairs that are easy to inspect and understand.
- Keep basic tools and repair materials organized so small fixes are easier to handle.
- Clean and dry a repair area before applying tape, adhesive, or another repair material.
- Check the repaired area carefully before considering the job finished.
- Know when a leak, electrical issue, structural problem, or major plumbing fault needs professional attention.
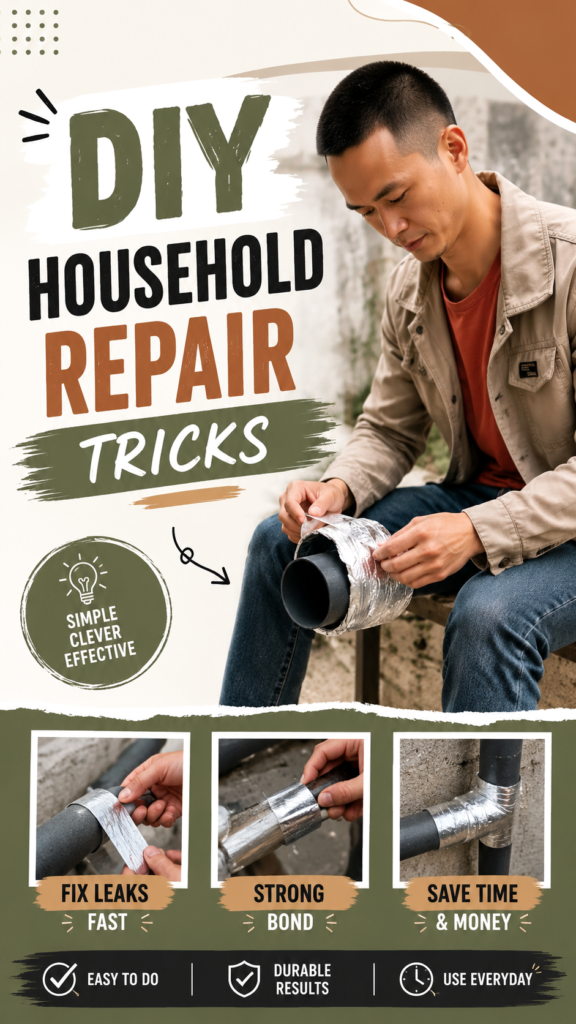
The visual focus of these DIY household repair ideas is a practical pipe repair using reflective repair tape. It highlights an important principle of home maintenance: a useful repair does not always need to be complicated. With the right material, careful preparation, and a sensible approach, some temporary or minor household fixes can be handled quickly while you decide whether a permanent repair is needed.
Why DIY Home Repair Skills Are Worth Learning
Learning basic DIY home repair skills can make everyday home maintenance feel much less intimidating. Instead of immediately feeling stuck when something stops working properly, you can inspect the problem, identify its likely cause, and determine whether it is suitable for a simple repair.
There is also a practical financial benefit. A small maintenance task may require only a few inexpensive supplies, while neglecting the problem can sometimes allow it to become more serious. Regular inspection and timely maintenance can help you notice issues before they become larger projects.
DIY repair is not about doing everything yourself. Good home maintenance also means understanding your limits. The most useful skill is knowing the difference between a straightforward repair and a situation where professional expertise is necessary.
Important: A DIY repair should never be treated as a substitute for professional work when safety, major water damage, electrical systems, gas lines, structural components, or significant plumbing failures are involved. When in doubt, stop and get qualified help.
The Pipe Repair Idea Shown in the DIY Concept
One of the clearest repair ideas represented here is wrapping a pipe or pipe connection with a strong, reflective repair material. The technique demonstrates how a flexible material can be wrapped around a problem area to reinforce or seal it as part of a temporary maintenance solution.
The important lesson is not simply the material itself. Preparation and application matter just as much. A repair product works best when it is used on an appropriate surface and applied according to its intended purpose.
Start by Inspecting the Problem
Before reaching for tape or another repair product, take a moment to inspect the affected area. Look for visible cracks, loose connections, moisture, corrosion, movement, or other obvious signs of damage.
If water is involved, identify where it is actually coming from rather than automatically covering the first damp spot you see. Moisture can travel along surfaces, making the visible wet area different from the original source.
For a minor issue, a careful inspection can help you decide whether a simple temporary repair is appropriate. If the damage appears extensive or the source cannot be identified, it is better to stop rather than repeatedly covering the problem.
Prepare the Surface Carefully
Surface preparation is one of the easiest steps to overlook in a DIY repair. Dust, dirt, grease, loose material, and moisture can interfere with the ability of a repair material to adhere properly.
Clean the area as appropriate for the material and situation. If the product requires a dry surface, allow the area to dry before applying it. Remove loose debris without damaging the pipe or surrounding components.
A few extra minutes spent preparing the surface can make the repair neater and more reliable.
How to Approach a Simple Household Repair
1. Gather the Right Supplies
Keep a basic household repair kit available for everyday maintenance. Depending on the type of project, useful supplies may include screwdrivers, pliers, adjustable tools, measuring tape, cleaning cloths, utility tools, replacement fasteners, appropriate repair tape, and suitable adhesives.
The goal is not to collect every tool imaginable. Instead, build a small selection of dependable basics that can handle common household tasks.
2. Make the Area Safe
Safety should come before speed. Before repairing anything connected to water, electricity, moving components, or another potentially hazardous system, take the appropriate steps to isolate the problem.
Keep your workspace clear and make sure you can work comfortably without balancing yourself awkwardly. Wear suitable protective equipment when the project calls for it.
3. Apply the Repair Material Evenly
When using repair tape, avoid creating random folds or loose sections. Wrap the material carefully around the intended area, maintaining consistent coverage. Depending on the specific product, overlapping layers may help create a more continuous covering.
Always follow the instructions provided with the repair product. Different tapes and sealing materials are designed for different surfaces and conditions, so a technique that works for one product may not be appropriate for another.
4. Check the Finished Repair
Do not walk away immediately after completing a repair. Inspect the area and, where it is safe to do so, monitor it for signs that the problem has returned.
A repair that looks secure from the outside is not necessarily a permanent solution. If moisture continues to appear, the material begins to separate, or the underlying damage becomes more obvious, the issue may require a different repair method or professional attention.
Expert Insight
The best DIY home repair is not necessarily the fastest-looking fix. A good repair starts with identifying the problem, preparing the surface, choosing a suitable material, and checking the result afterward. Think of quick repair materials as tools, not magic solutions.
Common DIY Home Repair Mistakes to Avoid
Even simple repairs can go wrong when the underlying problem is ignored. Avoiding a few common mistakes can make household maintenance safer and more effective.
Covering a Problem Without Finding Its Source
One of the most common mistakes is treating the visible symptom rather than the actual cause. A wet patch, loose component, or damaged surface may be the result of a problem somewhere else.
Before applying a repair material, inspect the surrounding area and determine what you can about the source. If the cause is unclear, professional assessment may be the better choice.
Using the Wrong Material
Not every tape, adhesive, sealant, or patching product works on every surface. Household repair products can have specific uses and limitations.
Read the packaging and product instructions before applying anything. Pay attention to surface compatibility, temperature, moisture conditions, curing requirements, and whether the product is intended as a temporary or permanent solution.
Skipping Surface Preparation
Applying a repair material over dirt, dust, grease, or loose debris can produce a weak result. Even when the repair looks acceptable at first, poor adhesion can cause it to loosen later.
Cleaning and preparing the area is a small step that can make a noticeable difference in the quality of a repair.
Assuming Every Repair Is Permanent
A quick repair can be extremely useful, especially when it prevents a minor issue from getting worse while a permanent solution is arranged. However, temporary fixes should be treated honestly as temporary when that is what they are.
For example, a damaged pipe may eventually need replacement rather than continued layers of repair material. Knowing when to move from a quick fix to a permanent repair is an essential part of responsible DIY home maintenance.
Other Useful DIY Home Repair Habits
The same practical mindset shown in a simple pipe repair can be applied throughout the home. You can make household maintenance easier by developing a habit of checking small problems before they become major ones.
Keep a Small Repair Station
Organize frequently used tools and supplies in one accessible location. A clearly arranged repair box makes it easier to respond to everyday problems without searching through multiple drawers.
Consider keeping basic hardware separated into small containers. Labels can help you quickly find commonly used items and avoid buying replacements unnecessarily.
Inspect Before You Repair
A five-minute inspection can sometimes save much more time later. Look around areas where leaks, loose fixtures, worn materials, or visible deterioration could develop.
Pay attention to changes rather than trying to make every part of the home look brand new. A new stain, unusual moisture, movement, cracking, or unexpected sound can be a useful reason to investigate further.
Learn One Skill at a Time
You do not need to become an expert overnight. Start with simple tasks that match your experience level, then gradually learn more as your confidence grows.
Understanding how common household components work is often more valuable than memorizing dozens of tricks. Once you understand the basics, many maintenance tasks become easier to assess.
When to Stop and Call a Professional
DIY home repair has clear limits. Some household problems can create significant safety risks or expensive damage if handled incorrectly.
Electrical work, gas-related problems, serious structural damage, major plumbing failures, extensive water damage, and repairs involving systems you do not understand should be approached cautiously. A professional can identify hidden problems and provide a repair that meets appropriate safety requirements.
Pro Tip: If a quick repair needs to be repeated again and again, treat that pattern as a warning sign. Repeated failure often means the underlying problem needs a more complete solution rather than another temporary patch.
Making DIY Repairs More Efficient
Efficiency is not just about completing a repair quickly. It means spending your time wisely and avoiding unnecessary rework. Before starting, gather your tools, understand the basic steps, and clear enough workspace to work safely.
Take photographs of complicated assemblies before taking anything apart. Keep small components together rather than placing them randomly around the work area. If you are unsure how something fits back together, stop and research the correct procedure or seek professional advice.
It is also helpful to keep notes about recurring household problems. If the same leak, loose fitting, or damaged component appears repeatedly, a simple record can reveal a pattern that is easy to overlook.
A Practical Mindset for Household Maintenance
The most valuable DIY home repair habit is learning to slow down enough to understand the problem. A quick fix may take only a few minutes, but the inspection before the repair can be the most important part of the process.
Think in terms of prevention, preparation, repair, and follow-up. Preventive checks help you spot problems early. Preparation gives you the right tools and a suitable workspace. Careful repair addresses the immediate issue. Follow-up tells you whether the solution actually worked.
This approach turns random household maintenance into a repeatable routine. It also helps you avoid the temptation to use a single repair trick for every problem.
At a Glance
- Inspect the problem before choosing a repair.
- Prepare and clean the surface properly.
- Use materials only for their intended purpose.
- Monitor temporary repairs after completion.
- Call a professional when the problem involves significant risk or damage.
Build Confidence With Simple DIY Home Repairs
DIY home repair does not have to mean taking on complicated renovation projects. The most useful skills often begin with small maintenance jobs that teach you how to inspect materials, use basic tools, prepare surfaces, and recognize when something needs more attention.
The pipe repair concept is a good reminder that practical household maintenance can start with simple ideas. A suitable repair material, careful application, and a thoughtful inspection can help you deal with minor issues more confidently. At the same time, responsible DIY means recognizing when a quick solution is only temporary and when professional repair is the safer choice.
Keep your tools organized, learn gradually, and make safety the first step of every project. With those habits, everyday household repairs become less stressful and much easier to approach.
Conclusion
Simple DIY home repair techniques can save time, reduce frustration, and help you stay on top of everyday household maintenance. Whether you are dealing with a minor pipe issue, a loose fixture, or another small repair, the most important steps remain the same: inspect the problem, choose the right material, prepare the area, apply the repair carefully, and check the result.
Use quick repair ideas as practical tools rather than universal solutions. When the underlying problem is serious, recurring, or beyond your experience, getting professional help is the smartest repair decision you can make. The goal is not simply to fix something quickly. It is to maintain a safer, more functional home while developing useful skills along the way.